Showing posts with label Gujarati Recipes. Show all posts

Saturday, October 31, 2015

Methi Aur Papad ki sabzi (*translation*) Fenugreek and Papad curry :-)

Dasara came and went by, Deepavali is just around the corner and I am way behind with my recipe posting :-). Much as I love blogging, I love the rest of my life too and sometimes things, events happening outside the context of the blog take over and doesn't let me come here as often as I would wish for. And then there is my old, old buddy called laziness which makes up excuses to not sit and write on the blog. This buddy is very powerful and has at his command another spoiler named 'blogger's block' and when it makes it way towards me, I am just a helpless lump not able to type two straight coherent words on my laptop. It is very similar to dementors from the Potter world that seem to suck away all my energy. The gloomy, breezy, cold weather doesn't make it any easier to get to work on the recipes either.
I hope you understand how many obstacles I have to overcome to get that wonderful dish that stole our hearts and satiated the tummy make its way to this blog and into your kitchens. But, be assured I am working on my will power which is the worst enemy of laziness and can even overcome the blogger's block. The current status is that my will power is in the process of growing up :-). So a little patience and wait is all that is needed. Why all that talk about dementors, and Harry Potter, you ask? Well, turn around (or wherever you have a calendar close to you) and check todays' date. Yep, Happy Halloween everybody, whether you go trick or treating or not, whether you get donned in a costume or not, this is the time to work with those huge, orange pumpkins. If you are (like me) not artistic enough to carve a jack-O-lantern, then make a spicy pumpkin soup and enjoy :-) with a side of good candies. Make them dark chocolate and you are all set.

I hope I haven't told you this joke before on the blog, even if I have it is ok to hear it for a second time. The chances are if I don't remember if I blogged about this before, you certainly won't remember having read it on the blog. So here it is - one of my bachelor colleagues a few years ago (when we were all much younger and new to the country and brand new to Halloween celebrations) opened the door of his apartment when the bell rang in the evening to find a little kid with a bag of candies. Obviously the kid was there to ask for candies but this culture agnostic friend of mine, dipped his hands into the open bag , took a handful of candies, said thanks and closed the door. We never got to know how irreparably he scarred the kid about Halloween but the next day when he innocently was sharing how a kid in his neighborhood brought him candies, some of us with a bit more awareness had to explain to him what he had done. So if this is your first Halloween, remember it is the adults that give out the treats and not vice versa :-).

Since mine is a vegetarian blog, I thought of wishing you all a happy Halloween with these really cute vegan witches, have a great evening :-)
Well, now the fact of Halloween is established, let us move on to more earthly matters, shall we? Ask me what I ate for dinner yesterday? Go on, and humor me, I promise it is worth it. Ok, assuming you asked the question, here is my answer - A bowl of yummy fenugreek seeds :-). Are you wondering if this is Halloween related and if you missed a memo, let me clear the air. What I ate on the eve of Halloween has nothing to do with Halloween itself though a bowl of fenugreek may sound somewhat like a ghoulish treat to enjoy.

If you haven't tasted this (I hadn't before I made it yesterday), making a subzi with fenugreek seeds may sound like a recipe to avoid. Indian cooking uses fenugreek seeds liberally, but they are mostly in quantities of Tsp at a time and as part of seasoning. The first time I stumbled on this recipe, I just flipped through the channel (Yep, it was on a You tube channel) ignoring it completely. Then again I love the bitterness of Methi/fenugreek and the flavor it imparts when roasted. Fresh green methi is my all time favorite too. So I went back to check the recipe. Since internet and the search engines are so smart and catch on to what your interests are based on your clicks, I got a couple other links to follow up on the same recipe. That is how I landed on the master chef's blog describing this succulent, delicious side dish. I had to give it a try after such a powerful endorsement, don't you agree?
So methi-papad sabzi (fenugreek seeds and lentil wafers side dish) is apparently a common preparation in Gujarat  and Rajasthan. The exact ingredients vary a little, yes as you can guess the Gujarati preparation will have a strong taste of jaggery that sweetens up the dish compared to its Rajasthani preparation. I stayed the middle course with a little bit of jaggery and the soaked and boiled fenugreek was a treat to eat as were the soft, soggy papad pieces in the subzi. Since this was my first time trying the dish, I made a simple cabbage stir fry which both BH and I love as my insurance incase the subzi was inedible but at the end of the dinner, the subzi pot was clean while cabbage sat there hardly touched :-). Such a successful experiment definitely is worth sharing on the blog, though the pictures aren't of great quality I decided to jump in with this one today. I will update them when I make the recipe again (soon).
Before we go onto the recipe, quick update on where I have been (other than the above stated reasons) - went to visit DD for a a quick weekend, time differences, overnight travel and an already hectic work week left us really tired but extremely contented to be able to hug the little one after 2 solid months. For her part, she checked in with us to the hotel room for the weekend and was happy to devour the gulab jamoons and other goodies we had carried with us. She has settled in, misses us and home but has made friends and is enjoying her classes and other activities. Looking forward to having her home in another 4 weeks or so :-)

Back to the recipe, this is a really simple one to make as long as you remember to soak the fenugreek seeds overnight. Once the soaking part is taken care of, the rest of the process is a breeze.

What do you need to make methi-papad subzi?
1/2 cup fenugreek seeds/methi dana
2-3 regular size papads**
1/4 cup finely chopped onion
1-2 pieces of 1 inch cinnamon
1/2 Tsp mustard seeds
1/4 Tsp cumin seeds
1/8 Tsp asafoetida
2 green chilies, finely chopped (deseed them if you prefer mild)
2 Tbsp chopped cilantro
1/2 Tsp red chili powder
1/2 Tsp coriander seeds powder
1/2 Tsp tamarind paste or about 10 kokum pieces
small piece (1/2 Tsp) of jaggery
2 Tbsp oil
1/2 Tsp salt (adjust to taste)
How do you make Methi-papad subzi? 
  • Wash fenugreek seeds in water and soak them in atleast 2 times volume of water overnight. 
  • Drain all the water and pour the seeds into a sauce pan. Add 2 cups of water and a pinch of salt and bring it to a rolling boil. 
  • Switch off and keep aside. 
  • Heat oil in a pan, add cinnamon, mustard, cumin seeds and let them crackle. 
  • Add chopped green chilies, asafoetida and onion and saute for a couple of minutes until onion is soft. 
  • Drain the water from the cooked fenugreek, reserve the water and pour the cooked seeds into the pan with onion. 
  • Roast them for a minute and half, add red chili powder, coriander powder and salt and mix well. 
  • Add the reserved water, jaggery, half of chopped cilantro and kokum pieces. If you are using tamarind paste instead add it at this time. 
  • Let kokum soften and give out tartness, it will take about 8-10 minutes of boiling on medium heat. 
  • If the water starts to evaporate, add another half cup. 
  • Taste test and adjust red chili powder, salt or jaggery to taste. 
  • Tear or break the papad (yes they are not roasted or fried) into pieces, keep them atleast 2X2 inches in dimension so they don't dissolve. 
  • Let cook for 2 minutes, switch off and add the remaining cilantro on top. 
  • Let it stand for 10 minutes and serve topped with crunchy, fried papads crushed. 
** Papads are traditional Indian lentil wafers that are usually circular and sun dried. You get different varieties of it in Indian grocery stores. I used my moong dal papad which was in stock but any papad would work too. The texture of cooked papad is that of thin pasta. 

Notes: 
  • I started with kokum pieces alone but as it was not tart enough used a small bit of tamarind paste. Adjust the sourness to taste as this helps mellow down the bitterness of fenugreek also. 
  • Be stingy with salt in this recipe since all papads have a load of salt in them already. If you want to add extra salt, hold until the end and papads have been added. 
  • Jaggery is your preference, increase or decrease as you like. 
  • You can use a chopped tomato in addition to onion, adjust kokum or tamarind quantity if the tomatoes are sour too.
  • Adjust the consistency of the dish based on usage and your preference, mine was moist and semi solid with not much of water. It was great to pick it up with rotis and eat. 

Saturday, September 21, 2013

Cauliflower handvo - a savory bake with Cauliflower and woes of a failed cooler

I have been slow with my blog posts for the past month or so, anyone noticed:-). All valid reasons, first it was work & the Arangetram, then it was work & house guests and later (which is now) has been work & work :-) and underneath all of this was the fact that my 3 year old laptop decided to die on me. Well, it didn't exactly die but is going through a very painful and noisy phase since the cooling fan decided to shut down and not work any more. For the initial couple of days when we were running around completely brain dead trying to finish up last minute tasks, the machine started humming and then graduated into really loud noise like something was coming down. No prizes for guessing that all logistics details were on my lap top. I asked the BH to take a look which he did cursorily, decided that my hard drive was on its last leg and told me to shut it down once I had made a back up of everything precious I had. That is when I realized how dependent I had become on this little piece of machinery. I had to keep it switched on long enough to atleast get some files transferred over so I could continue to function, make a back up on to a hard drive and then put the PC to sleep (Err, rest in this case).

After all the guests had left, I made another attempt to switch it on, the noise seemed to have decreased on decibel but when I switched on it made a very clear, dummy proof opening statement that said the cooling fan was not working. BH said a non working fan was better than a dying hard drive and very generously offered to call the geek squad to get an estimate but after the phone call he was convinced that I was better off buying a new PC instead of spending a fortune on the old one :-). Then it took a little while for us to get our home & affairs in order since lotsa things were happening together and I was set up with a temporary solution of an external fan to keep the cool (of my PC - not me definitely). While this allowed me to login & out for short durations, I was totally handicapped since I couldn't lug all that paraphernalia to wherever my creative mood directed me to go and sit. So, finally I decided to call it quits and got my new shiny PC earlier today :-). Yep, it is shiny but is also factory made with the latest OS I had been resisting upgrading my older laptop to so there is some learning curve. While the tech savvy (ier) and already experienced BH & DD snigger around I am determined to conquer this new challenge in a matter of minutes (or hours or days or weeks, who is in a hurry?) but in the mean time am trying to minimize fat fingering apps on this touch screen and look forward to visit my favorite blogs and be more active on my own.
On to today's recipe, this is something I saw on a You tube channel one day while generally surfing the big bad web. As I have said before, I am extremely partial to savory/spicy dishes, finger foods/snack items and especially Gujarati food. This dish fit the bill perfectly on all counts and tried it the next day, took it to a friend's house as I was visiting and it was very well received. I made it for a second time the same week and then the next and so on. When my in laws were here last month, I tried it on them and they liked it too especially the fact that it is baked. So, it is another much loved cauliflower recipe. I have packed this on travels and it stays fresh upto 4 days if kept in the refrigerator. I make the traditional Handvo often which requires some pre-planning, soaking, fermenting etc but this is a very easy and quick recipe with 100% satisfaction guaranteed.

I have experimented with the amounts from the original recipe and what I give below is my optimum quantities for ingredients, cauliflower brings in its flavor full force, the final dish is moist without being wet and crumbly. Make your own changes, keeping the spirit of the dish and I am sure you will love it just like we do. This is a perfect snack when the craving hits to have with your favorite cuppa.
What do you need to make Cauliflower handvo?
3 cups grated cauliflower
1.5 cups besan/gram flour/chick pea flour (plus or minus a couple of spoons, see notes for details)
1  cup finely chopped onion
1 cup chopped cilantro
1 inch piece ginger
2-3 green chilies (adjust to taste)
1/2 tsp sugar
1 Tsp salt
1 cup grated coconut
2 Tblsp oil
2 Tblsp bread crumbs
How do you make Cauliflower Handvo? 
  • Pre heat oven to 400F.
  • Clean and pund ginger & green chilies to a rough paste using a mortar & pestle.
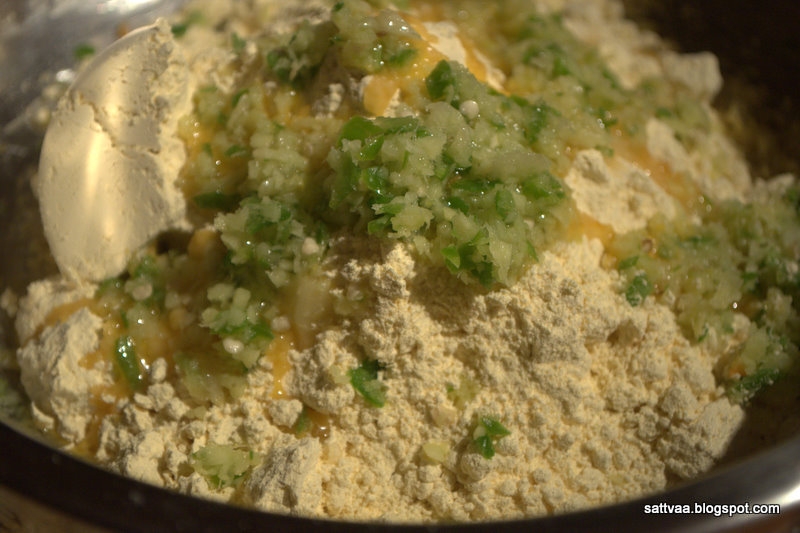
  • Mix all ingredients in a bowl except for besan. Add besan slow to form a moist dough that you can hold in your hands and drop in clumps. 
  • Prepare a 8 inch round pan with cooking spray.
  • Put the mixture into the pan and gently even the top surface. 
  • Sprinkle bread crumbs on top.
  • Bake for 30-35 minutes or until a knife comes clean. 
  • Let cool for 10 minutes before taking the handvo out of the pan. 
  • Lay it upside down on a flat surface and let cool slightly before slicing and serving. 
Notes: 
  • Like the traditional handvo, you can add grated carrot, grated zucchini or bottle gourd to this recipe. 
  • As the recipe contains raw besan/gram flour, it is important to cook the handvo thoroughly. Adjust your baking time until a tooth pick comes through clean from the center of the pan.
  • Adjust the amount of Besan depending the moisture in your cauliflower, onion and cilantro. You can increase or decrease the above mentioned quantity by 2 Tblsps.

Monday, June 10, 2013

Fada Ni Khichdi - comfort in a bowl, a Pongal equivalent from Gujarat

Welcome to yet another bright, Summery week. I realize I have been going slow on my posts, it is just the weather and I feel like going out and soaking in the Sun whenever I get a chance instead of sitting in front of the laptop which I any way do for a living :-). Yesterday we had our Balvihar annual day celebrations and the kids had some really good cultural programs and presentations including my own teenager that skipped most classes this year citing her exams and school work. With that comes my Summer break until September before we start classes again so few more hours to do other things and enjoy the Summer.

What is your ultimate imagination of 'culinary comfort' or what do you crave for as the 'go to food' that seems to make you all warm and nice inside no matter what the weather is :-)? When I ask this, most times I hear people (including myself) say 'Pongal or khichdi'. I think it is rightly so since a bowl of warm khichdi flavored with home made ghee and cumin and pepper can just melt away the blues. And it provides an easy choice to stock up on some proteins in the vegetarian diet.

This is such a popular comfort food all over India and that is how you see 'Huggi' in Karnataka, 'Pongal' in Tamil Nadu, 'Pongali' or 'pulagam' in Andhra, 'Khichdi' in many parts of Northern India which are regional variations of the same basic concept. You change the dal in some recipes, vegetables added into some others, cook them open or in pressure cookers but ultimately they all serve the same uplifting purpose of making you smile with happiness :-). My ultimate pongal experience is at the Pittsburgh SV temple. If you are one of the lucky people inside the temple at that time, you get to taste this heavenly, delicious blob. A bucketful of pongal vanishes in no time and all you are left with is the lingering aroma of the ghee and the roasted pepper if you miss those few precious minutes.

I already have 2 recipes(3 if you count the sweet version) in this genre on the blog here, here and here, so I wondered if today's post merits its own space on the blog and decided quickly that it did. For one, this version is also loaded up with many vegetables (tastier :-)) and is made with broken wheat instead of rice ((hmm, I told you this was healthy) and lastly it is another addition to my Gujarati recipes.

We had been to a dear friend's house for lunch one weekend. N thinks that I make better food just because I write a blog so when we talked before the lunch she told me that she had made something very simple and hoped that we would all like it. Then she served us with this Fada Ni Khchdi with raita and a few more delicious dishes. I was hooked to the khichdi totally. N is not from Gujarat and when I asked how she made it, she promptly sent me the recipe on email the next day. I also went back to Tarla Dalal's books for reference and found it there. Again, as with any dish, the recipe changes from region to region even in Gujarat and what I have below is my version of this healthy, hearty Khichdi.
We like the consistency to be like the above picture, dal & broken wheat cooked soft and coming together, vegetables cooked well but not disintegrating. Also, I like equal quantities of dal & broken wheat but you can play around with the proportion with 1:3/4 (1 cup dal to 3/4 cup broken wheat). This is a versatile dish that you can mold to suit what you have in the refrigerator and pantry, but is very forgiving and every time turns out delicious. Because you replace rice with broken wheat, this is also diabetic friendly dish.

What do you need to make Fada Ni Khichdi? 
1 cup broken wheat (called Fada in Gujarati)
1 cup moong dal (de-husked)
1/2 cup thinly sliced onions
1/2  cup cubed carrots (wash, peel and cube carrots)
1/2 cup cut green beans (wash, string, chop ends and cut into 3/4 inch pieces)
1/2 cup cubed potatoes (wash, peel and cube potatoes)
1/2 cup fresh or frozen green peas
1/4 cup chopped bell pepper (optional)
2 Tblsp oil (use ghee/clarified butter if you prefer)
3-4 green chilies (adjust to taste) + 1 inch piece of ginger - crushed into a coarse paste
1 Tsp mustard
1 Tsp cumin seeds
2-3 1 inch piece cinnamon
2-4 cloves
1/2 Tsp black pepper
1 bay leaf
1/8 Tsp asafoetida powder
1/4 Tsp turmeric powder
6-7 cups water
1 Tblsp salt (adjust to taste)
1/2 Tsp Red chili powder (optional)
1/2 Tsp Garam Masala powder (optional)

How do you make Fada Ni Khichdi?
  • Wash and soak both moong dal and broken wheat for about 30 minutes or until the dal plumps up and broken wheat becomes soft. 
  • Heat a heavy bottom pan, add oil (or ghee), add mustard and cumin seeds and let it pop. 
  • Add the whole spices (cloves, cinnamon, bay leaf and pepper) and fry for a minute until the aroma surrounds you. 
  • Add asafoetida followed by sliced onions and fry for a minute. 
  • Add the ginger and green chili paste and mix it in. 
  • Add remaining vegetables, turmeric powder and fry for another 2 minutes as they get coated in the oil and turmeric. 
  • Add the soaked and drained moong dal and broken wheat, salt, red chili powder and garam masala (if using) and give it a good mix. 
  • Add salt and water, cover and cook on low heat (stirring occasionally so it doesn't stick to the bottom) until the dal & broken wheat cook till they are soft and slightly mushy. 
  • Serve the khichdi warm with a side of raita or yogurt. 
Notes: 
  • Soaking broken wheat and dal helps to cook them faster. 
  • Cutting vegetables to the same size helps in uniform cooking. 
  • You can add other vegetables (preferably those that do not have a strong odor or flavor) or skip some from the list I have above.
  • Last time I made this, I threw in about 2 Tblsp of chopped fresh coconut pieces, it brought in a wonderful crunch to the Khichdi.
  • You only start with the vegetables to give them a slight head start and coat them with the spices. Do not fry them for too long as they will become mushy by the time the khichdi cooks.
  • I prefer to cook this in the pressure cooker as a faster and healthier option but sometimes (like when I want to take pictures :-)), I cook it in open vessel. Open vessel is easier to control the consistency of the khichdi. 
  • I have seen different thickness of broken wheat (named either fine, extra fine, medium etc or #1, #2 etc depending on the brand) and I usually get #2 or medium which works well in the khichdi and salads. 

Thursday, April 18, 2013

Moong dal Dhokla - discovering non greasy snacks with a cuppa

I don't want to sound like a person who has waged a war against use of oil in cooking, because I am not. I do understand the need to consume oil so the body functions normally. I just like to cook being conscious of what goes into my food, that is all. Deep fried food is my personal weakness and I try to avoid making them very frequently. There was a time when I oil fried snacks on a regular basis, ate them and fed family and friends. I am surprised and glad that I have discovered other equally tempting, less harmful snacks to munch on. well, I will get off my soap box before you get bored/scared and go away from my blog :-)

The other day I was watching something on you-tube and you know how you get carried away sometimes following one link after another, I landed up with some Indian show that had this guy visiting different places in Gujarat and exploring local food. One Ahmadabad eatery showcased 50+ varieties of dhoklas. Traditional dhoklas deep fried, sauced up like the Manchurians, dipped in various sweet and savory sauces :-) and so on. It reminded me of Ganesh Darshan in Jayanagar famously known as Dosa corner with his umpteen varieties of dosas.
When I wrote my Dhokla post previously, I mentioned about a friend who actually soaked, ground dal and made the most moist, fluffy dhoklas. The instant, gram flour dhokla is very tasty and popular among my family and friends but I always wanted to try the real deal once. My inlaws have a psychological block about certain ingredients in the kitchen and besan is one of them, they fear that besan is not good for their system. I feel bad when they don't enjoy besan based dishes but it is deep rooted and I totally respect their opinion. Amma only makes moong dal pakoda or urad dal peruggarelu etc but not the regular besan dipped pakoda, bajji or bonda. So when I set out to do the dal soaked dhokla, I decided to try my hands with moong dal, this infact is a traditional Gujarati Dhokla recipe. I took some help from the great Gujju chef a.k.a Tarla Dalal and made it spicier to suit my taste.

These moong dal dhoklas turned out to be perfectly moist and fluffy just like the other one and since moong dal soaks quickly, there is not much wait time either. So this gets added to my list of 'frequently made snacks' especially for the Summer when in laws are going to be visiting :-).
What do you need to make moong dal dhokla?
Makes about 25 1X1X1 inch piece 
1 cup moong dal/hesaru bele
3-4 green chilies (adjust to taste)
1 inch piece of fresh ginger
1/2 Tsp sugar
1/4 cup yogurt
1/4 cup oil
1 Tblsp besan/gram flour
1/2 Tsp eno fruit salt
1/8 Tsp asafoetida
1 Tsp salt (adjust to taste)
Seasoning & garnish
1 Tsp oil
1 Tsp mustard seeds
3/4 Tsp white sesame seeds
1 Tsp grated coconut (optional)
1 green chili chopped fine (optional)
1 Tsp finely chopped cilantro
1 Tblsp lemon juice

How do you make moong dal dhokla? 
  • Wash and soak moong dal in 3 cups of water for about 2 hours or until the dal plumps up completely.
  • Wash and drain the moong dal. 
  • Grind moong dal, green chilies, ginger into a smooth paste, add a Tblsp or so water if needed. Wet moong dal usually grinds easily without needing any additional water. 
  • Take the ground dal into a bowl, add whisked yogurt, oil, salt and gram flour and mix lightly to incorporate. Consistency of the batter is similar to idli batter (dropping but not flowing)
  • Add the eno fruit salt and immediately pour into a pressure cooker vessel or any deep plate that fits into the pressure cooker. 
  • Cook without weight for 15 minutes on medium heat once steam starts coming out. 
  • Let the steam subside, open the pressure cooker and keep the dhokla vessel/plate outside to cool. 
  • Heat oil in a seasoning pan, add mustard seeds, give it 15 seconds head start, add sesame seeds and green chili pieces (if using) and let them crackle. 
  • Switch off, add the lemon juice, spoon the seasoning all over the dhokla. 
  • Garnish with grated coconut and cilantro. Cut into pieces and enjoy. 
Notes: 
See notes from here 

Tuesday, September 11, 2012

Dhokla - Home made and instant

Even at the expense of sounding like a broken record, I state that I am a self confessed snack junkie and a grazer by all ccounts. I love my snacks more than regular food and love spicy ones better than sweet ones. I have successfully transferred that habit of mine to BH in all these years of togetherness. He was the 'happy to overeat' at regular meals but 'not bother about snack' person. On the contrary, some of my best childhood memories are with the snacks nammamma stored in the tin cans and plastic jars. I don't remember our kitchen devoid of some kind of snack item at any given point of time. The quantities used to be large as the house was always filled with visiting friends, family and others :-). I love to keep something in the kitchen for my cravings. These items have varying shelf lives depending on what they contain and how they are cooked.

A lady I knew in Midwest made rotis at home that used to get grabbed almost immediately by people who either had no inclination to cook at home or were busy to do so. I have got rotis from her on occasions when work was too hectic. I could walk into her kitchen and chat with her as she deftly made rotis and packed them hot and soft. I later learnt she also made some curries and was famous for her 'made from scratch' Dhoklas. Once when we had family visiting and went out on a trip, I asked her for a couple of dozen rotis and Dhokla. She hesitated a little bit as it was a long weekend and she had other plans but handed me the Dhokla box when I went to pick up my rotis. One of the sweetest ladies I have met and the Dhoklas were to die for.

She told me later she soaks dal, grinds it and makes the dhokla. I don't go into all that trouble but I do make some real good Dhoklas. Lot of my friends have been asking for the recipe and though I have made it many times in the last year, I had either not taken pictures and the pictures had not turned out to my satisfaction. But I made some this past weekend for a pot luck and remembered to also take pictures. Since everyone liked it at the party, here is an easy and quick recipe for Dhokla. Look for the tip in the notes section to make every Dhokla piece taste equally tangy & good.
What do you need to make Dhokla? 
Makes about 20 1X1 inch piece dhoklas
1 cup besan/fine gram flour
1/4 cup plain yogurt (preferably home made and a day old)
1/4 cup oil (I used Sunflower oil)
1 Tsp eno fruit salt
1 Tsp salt (adjust to taste)
1 Tsp grated ginger
1/2 Tsp green chili paste
1/4 cup water
1/8 Tsp asafoetida powder
1 Tblsp Chopped cilantro for garnish
1 Tblsp Grated coconut for garnish
For seasoning:
1 Tblsp oil
1 Tsp mustard
1/2 Tsp cumin (optional)
1 Tsp white sesame seeds
1 Tblsp lemon juice
How do you make Dhokla? 
  • Take a big bowl, add besan, salt, asafoetida, grated ginger and green chili paste. Mix well.
  • Whisk the yogurt once to make it uniform.
  • Add oil, eno, yogurt and water and mix it in. Consistency of this batter should be thicker than the regular dosa batter and it should fall in clumps. Follow the proportions above and you get the right consistency. 
  • The batter should be mixed well without any lumps, I employ my trusted hands for the job as I can feel the texture better. 
  • Pour the mixture into a pressure cooker vessel (or any other vessel you can fit in your pressure cooker) and cook it without the pressure cooker weight for 15 minutes after the steam starts coming out. 
  • Switch off and let the steam go down, open the cooker and let the dhokla stand for a few minutes before cutting them into pieces of desired shape and size. 
  • Arrange the pieces in a wide plate.
  • Heat oil in a pan, add mustard, cumin(if using) and sesame seeds. Let mustard crackle. Add lemon juice into the hot oil and switch off the stove. 
  • Using a spoon, pour the seasoning all over the Dhokla pieces. 
  • Garnish with chopped cilantro and grated coconut.
  • Enjoy the moist, melt in the mouth Dhokla with your evening tea or coffee. 
Notes:
  • Ensure your Eno is fresh & potent. When you add Eno to the mixture, it should feel frothy in your hands as you mix it in. 
  • I add asafoetida in most of my non-sweet dishes using besan to ward off the side effects of the flour. You can omit it if you consume besan regularly or do not like the smell of asafoetida. 
  • Cooking Dhokla is same as cooking idli, no weight on the pressure cooker, turn the heat down to medium low once it is full steam and cook for 15 minutes. A knife pushed into the Dhokla should come out clean.
  • The lady who made the Dhoklas for me said adding lemon juice to the hot seasoning helps Dhokla to absorb the lemon juice uniformly and I find that tip to be very useful. 
  • I use plain Eno salt, you can use flavored ones if you like them. 

Sunday, July 1, 2012

Handvo - Love affair continues with Gujarati snacks

I have already professed my love for Gujarati snacks with recipes blogged here and here. I am more partial to their snacks than anything else. Handvo (or Handwa) is a Gujarati snack made with soaked rice and mixed lentils. There are as many variations of the dal mixture as there are dals :-). Having said that, typical Handvo consists of toor dal, chana dal and urad dal with an addition of moong or masoor dal. Can you already see that this is not protein deficient dish by any means? The traditional version is cooked with a lot of oil but baking this dish with oil used only for seasoning keeps it healthy. Baked handvo is cut into wedges(or any other shape you prefer) and served with a coriander/mint sweet-spicy chutney as a snack.

When I cook dishes that are not native to me (those that I didn't grow up eating), I always start with an analysis of similarities and differences between the new dish and something I am familiar with. If you think about it, Handvo has some resemblance to the South Indian Dosa/Dose or adai. After all, ingredients are similar (proportions though vastly different) and traditionally it is pan fried with an oil base which is the same concept of uttappa(m)s, right? I am glad someone in a Gujarati house hold figured out how to make a Handvo with rice and lentils while some one down South made a Dose because both are equally welcome in my kitchen :-). I will not go any farther on this though because if DD had her say, she would definitely do a 'Mom, stop comparing things weirdly', because according to her, I killed the fun of Harry Potter series by constantly quoting story lines from Indian epics such as Mahabharata and Bhagavata :-). For the record, I love the Harry Potter books. It is a different story that she is still hooked to HP and keeps reading the books over & over again. 

But I guess the point I was trying to make above is that cooking is more an art than measurements, there are techniques you need to be aware of but once you know the basic process, every cook can weave their individual magic wands and make the dish unique. BTW, that is the excuse I use every time one of my preparations falls short against nammamma's :-)

If you are entertaining friends or family, think about Handvo as one of the starters since the batter can be prepped ahead of time. All you need to do before the party starts is to pour the batter into the pans and bake it. I have seen the Handvo flour in Indian grocery stores here but have never tried it myself. I prefer my old fashioned way of grinding the batter at home.
What do you need to make Handvo? 
Makes 2 - 8 inch pans
1 cup rice - any long grained rice will work, I typically use Sona masoori variety.
1/4 cup toor/tuvar dal or togari bele
1/4 cup chana dal or kadle bele
1/4 cup masoor dal or moong dal - I used masoor dal this time
2 Tblsp urad dal or black gram
3 cups tightly packed grated bottle gourd
5 green chilies - adjust to taste
1/4 cup sour yogurt - a day old works best
1 inch long piece ginger root
1 Tblsp grated coconut - fresh or frozen - optional
1 Tsp sugar
1 Tsp salt
For seasoning:
1 Tblsp oil
1 Tsp mustard
1/4 Tsp asafoetida
4-5 finely chopped curry leaves
1 Tsp red chili powder - optional
For garnish:
1 Tsp white sesame seeds

Optional - chopped cabbage, chopped cilantro, grated carrot - I haven't used any of these this time though I usually load up my Handvo with finely chopped cabbage or grated carrots.

How do you make Handvo?
  • Wash and soak rice and the dals together in water for about 6 hours. 
  • Rinse, drain the rice and dals and grind it with green chilies and ginger to a coarse paste with as little as 2 Tblsp of water. 
  • Wash, peel and grate bottle gourd (thick grates is preferred here) - see notes for additional vegetables
  • Add the bottle gourd grating along with yogurt, salt and sugar into the ground mixture, set it for fermenting over night or atleast 6-8 hours. - see notes for fermentation tips
  • The batter would have thinned down a little with the yogurt and bottle gourd juice and will look fluffy and porous with fermentation, mix grated coconut into the batter. It is important to use as little water as needed while grinding.
  • Heat the oil, add mustard, chopped curry leaves and asafoetida. Let mustard sizzle & pop, switch off the stove, add the red chili powder, mix it well into the oil. Pour everything into the batter and mix well. 
  • At this time, taste the batter to check and adjust sugar, salt, red chili powder per taste. you can add more green chili-ginger paste at this time if you like. 
  • Spray 2 - 8 inch pans with cooking spray, pour the batter to 1/2-3/4 inch thickness and sprinkle sesame seeds all over. 
  • Pre heat the oven to 350F, bake the Handvo for 30 minutes. a toothpick or knife pushed in the center of the pan should come out clean. 
  • A more traditional way of making this is to pour the batter into a thick cast iron pan (about 1inch thickness), drizzle oil around the sides, cover and cook on low heat until the bottom side gets the crispiness of your liking, gently turn it over and continue cooking on  the other side without covering the pan until both surfaces are roasted well and a toothpick comes out clean when pushed through the center.
  • the stove top method needs a little bit more attention than baking and results in a deep roasted texture if you prefer. i love to use my cast iron pan for this.
  • Switch the oven to broil (high) and broil for 3 minutes to get a nice brown coating on top. Keep an eye on the Handvo during broil as oven settings differ and it can burn the dish in a matter of minutes.
  • Let the Handvo stand for a couple of minutes, cut wedges and serve it with coriander or mint chutney or ketchup as a tea time snack. 
Notes: 
  • If you are adding additional vegetables, make sure all of them together make 3 packed cups. Keep bottle gourd to atleast 2 cups so you get the right consistency of batter. You can squashes or cucumbers for a different flavor. 
  • The Handvo batter needs to be fermented well, if you are in a hurry and do not have overnight waiting time, go ahead and add 1/2 Tsp of cooking soda into the batter and leave it for about 30 minutes before baking. 
  • Addition of coconut makes the Handvo lighter, but this is a personal preference. skip it if you don't want to use it. 
  • Broiling the Handvo at the end is important to get the crispy layer on top, but keep a close watch during the broil cycle. 
  • The batter should not be ground very smooth, the texture should be a little grainy. 
  • Do not pour the batter thinner than 1/2 inch as it changes the texture of the finished product and makes it chewy. 
  • Reheat Handvo pieces in the conventional or toaster oven to get it to taste as good as new.

Thursday, May 17, 2012

Stuffed Okra - Story of an Ogre turning into a Prince(ss) charming

What is green all over and slimy? If you thought I was talking about Ogres in general or Shrek in particular, you are way off track. I am here to talk about one of my favorite vegetables which in its unprocessed or under processed form resembles slimy green ogres very much :-).

Stuffed okra is a Gujarati recipe which I had seen in a Tarla Dalal book but had put off making. Sometimes when I see a recipe in a book/magazine/show,  I deliberate on it unless it is love at first sight convincing myself it is the right choice for me and my family in terms of the ingredients. Also with books and magazines, sometimes I feel distant from the original cook as I do not know them and do not relate them to real people. But if I taste something or someone cooks it and talks about it, I go hook, line and sinker.  I know, my brain is weird that way :-).  Back to the stuffed okra, I recently saw the recipe here and then googled it some more to confirm people were infact making it at home and gave it a shot in my kitchen. Boy, I am glad I did. Simple ingredients, fresh, tender okra turns this into a mouth watering dish with your rice or roti. We had ours with rice and rasam.

When I posted my Bendekayi gojju earlier, I mentioned a few tips to create a slime free okra dish. Okra or ladies finger or bendekayi requires a tart acidic substance like tomato or tamarind or yogurt or even dry mango powder and some TLC in the form of slow roasting and avoiding extra mixing to let go of its sliminess. Remember to follow these and you will be pleasantly surprised with the versatility of Okra.

And a side note on Ogres, I love the Shrek series - Shrek, Fiona and Donkey and all the other characters not just for the great animation but for the fact that the movie and the book do not change Shrek or Fiona's physical appearances for a happy ending. They remain ogres and not turn into the stereo typical good looking girl and handsome boy before living happily ever after. I love that kind of ending:-)

Here is the recipe for a Gujarati Bhindi Sambhariya - a yummy stuffed ladies finger dish.
What do you need to make stuffed okra? 
20-25 tender, fresh okra (increase or decrease this quantity based on the # of people you are planning to feed)
1/2 cup grated coconut - fresh or frozen
1/2 peanuts
1 Tblsp white sesame seeds
1 Tsp coriander cumin powder (I used store bought, make fresh if you prefer)
1 Tsp amchoor (dry mango) powder
4-5 green chilies
2 inches fresh ginger root
1 Tblsp salt
5-6 stalks of fresh cilantro - chopped fine
1 Tsp sugar
1 Tblsp cooking oil

Others - patience, do not attempt this if you are in a hurry, stuffing okra takes time
How do you make stuffed okra? 
  • Wash, pat dry okra, remove the stubby end and slit it length wise ensuring the okra remains whole with just enough opening for stuffing.
  • Roast the peanuts (see notes below), let cool, make it into a coarse powder by pulsing it in your blender. 
  • Pound green chilies and ginger in a mortar and pestle into a coarse paste.
  • Mix grated coconut, peanut powder, amchoor, coriander-cumin powder, salt, sugar, sesame seeds and chopped cilantro in a bowl. 
  • Mix in green chilies-ginger paste. Check and adjust salt, sugar or spices. 
  • Stuff this mixture into slit okras, work the stuffing into the tips of the okra where sliminess is more. 
  • Heat oil in a wide, flat pan, load the stuffed okras stuffed side up and preferably in a single layer and cook it open for 5-7 minutes on medium heat. 
  • Slowly turn the okras over and cook the other side for another 5-7 minutes. 
  • When okras turn soft and wilt a little and the color changes to darker green, switch off. 
  • Serve it warm with rice or rotis. 
Notes: 
  • You can pan roast peanuts until the outer skin turns light brown and you hear small pop sounds or alternatively you can put them in a  single layer in a microwave safe plate and microwave them for 5-6 minutes mixing them after every minute and half. 
  • The original recipe mentioned garam masala which I didn't use. 
  • Select small (1-1.5 inch), tender okras for this recipe.
  • When you mix in the ingredients for stuffing, the moisture from coconut, chilies-ginger paste and peanut powder is sufficient to make it binding, do not add water. 
  • Avoid mixing or turning over okras too much, they need to cook slowly and left to themselves they cook beautifully, just maintain heat on medium or lower. 
  • While okra renders itself well in curries, by itself it is bland. Make sure you really stuff the okras to get delicious Bhindi Sambhariya. 
  • If you do not like coconut too much, increase the amount of peanuts.

Friday, February 10, 2012

Methi Muthia - snack from Gujarat

I love Gujarati food, the first time I ever tasted a Gujarati meal was at this restaurant near Edison in NJ called Jhupdi which my brother & SIL took me to. It has been years and I still remember how I fell in love with their Undhiyu, I can feel the taste of it on my tongue even now :-), well you know what I mean.. There is a small family run eatery in Fremont, CA called Krishna and they serve you a Gujarati Thali just like one you might get if you visited someone's home. The phulkas are soft, fresh and directly from the tawa. I relish everything in a Gujarati thali except for the rasam which is too sweet for my taste.

A few years back, one of my colleagues S got married, he is from Ahmadabad and his wife was a sweet, young girl who was just out of college. When we had a pot luck at work, she had made sheera (sweet sooji pudding) and doodhi/bottlegourd muthias and sent it with S. They were both gone in such a hurry that people really wanted to meet the cook behind the delicious dishes. The moment I see/taste a new dish, I go after the recipe and asked S to get the recipe and to my surprise next day when I went to work, he handed me this very meticulously typed instructions from dear E to make the yummy muthias. I still have that print out in my collection of recipes but don't need to refer to it anymore as I have made it so many times and know it by heart. Thanks E for the delicious muthias and generous sharing of a family recipe.

I have made changes to E's original recipe to suit the way we like it and I experiment with the vegetables since I am confident now of the basic recipe. I know this is a traditional recipe and here is my way of making the delicious Methi muthias as I love methi to bits :-).
What do you need to make Methi muthias?
1 cup wheat flour
1 cup basan/chick pea flour/gram flour/kadle hittu
1/2 cup fine sooji/chiroti rava
1 cup chopped fresh methi leaves/fenugreek leaves
11/2 cups grated bottle gourd
2 Tblsp fresh ginger+green chilies paste (I used about 5 green chilies and an inch of ginger root and pounded them together in mortar-pestle)
1 Tblsp salt
2 Tblsp cooking oil
1 Tsp baking soda
1 Tsp sugar

For Tadka/vaggarane:
1 Tblsp cooking oil
1 Tsp mustard seeds
1 Tsp white sesame seeds
3-4 curry leaves

How do you make Methi Muthias?
  • Mix the grated bottle gourd, methi and salt in a wide bowl and set aside for 10 minutes.
  • Squeeze out the vegetables and keep the water aside, this is very nutritious and you can use it in any of your soups, gravies etc.
  • Mix ginger-green chilies paste, sugar, baking soda and oil with the vegetables.
  • Add the wheat flour, basan and chiroti rava into the bowl and mix it to get a soft mass. 
  • Your exact amount of dry flours depend on the water content from the bottle gourd, so adjust them - I keep the wheat flour and basan equal and sooji at half the other two as we like the taste better with this proportion. 
  • Squeeze out big tennis ball size of the mixed dough and roll them into thick logs. 
  • Arrange them in your pressure cooker vessel and steam (no weight) for 30 minutes on medium heat. 
  • Let the cooked logs cool down before cutting them into 1/2 inch thick discs.
  • Heat oil in a wide pan and add mustard, sesame seeds and curry leaves into it. 
  • Once the mustard and sesame seeds splutter, add the cut muthia discs into it. 
  • Keep the heat on medium and stirring occasionally roast the muthias until they turn light brown. 
  • Serve it with your choice of chutney/dip. 

Variations: 
  • Add palak/spinach instead of or in addition to methi leaves. 
  • Change the proportion of the flours - wheat flour makes muthias dense, rava turns them crisper and basan is for the taste, adjust to suit your taste.
  • You can use grated carrots, finely chopped onion in muthias. 
Tips: 
  • Squeeze the water content as much as you can out of the bottle gourd and keep it aside, I prefer to add the water later if needed than having to end up with an liquidy paste that will consume lot of dry flours and leave you with large portions of bland muthias :-)