Showing posts with label Home Made Bread. Show all posts

Thursday, August 29, 2013

Whole Wheat bread - it is 100% this time :-)

It has been exactly 2 weeks since I wrote my last post. Anybody missed me? Just say yes and make me happy:-), won't you?. Hope everyone is having a great time cooking, eating and chatting away especially with the Hindu festivals lined up this month. I did all of that and much more, we had a bunch of friends over on varalakshmi habba and made little Krishna's favorite snacks for Gokulashtami/Krishnashtami/Janmashtami. With so much food around me, why wasn't I still posting anything? This is when you guys ask me what was the thing that consumed me so much without feeling the urge to blog about food. Well, without going into a lot of personal details I will tell you, we had the time of our lives as our DD performed solo and did her Bharatanatyam Arangetram. She did a splendid job and we are so very proud of her. An Arangetram is sorta graduation for an Indian classical dance student where she or he presents a solo performance with the blessings of the teacher or Guru in the presence of family, friends and a gathering. The learning doesn't end but the event grants the dancer permission to pursue it with additional passion, get deeper into the art with a more mature perspective. DD has been learning for a decade now and all her hard work and dedication to the art sparkled in last weekend's performance. Last two weeks were hectic not only for the dancer but for the rest of the family and now we are feeling completely dazed out and drained out :-) in a very happy way. The young dancer is taking rest while her parents are trying to tidy up the house, get back to work, push for the photos, video etc. So that is where I have been these last two weeks.

Let me return to our usual chatter about food after that glimpse into my personal life. I cooked up a storm as we had loads of people but didn't stop to take any pictures and also didn't experiment much as I was focused on being efficient and making tasty food for the people that had gathered at home. While I am yet to revert back to my picture taking regimen again, I do have a few posts in the draft with a whole bunch of pictures that I made recently and I plan to use those as fillers. Old or new, every recipe is tested and tasted and certified :-).

I had earlier posted a whole wheat bread (not 100% whole wheat, there was an honest declaration in that blog post), today's post is a 100% whole wheat with no trace of all purpose flour and this is one of the best and healthiest wheat breads I have ever had. It is very easy to make if you are game for a 15 minute kneading exercise, if not you have alternatives - buy a bread machine, recruit the spouse to do the kneading, everything is fair in love, war and bread making. I saw this recipe first on King Arthur's website and while I wanted some more testimonials when I saw it on our versatile baking whizz Priya's website, and I knew I had the right recipe :-).
The best part of this wheat bread is you make it at home and the sturdy loaf is ready in under 4 hours and the wonderful aroma of the fresh bread fills your senses the whole day. You can freeze the slices for upto a week so if you eat bread regularly, go ahead, double the recipe and bake 2 loaves. I made this bread 3 times in the last few weeks as my FIL is on a diabetic diet and I feel comfortable feeding him this home made bread instead of the store bought version since I know exactly what goes into it.

I don't have kitchen scales or a thermometer. So when I say warm, it should pass 'baby test', remember how you would put a drop of the warm milk on the back of your fist before giving the bottle to the little one? Just repeat that test and it works like a charm :-)
What do you need to make (100%) whole wheat bread?
Makes 1 regular loaf (9X5 bread pan)
3.5 cups whole wheat (I used Bob's Red mill flour)
2.5 Tsp Rapid rise yeast (also called bread machine yeast)
1/4 cup oil (I used canola, choose any non-flavored oil)
2 Tblsp honey
1+1/4 cup warm water
1/4 cup dry milk powder (I used fat free)
1 Tsp salt
1 stick of butter - no you don't use all of that, infact any of it, it is just easy to hold the stick and brush it on top of hot bread :-), think 2 drops of melted butter if it makes you feel better

How do you make (100%) whole wheat bread?
  • Heat the water for 30 seconds in microwave or until water is luke warm.
  • Bring all ingredients into a large bowl, add water and mix it until the dough comes together.
  • Put the dough on a flat surface and knead it for 10-12 minutes until the dough becomes supple.
  • Put it in a lightly oiled bowl, cover with an lightly oiled cling wrap and set aside in a warm place for an hour or until the dough increases 1.5-2 times in volume.
  • At this time, take the dough out onto a flat surface, gently punch it down and shape it into a loaf (see here for detailed instructions on shaping the dough)
  • Put the prepared loaf in the bread pan, cover with the cling wrap and let it rise for 45 minutes to an hour.
  • Mean while preheat the oven to 350F.
  • Bake the bread for 35-40 minutes or until the bread sounds hollow when tapped on the top, turn it half way once at 15 minutes or so. 
  • Take it out of the oven, let it stay in the pan for 5-7 minutes, turn it over onto a cooling rack, brush butter lightly on the bread. 
  • Cover it with a thin wash cloth and let it cool completely for 2-3 hours. 
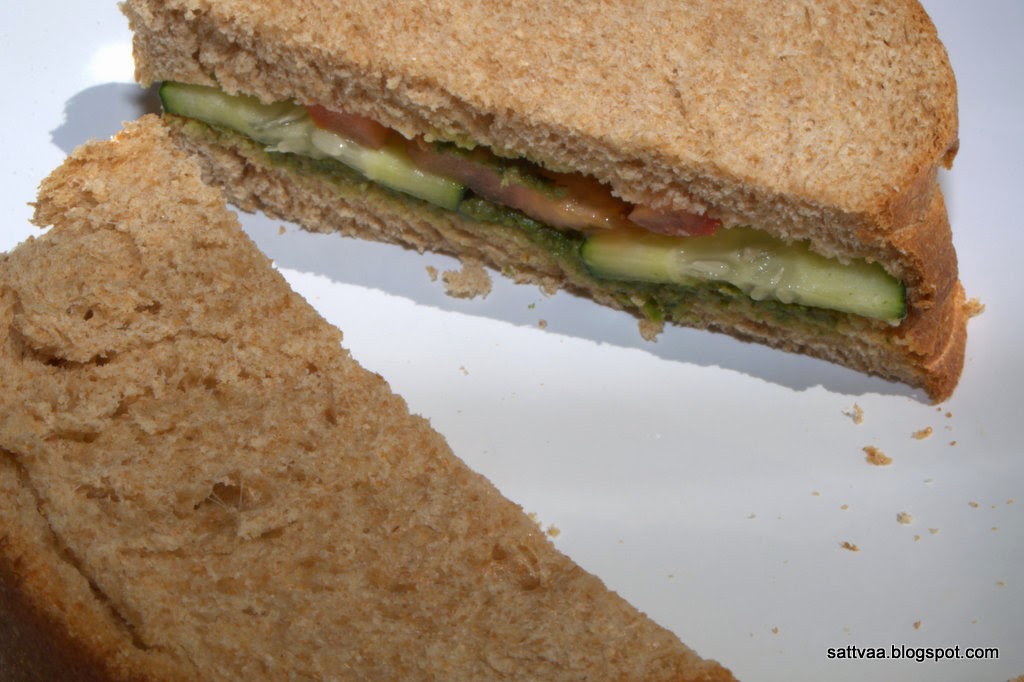
  • Slice the bread with a sharp knife and enjoy it hot or cold, toasted or untoasted in any combination that pleases you.
Notes:
  • Add 1 cup of water first into the bowl and then slowly add the remaining 1/4 cup as needed. The resulting dough is not sticky but soft and firm. Since I do not weigh the flour, the measurements depends completely on how you use your measuring cups.
  • This dough does not need extra flour while kneading.
  • If you are kneading by hand, there is not really an 'over knead' possible so go on and switch the timer for 12 minutes, whistle a tune or two and knead it.
  • I like to sprinkle a spoonful of oats or flax seeds at the bottom of the pan and on top of the loaf before baking, this gives a nice crunch while eating.
  • You can substitute molasses or maple syrup in place of honey depending on your taste preference.

Wednesday, March 20, 2013

Whole wheat bread

Let me first clarify this is wheat bread but not 100% whole wheat rather 50-50 partnership of all purpose and whole wheat.

Ok, it is official that I am bitten by the baking bug. It beckons me all the time, I am smitten like this teenage girl with a crush, only in my case it looks the crush has every chance of becoming the soul mate. I am in love with the yeast, the dough, the kneading, the aroma therapy of baking and the pure bliss of biting into a perfectly gorgeous, home baked bread. Whew, I know, I know, that was a lot of adjectives and I do sound like the starry eyed teen but here I am with a perfectly valid reason to feel just 'Super' :-)
How many of you buy bread from a grocery store? We do, though not regularly. I stand in the bread aisle every time and spend more than a few minutes going over multi grain Vs whole wheat Vs wheat Vs God knows what else before I grab a bag of the bread. I prefer getting bread from a bakery where I am guaranteed of the freshness factor than regular stores. I have been secretly drooling over the breads in the blogosphere for a while now but chickening out every time I thought of making one myself. Recently, I landed on this beautiful looking bread in my quest of a wheat bread. The pictures looked so good to be true for a home made recipe and the post was inundated with positive comments from people that had actually made the recipe. So I thought there was nothing to stop me this time and decided not to be indecisive anymore.
I wanted to take the path of no return, so started laying out the ingredients. Since I have one set of measuring cups for both dry and wet ingredients and I am too lazy to wash, dry in between, I went ahead and measured the dry flours onto a plate and set out to do the wet ingredients. Then I found out I didn't have milk in the refrigerator, think about it, I am that person who never ever lets milk (by necessity) and salt(passed on from my MIL) run out in my kitchen. When a recipe calls for one Tblsp of milk, the cans are empty, well everything has a first time, right? It was one of those weeks where both BH & I had exhausting work days and I kept pushing and hoping the milk would see me through until the weekend, didn't happen. How I wish I was back in India where you could just step out in to the backyard and ask a friendly neighbor for a cup of milk :-). I have friendly neighbors here but I won't go and ask for a cup of milk from them. Well, I wasn't going to be daunted by the lack of a mere tblsp of milk, and also what was I going to do with a plate full of mixed AP & wheat flour? I checked my pantry and found a sachet of dry milk (don't ask me why I have it, will tell you when I find out myself :-)) and with a spark, added a Tsp of it into the recipe and increased 1 Tblsp of oil to make up for the liquid volume, smart move I would say.
I then followed directions meticulously until my e-mouse seemed to jump ahead of me as I was scrolling down and there I saw something that made me almost sit down and cry in disbelief. The blogger had updated the original post since they moved to Seattle from Ohio  (again, what are the odds?) that the recipe had failed her miserably and provided the new set of ingredients to make it work in the area. Honestly, I have never set out to try a recipe before reading the instructions with all the tips more than once, again there is a first time for everything, right? I was on the verge of calling off the project 'bread making' since more than one ingredient in the new list is not a pantry staple at my home. But I thought all those nice people who took time to make this bread and leave comments couldn't be so wrong and Seattle couldn't have something so destructive in the weather that a bread dough will not work. So I marched on with the original recipe like a brave soldier. So much for Seattle weather bashing, I am sure God was smiling down on me that day as I persevered, I am glad I did what I did. See the results yourself and this only makes me love Northwest more than I do already.

I made this with regular desi whole wheat flour or chapati flour (I had Deep brand at home) the first time and second time made it with Bob's Red mill stone ground whole wheat flour, no difference in texture I could make out, both tasted delicious. The addition of honey not only gives a wonderful hue but a very faint sweet taste. Next, I will be upping my wheat flour portion in this to make it 100% whole wheat bread and will come back and blog when I get to a reliable recipe.
This turned my kitchen into an Indian bakery with that heavenly smell and best of all what I found out that bread making is not scary at all, it is a very, very friendly dough and this recipe consistently makes great bread. Pay attention to the yeast and make sure you have good quality, if in doubt proof it and use it in the dough.

I wish there was a way to share the smell in my kitchen as the golden loaf baked and a way to make you hear that hollow sound of a perfectly baked bread. Well, the pictures and my post should do for now..

Recipe source: Tammy's recipes
What do you need to make wheat bread? 
Makes one 9X5 loaf
1 cup warm water(35-40 secs in the MW)
1 Tblsp milk
2 Tblsp honey
3 Tblsp oil (canola) - original recipe had 2 Tblsp
2 Tblsp brown sugar
1 Tsp salt
1 Tsp dry milk (optional, recommended) - This is my addition based on an accidental finding and I think it makes the bread tastes great.
1.5 cups all purpose flour
1.5 cups whole wheat (desi or any other stone ground)
2 Tsp active dry or fast rising yeast
1 Tsp oil to prepare the dish & pan
1/4 Tsp AP flour to prepare pan

How do you make wheat bread? 
  • Put the first 7 ingredients listed above in to a big mixing bowl and stir it a couple of times. 
  • Measure out the wheat flour and all purpose flour and sieve them together. 
  • Add the flour into the bowl with the wet ingredients, add yeast and stir together with a spoon. 
  • Dump the contents of the mixing bowl and let it rest for a minute (this settles the yeast and gives it a chance to rest)
  • Set your timer to 20 minutes and start kneading (see notes below for tips on kneading by hand), this is a great work out as you swing back and forth and flex your wrist and forearm muscles. If you think you are well exercised, find a couch potato around the house (read spouse) and put him to work with an incentive of the warm slice of bread. Put on some music to help you on.
  • At 20 minutes, stop kneading and form the dough into a ball. 
  • Smear a couple of drops of oil around the inner surface of a big bowl, put the dough ball in it, cover with a cling wrap and let it rise in a warm place for about an hour or until it doubles in size. 
  • Take the dough, punch it down gently and form it into a a bread loaf, see notes for details shaping bread loaf. 
  • Prepare a 9X5 bread pan by smearing oil all over the inner surface and dust it with a couple of pinches of AP flour. 
  • Put the shaped dough into the pan, cover with a cling wrap and let rise for 45 minutes to 1 hour or until it doubles in size. 
  • Preheat the oven to 350F, bake for 20 minutes, turn the pan around for uniform baking and continue to bake for another 12-15 minutes. When you tap on the surface of the bread, it should sound hollow and light. 
  • Take out the pan, let it rest for 5 minutes on a wire rack, take the bread out of the pan and let it rest on the wire rack until it cools down completely. 
  • This is the toughest part of the bread making, the smell wafting from your kitchen is so intoxicating and the sight of that golden brown bread is so beckoning, you just have to find an excuse to get out of the house for an hour or so. 
  • Keep the bread covered with a towel while it is cooling to help it stay soft. 
  • After the loaf has cooled completely, slice it with a sharp knife and enjoy any way you like it. This is a hearty bread with a perfect texture and holds up well in sandwiches.
Kneading by hand: Take the dough onto a flat surface, press the heel of your hand into the center of the dough, curl your fingers & grab the far end of the dough. Stretch it and pull towards you and give the dough a half rotation. Keep rotating the dough and continue to knead uniformly.

Shaping a bread: I found a very useful link here with a video on shaping the bread, so I am not going to regurgitate all that info, here you go to find the tips. The idea is to keep the shaped roll taut so it bakes uniformly and doesn't fall after and during baking.
Notes:
  • If at 20 minutes you notice the bread top is turning brown quickly, cover it lightly with a piece of aluminium foil. This slows down the browning while giving the bread a chance to bake evenly. 
  • Slice the bread only after it has cooled completely, else the slices will be crumbling. 
  • Covering the bread with a layer of towel helps it to stay soft and not become dry. 
  • You can reduce the amount of brown sugar by half, but this is not a sweet bread by any means. 
  • Cooled and sliced bread can be wrapped in a plastic bag and refrigerated for storage. I haven't had to do that as on both occasions the bread was gone completely in the first hour after slicing. 

Wednesday, December 12, 2012

Focaccia - Get ready for a therapeutic experience with this recipe

This is my 2nd baked recipe in just a week. I am not part of any ongoing baking marathon (I am not that good yet) but I seem to have a confidence surge with regard to my baking abilities and I do have a reason/mentor. The other day, I was in the half price book store browsing books, did I mention it before that I frequent this store as I have realized I can find treasures at bargain there. I collect books (all kinds of them) and then the first thing that goes when we have moved every time are those books. My rationale is that the World is a huge circulating library, get some, read and enjoy and drop it off for others to have fun too(This is not my quote, I read this somewhere but don't remember where or who to attribute it to, so credit goes where it is due..). I have even bought my text books at bargain stores during my graduation, honestly how many of us go back and read those text books after the exam is over? and I am too much of a penny pincher to pay those exorbitant prices for a 4 month reading. So I get them used and recycle them for other self financed students such as me.

Anyway, back to my recent browsing escapade at half price book store, I went into the 'cook books' section and found a gem of a book. 'Making bread at home' by Ingram & Shapter is 256 pages of pure joy and revelation for a wannabe baker like me. Not only does the book have trust worthy recipes but also starts off with a really informative history of world bread, techniques, ingredients for everything from French baguettes to Italian Ciabatta to English muffins to Indian Bhatura with eye catching pictures. I have been trying recipes from this book and made a wonderful focaccia to start with. Just to prove this is a tried & tasted recipe in the Sattvaa kitchen, I made two batches in the last 5 days :-)
I had a colleague once, slightly older lady who used to mother all of us in the best way a mother knows, bring good food and hope the team would perform well and that no one would be stressed at work :-). Her warm, home baked, soft dinner rolls did make us forget the project deadlines for a little while as we sat there and chewed on them. As can be expected, yours truly pestered her for recipes. This lady had certain principles when it came to her recipes, she would part with her recipe only if someone proved worthy of her recipes :-) and not to every altoo-faltoo (good for nothing) person that came about asking for them. Here I was with a pure vegetarian repertoire trying to prove my mettle as a cook to a lady who wouldn't even come close to anything vegetarian or vegetables even if she was starving. Desperate that I was for those soft rolls, I took some devious means, engaged other colleagues to speak on behalf of my culinary skills and passion and also took it upon myself to tell her stories from my childhood to prove that I had a decent pedigree in cooking and would never do anything to disrespect her recipes. It took some hard work before she gave me the recipes for her 'to die for' dinner rolls. One look at that recipe sheet and I knew I was not ready for it. It called for kneading the bread dough for exactly 8 minutes, turning it halfway for the right number of times and stopping exactly when it was kneaded well. I was just not there and the recipe sheet promptly went into my book and stayed there. Now with the afore mentioned book as my baking guide, I am all set to revive my hitherto stored away baking recipes, so stay tuned.
Now there are so many versions of 'no knead focaccia' out there, so you may wonder, why am I back to kneading? Or even with this recipe, I could have cheated and kneaded the dough in my food processor but honestly, I wanted to get the hang of making bread the real way and also learn the technique of knowing when you have kneaded well, I wanted to understand what happens through the 1st, 2nd and 3rd rise the bread dough goes through, I wanted to learn about proofing the yeast. So, I set on this slightly laborious but completely satisfying journey of making the focaccia at home by kneading the dough. I will let you all in on a secret, if you have one of those 'blue days' and if you really want to punch someone in the face but can't do it because you are a 'nice person', go ahead and mix some bread dough. The 10-12 minutes spent kneading that dough will really help you vent out all the frustrations and make you good as new :-). It is a sublime experience to feel the dough turn soft and mellow right under your knuckles and is good for your morale. If you are making the dough using a bread machine or food processor, follow the manufacturer's instructions to knead the dough.

Focaccia is a dimpled Italian bread, made with generously herbed dough to make it aromatic. It is the original Italian hearth bread made from surplus pieces of dough in a very hot oven. The olive oil kneaded into the dough gives the bread a nice aroma.
What do you need to make Focaccia?
Makes one 8 inch round pan
2 1/2 cup bread flour
2 Tsp active dry yeast
3/4 cup water
1 1/2 Tblsp olive oil
1 Tsp salt
1/4 Tsp sugar
1 Tsp (or less) oil to prepare pans & bowls
Topping:
2 Tsp EVOO
dried herbs of choice - garlic, oragano, thyme, italian seasoning, kasoori methi, black pepper crushed
toppings of choice - sliced tomato, bell pepper, onions, jalapeno pepper, grated cheese
kosher salt (optional)

How do you make Focaccia? 
  • Stir in sugar and yeast with luke warm water, set aside for 5-8 minutes or until you see the mixture frothing on top. 
  • Sieve the bread flour and salt together into a wide bowl, make a well in the center. 
  • Pour in the frothing yeast mixture, olive oil and mix it into a soft dough. 
  • Take the dough onto a lightly floored surface, set your timer to 10 minutes and start kneading the dough.
  • See notes below to know when to stop kneading. 
  • Prepare a bowl by smearing a couple of drops of oil all around the inside, drop the kneaded dough in, cover it with a lightly oiled plastic wrap and set aside in a warm place to rise to double the volume. This process is dependent on the potency of your yeast and the temperature of surroundings and generally takes an hour & half. 
  • When the dough has doubled in volume, take it out from the bowl and punch it down. 
  • Add the dry herbs (I did kasoori methi today and had used a combination of Thyme, oregano & Italian seasoning 2 days back) and gently knead them into the dough.
  • Prepare your baking pan with a couple of drops of oil, put the punched down dough in it and stretch it uniformly to reach the ends of the pan. 
  • Cover with a lightly oiled plastic wrap and set aside for 30 minutes. 
  • Remove the cover, using fingers make deep dimples all over the bread, top with any toppings of choice. I did sliced tomatoes and ground black pepper. 
  • Drizzle olive oil all over the bread, cover with the plastic wrap and set aside until it rises to almost double the volume (about 45 minutes). 
  • Preheat the oven to 400F, bake the bread for 20-23 minutes or until it looks light golden brown on the surface. 
  • Remove the bread from the baking pan, let it cool. Cut wedges and serve it warm. 
Notes:
  • Kneading by hand: Take the dough onto a flat surface, press the heel of your hand into the center of the dough, curl your fingers & grab the far end of the dough. Stretch it and pull towards you and give the dough a half rotation. Keep rotating the dough and continue to knead uniformly. 
  • The dough will start to become soft and elastic by the 5th minute or so and you will notice the pliant difference as you knead it.
  • The sure test to confirm if the dough has received a good kneading is to poke your fingers in to make a deep hole. If the dough doesn't spring back and cover the holes, you are good to go. 
  • I used pure olive oil and not extra virgin as I didn't have EVOO in the pantry. Nevertheless, the flavor was absolutely delicious. 

Wednesday, December 5, 2012

Stuffed masala bread or is it bun - smells of childhood revisited

If you frequent my space here, you have already heard that I am not much of a baker. On the occasions I successfully bake, it is totally satisfying and therapeutic for me. Nammamma never baked anything, while she is a very eager to learn and enthusiastic cook when it came to new recipes, somehow baking was not her forte and I never saw anything baked in her kitchen. That partially explains my inhibitions towards baking. While I am good with baking soda/baking powder bakes and can whip up a mean batch of muffins any time, my yeasty tales are very woeful. When I found this other girl expressing almost the same anxiety with yeast bread but had these beautiful pictures of 'oh so well baked' yeast breads, I was hooked. It gave me that last push I needed to put on some gloves and bake these beautiful masala bun. This recipe is a 'feel good' recipe for me and you can be rest assured it is 'dummy certified' since I have made it so many times and is a winner always.

If you are a frequent reader in the food blog area, you would have seen people raving about Iyengar bakery dishes, there is almost a cult like following for this genre of baked items where I come from. These humble bakeries satisfied an entire generation of kids with their wonderfully aromatic baked goodies before the Indo Chinese, grilled sandwiches made their way into every day cuisine. We were mesmerized by the smells and texture of these local bakery breads. My parents didn't believe in 'non-home cooked' food and we were discouraged from eating outside food when we were kids and the fact that we didn't get to eat much of it made it all the more mouth watering.. My introduction to Iyengar bakery breads & buns was through a family friend.

One of my father's friends used to come visit Anna, sit and chat for a couple of hours every few weeks. He was a man who had seen lot of hardships in life, had a big family of kids he was bringing up on his own without a spouse to support. While my father looked sober every time he visited and there would be a hushed conversation between nammamma and Anna with some cash taken out of the cash box, me & my little brother looked forward to his visits. He had opened a bakery for his elder son and used to get a small loaf of fresh masala bread or a couple of buns when he visited. The two of us would hang around without being conspicuous but very anxious for that warm packet to emerge out of his small, cloth bag :-). I am not proud of the fact that we were so childish to not really see the sadness of the situation but am happy my parents did what they could to help a friend. When we were a little older, nammamma would sometimes give us an ok to go to the bakery near our house and get a snack. It was always a 'Dil khush' or 'Dil pasand' for my sweet toothed little brother while I gorged on the stuffed masala bun. These were again very rare occasions and I don't remember my parents ever eating the bakery stuff at all :-).

Post wedding, eating out was not such an uncommon thing. If you are familiar with the Malleswaram area in Bengaluru, there is a bakery called Butter sponge which made some of the best stuffed buns I have had. BH & I used to stop there almost every week on our way back home to pick some up. The place has had a make over and the last time I was there, they had converted it to a chat place serving Indo chinese, Indo-American etc. He used to make different stuffings and shapes of these buns and our favorite was the potato stuffed bun and the bell pepper masala stuffed bun. When we reached home with the masala buns, we would be greeted by two very excited dogs vigorously wagging their tails as they somehow knew the smell before the vehicle even turned the corner :-).

I made a very South Indian palya with potatoes for the stuffing this time, you can easily replace it with any other choice. The bun is soft and light and is delicious to eat even when it is cold. I prefer using bread flour in this recipe over regular AP flour as the texture is so much better with the gluten in the bread flour that gives the right elasticity to the buns.
What do you need to make stuffed buns? 
Ingredients for the buns:
Makes 12 good size buns
1.5 cup whole wheat
1/2 cup bread flour
1 Tblsp active dry yeast
3 Tblsp oil + 1 Tblsp oil (divided use)
1.5 Tblsp sugar
1/4 cup warm milk
1/2 cup warm water
1/2 Tsp salt
1 Tblsp milk for brushing
kasoori methi

Ingredients for the stuffing:
3 medium sized potatoes - boiled, peeled and mashed gently
1 medium sized onion - chopped finely
1 green chili - chopped
small piece of ginger - chopped finely
4-5 curry leaves - chopped finely
3-4 twigs of cilantro
1 Tsp salt (adjust to taste)
1/4 cup frozen green peas (optional)
1 Tblsp oil
1 Tsp mustard
1 Tblsp lemon juice
1/8 Tsp turmeric
How do you make stuffed buns?
Making the bun dough:
  • Sieve the bread flour and wheat flour together with salt in a wide bowl. 
  • Dissolve sugar in the warm milk and add yeast to it, give a mix with a spoon and set aside for 5 minutes or until the mixture froths.
  • Crush the kasoori methi in your palms, add it to the flour bowl.
  • Add the frothy yeast mixture, 3 Tblsp oil and bring the dough together by hand adding water. The 1/2 cup water suggested above works perfectly for the dough, however as wheat flours are different, add water slowly and feel the dough. You should get a non sticky, elastic dough at the end.
  • Knead the dough for a good 10 minutes, smear oil all over the dough, cover with a wet napkin and set it to rise in a warm place. 
  • When the dough has risen to double its original quantity (1.5-2 hours depending on the temperature), punch it down and knead well for 5 minutes. 
Making the stuffing:
  • Heat the oil, add mustard and let it sizzle.
  • Add the green chilies, chopped curry leaves, ginger and roast for 30 seconds. 
  • Add the chopped onion, salt and turmeric and let it cook until onion sweats a little and turns limp. 
  • Add the mashed potatoes, chopped cilantro and lemon juice, give it a good mix and switch off the stove. 
Making the stuffed bun:
  • Break off golf sized balls of the dough and potato stuffing. The stuffing ball is a tad bit smaller than the dough ball.
  • Take the dough ball and flatten it into a 3 inch diameter disc, put the stuffing inside and bring the ends together to close it in. Gently roll the stuffed balls, flatten it very lightly.
  • Repeat for all the dough and stuffing. 
  • Arrange the stuffed balls in a baking tray with the seam side down with atleast an inch of space on all sides between the buns.
  • Cover with a wet napkin and let it rise for another 30 minutes. 
  • Preheat the oven to 375F and bake the buns for 10-12 minutes or until you see a very light golden brown on top.
  • Take the buns out, brush them with warm milk and bake them for another 3-4 minutes until the outside looks perfectly golden.
  • Let it cool on the rack before eating them. 
Notes: 
  • Kneading the dough is very important and defines the texture of your final product, do not take short cuts as this step works on the gluten in the flour, rearranging and stretching strands helping the bread dough to rise properly resulting in a light & fluffy bread. Here is a gem of a video I found which describes 'bread kneading'.
  • Pay attention to the yeast, if you do not see the bubbles start to come up within a couple of minutes, odds are high that the yeast is not potent anymore. Your best bet would be to chuck it down the drain and go buy another fresh pack of yeast. 
  • Remember to cover the dough completely with a wet napkin when you let it rise, else the surface will become dry.
Ideas:
  • This dough is very versatile and you can add spices or flavoring agents such as red chili powder, crushed black pepper, chopped green chilies, ajwain and bake the buns without any stuffing. 

Sunday, November 25, 2012

Corn bread - native, hearty, festive and quick

Once upon a time, there was a little girl named Laura who lived with her Ma & Pa, older sister Mary and baby sister Carrie. They left their Big Woods home in Wisconsin and started to move towards the wild Western states in search of better life, wild west was also known as Indian country. They had to travel for many many days in their big caravan and camp at nightfall.

''..Pa brought water from the creek, while Mary and Laura helped Ma get supper. Ma measured coffee beans into the coffee-mill and Mary ground them. Laura filled the coffee pot with the water Pa brought, and Ma set the pot in the coals. She set the iron bake-oven in the coals too. When it heated, she mixed cornmeal and salt with water and patted it into little cakes. She greased the bake-oven with a pork rind, laid the cornmeal cakes in it, and put on its iron cover. Then Pa raked more coals over the cover, while Ma sliced fat salt pork. ...The coffee boiled, cakes baked and they all smelled so good that Laura grew hungrier and hungrier..."

That is a small excerpt from the Little house books by Laura Ingalls Wilder. I read this over & over with my little girl. It is an autobiographical series from the late 1800s where much of America was still unpopulated and life was farming based and pre-industrialization. The stories are very heartfelt, makes you fall in love with the Ingalls family as they go through their ups and downs in life but more importantly I think it is a story from the times when family values were held high. If you have little girls and boys and looking for bed time reads, I would strongly recommend these books.

Well, back to today's recipe, I made some corn bread for our Thanksgiving brunch, corn bread is a very native American recipe that is hugely popular for its simplicity and taste. As you see above, in the olden days the humble corn bread was cooked with just salt and water and may be a little bit of fat if you could manage it. The easy bake cake has morphed into suave variations and Mexican immigrants have added their own touch with peppers in these corn breads. These keep well and taste good when cold also and hence easy to carry on travels. Southern corn breads usually are sweeter and have eggs in them. I like it spicier, skip the egg and reduce the sugar.
Indiana is known as the cornfields of midwest and I have seen corn fields and corn until your 'eyes can tire of the sight'. As you drive by, you could reach out and touch the ripe corn cobs by the roadside. Corn  is put into many uses including fuel generation.

There are many variations of eggless corn bread on the web and here is my adaptation from a few different sources. This corn bread is perfectly moist and 'just right' crumbly in your mouth.
What do you need to make corn bread? 
Makes a 8" pan about 2" cooked pieces
1 cup corn meal (I used coarse yellow corn meal)
1 cup all purpose flour or maida
1.5 cups milk (Use soy or almond milk to make it vegan)
1.5 Tblsp apple cider vinegar
1 Tblsp sugar
3/4 Tsp salt
1/2 Tsp baking soda
1 Tsp baking powder
1/4 cup corn (fresh or frozen)
2 Tblsp oil
1 jalepeno pepper, washed, deseeded and chopped into small pieces (Optional)

How do you make corn bread? 
  • Pour milk and cider in a bowl, mix with a spoon and set aside for 5 minutes. 
  • Add the flour, corn meal, salt, sugar, corn kernels, baking soda & baking powder in a wide bowl and mix them until well incorporated. 
  • Pour in the milk+cider mixture, add oil and mix lightly until everything folds in together. 
  • Pre heat oven to 425F, prepare a 8" pan with a spray of cooking spray. 
  • Pour the batter and add the jalepeno pieces on top. 
  • Bake for 25 minutes or until a tooth pick comes out clean. 
  • Let cool and cut into wedges. 
Notes: 
  • You can use plain vinegar and increase the amount of sugar by another Tsp if you like it sweeter. 
  • You can bake the mixture in small muffin cups for individual serving. 
  • I add the jalepeno on half of the pan and leave the other half for heat intolerant people.
  • You can be creative and add other spices to make the corn bread customized to your taste - I add roasted, ground cumin sometimes.
Here is a view of our Thanksgiving brunch with the mysuru masala dose, cranberry chutney, baked BN squash, baked sweet potatoes, pomogranate mosaranna and corn bread

Tuesday, October 23, 2012

Banana walnut muffins - tasty way to consume overripe bananas

My baking repertoire is very limited. Though I have switched many of my Indian deep fried recipes to baking as alternative, I don't delve into full time baking in my kitchen. I am yet to overcome my inhibitions about baking. However there are some very simplistic baking recipes I dish out frequently to make myself feel good :-). You can find some of my successful baking experiments herehere here.

After last weekend's bommala koluvu, as always I ended up with a bunch of fruits. BH & DD have a funny way of consuming fruits, they both love fruits as long as it is washed, cleaned and kept in front of them. I will have bags of oranges go unnoticed until I start peeling them, then there will be a pile of orange peels (and a plea for me to make Orange peel gojju) in a matter of minutes, same with other fruits.. they need someone (me) to start the process and then things will happen quickly when it comes to eating fruits. What can I say? it takes all kinds of people to balance this world :-) I could see the golden yellow bananas turning brown on their way to final stage of life. I have multiple ways for overripe banana nirvana in my kitchen and chose to make some plump muffins this time for DD to munch on while doing her homework.

If you have not tasted or heard of muffins, they are cute little roundish things that is widely popular as breakfast staples. For the uninitiated, they may look like cup cakes but they differ a lot from cupcakes. Googling for gyan, I found that muffins are made by preparing dry ingredients and wet ingredients separately, pouring wet ingredients over the dry ones (for muffin purposes sugar is considered as a wet ingredient) while cup cakes go through the 'cream them together ' concept with their ingredients. Muffins are not overly sweet like cup cakes and they are not frosted either. There are muffins made with eggs and without eggs.

I am not a vegan in my diet but as a personal choice I avoid eggs in recipes if there is a way out. This banana walnut cake is one of them, I have been baking this for a while now, started with a buttery recipe that called for eggs and have morphed it into a no-butter, no egg recipe by some trial & error and here is a perfectly soft, deliciously sweet muffin.
What do you need to make banana walnut muffins? 
Makes 12 big muffins
Wet ingredients:
4 ripe bananas
3/4 cup light brown sugar
1/3 cup oil (I used saffola oil, replace with canola or vegetable oil or with butter)
Dry ingredients: 
1.5 cups AP flour or maida
1 Tsp baking powder
1 Tsp baking soda
1/8 Tsp salt
1/2 cup + 1 Tblsp chopped walnuts

How do you make banana walnut muffins? 
  • Mash the bananas really well or run them in your blender like I do to make a puree.
  • Mix the wet ingredients together in a bowl. 
  • Sieve AP flour, salt, baking soda and baking powder in another bowl, make a well in the center. 
  • Pour the wet ingredients into the dry ingredients bowl and mix them in gently with a spoon. 
  • Fold in 1/2 cup of chopped walnuts. 
  • Preheat oven to 375F, line a muffin tray with muffin liners. 
  • Spoon the batter to 3/4 in each muffin groove. 
  • Add a few chopped nuts on top. 
  • Bake for 25 minutes or until a toothpick comes out clean. 
  • Enjoy the muffins warm or cold for a hearty breakfast or evening snack. 
Notes: 
  • It is important to not use a hand mixer or even mix for a long time with spoon as it activates the gluten while also using up the baking powder/soda. This causes muffins to not rise properly and turn them chewy & tough. Mix the ingredients gently until they come together.
  • I use brown sugar instead of regular sugar as it gives a nice brown color to the muffins and adds to the flavor. Myth buster: brown sugar is not a healthier option than white sugar. 
  • I have made these muffins with AP flour, bread flour and a combination of whole wheat and AP flour and we love it every time. If you are using wheat+AP flour, use 1 cup wheat and 1/2 cup AP flour. 
  • Walnuts is a personal choice and traditional option, replace it with any nuts of your choice - almonds, pistachio, pine nuts etc for crunch or omit them completely. 
  • Add 1/4 Tsp cardamom powder for the distinctive Indian dessert flavor if you like, bananas & cardamom are a great pair. I don't add it since DD doesn't like cardamom.
I am sending these muffins to Nupur's What with my Cuppa event.