Showing posts with label Malnad recipes. Show all posts

Sunday, January 28, 2018

Cucumber idli - a no soak, grind or ferment sort of idli

We are almost done with a whole entire month of the new year :-). India celebrated 69th Republic day recently and we are ready to move into month 2 of the year. Where does time go??? BTW, how is everyone's resolutions going? I wish you all the strength to stay on top of your list. I didn't have any to start with, made some in the last 28 days and have already broken many of them :-). I totally suck at this resolution thing!!

Let us jump right into food today, shall we? I grew up on mosaranna (yogurt rice with left over rice from the night before) early in the morning to be followed by a hot breakfast later in the morning :-). Now that I have to make it all myself, and also because BH & I like oats, it is pretty much oats cooked the previous evening for the two of us. I do make variations with the base oats just for variety. Our proper breakfasts are reserved for weekends or holidays at home.

If you ask any true blue South Indian to list 5 of their top breakfast choices, idli (these are the light, fluffy, pearly white steamed savory cakes made with rice and lentils) would most definitely make the list atleast 99 times out of a 100 people surveyed, do you agree? This humble breakfast is popular as it is wholesome, has the right mix of carbs and proteins and is oil free to start your day on a perfect note. Though idlis are by themselves pretty close to tasteless, there is a universe of difference between a good idli and a bad one and they can go bad for any number of silly reasons - your grinding of the batter was not correct, temperature was not right for the fermentation, you didn't mix it well, proportion of urad dal and rice was not right, and so on. On the bright side, if you got the batter right and made some fluffy idlis you can serve them with a range of side dishes and take the idli from a simple homely breakfast to something worthy of a spot on a royal buffet. There is so much creative freedom the Idlis provide to mix and match the side dishes ranging from a piping hot sambar to chutneys to pudis to exotic dishes like kadappa or vada curry.
Why this passionate rant about idlis today, you ask? Because I have a recipe for a different kind of idli for you so you can give a break to the normal idli and still appease those die hard 'only idli for breakfast' fans at home :-). Long before MTR and Maiyas made Rave idli (semolina idli) as the no soak, no grind, no ferment alternative to the staple South Indian urad dal idlis, there was a well kept secret in the cozy malnad and coastal Karnataka homes. An idli so soft and delicious, that was a deviation from the regular (and almost boring due to the frequent appearance) urad dal idli, one that was much lighter compared to the traditional fermented idli and one that used up a commonly found vegetable from the backyard. This secret recipe was for the quick akki tari (or broken rice/rice rave) idli, flavored with either the mild and innocuous cucumber or the slightly sweetish pumpkin depending on the season.

The cucumber idli or sautekayi kadubu as it was known in local languages had the dual distinction of being either a savory or a sweet version depending on the eaters' choice. If the household had a sweet tooth or was made of younger kids, the sweet version with a generous amount of jaggery (bella or brown sugar) made its hot appearance for the chilly morning breakfast and if the folks at home preferred a mildly savory/salty version, it was spiced with a few green chilies and cumin. Sometimes I add a small carrot to mix up the colors a little bit.

I am told that cucumber idli is an acquired taste and you should first like cucumber to like this idli. I love cucumbers and so does the family. We like to mostly eat it raw in kosambri or raita but also cook it as part of a majjige huli or regular huli/sambar. So, if you belong in the category of people that turn their nose up at cucumber, this may not be for you. However if you are like me and like the subtle taste of cucumbers, this is a recipe you don't want to miss.
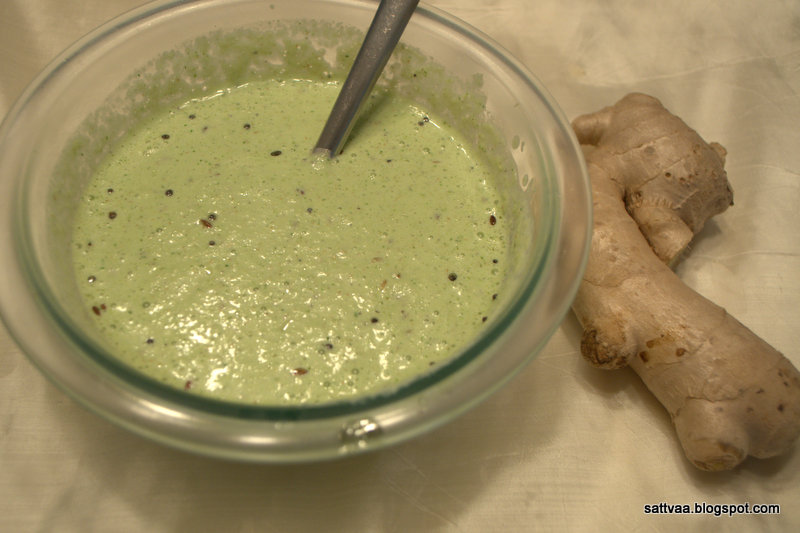
I made this recently for the new year day as we were home and wanted to start the new year off with a healthy start. We usually like to eat it with a side of some spicy chutney like the cilantro+coconut or red chili+coconut or a tangy mint chutney. You can eat it with a good chutney pudi and some home made yogurt too.

So, here is one of those old world recipes that you won't find on any restaurant menu. I like this better than the rave idli because there is no frying, you don't have to add any baking soda or eno to fluff this idli up. And it is obviously a gluten free, vegan recipe if that is a criteria.

What do you need to make cucumber idli? 
Makes 12-13 standard size idlis
1 big tender green cucumber (I use slender English cucumbers with skin on)
1.5 cups of idli rave/rice rave
1 Tsp salt
1/2 cup shredded coconut
4-5 green chilies (adjust to taste)
2 Tbsp finely chopped cilantro
1/2 Tsp cumin
How do you make cucumber idli? 
  • Wash and cut the ends off cucumber. 
  • I do not peel cucumbers for this recipe as I like the slight green tinge it gives to the idli. If you are using regular cucumbers and the skin is thick, go ahead and peel it before grating. 
  • Grate the cucumber in the bowl you are going to mix the batter so no liquid is wasted. 
  • Coarsely grind shredded coconut and green chilies without adding any water and add it to the bowl. 
  • Add salt, chopped cilantro and idli rave to the bowl and mix well. 
  • Cover and set aside for 20 minutes. 
  • Prepare your idli plates by brushing them with a couple drops of cooking oil. 
  • After the resting period, pick up a large lemon size portion from the batter and press it into a ball in the palm of your hand. It should hold the shape without breaking apart. If it feels too dry, add a spoonful of water. 
  • Put the ball into the dip of the idli plate and repeat for remaining batter. 
  • Steam the idlis in medium heat for 18-20 minutes. 
  • Switch off and let cool for 10minutes before removing them. 
  • Enjoy with any spicy chutney or sambar of choice.
  • Sweet idli version: If you have a sweet tooth, skip the green chilies and coarse grind coconut with 2 Tbsp of jaggery (indian brown sugar) and add it. Reduce the amount of salt in this version. Rest of the process is same as above. 
Notes:
  • Depending on the water content in your cucumbers, you may need to adjust the idli rave quantity slightly. Remember you are looking for a batter(after the resting period) that comes together into a ball and is not dry. Hold a portion of the batter in your hand and if you can set it into the idli mould without it breaking all over you, you are good to go. 
  • Resting the batter and steaming idlis on medium heat is important, it gives the time to the raw rave to cook completely and not stay grainy or dry. 
  • Use medium sized (not too fine but a little grainy) idli rave for this recipe. If it is too coarse, the idlis turn dry and a fine rave will make your idlis go flat. 

Tuesday, October 25, 2016

Sautekaayi saasve (raw cucumber curry) - cooking a delicious dish without actually "cooking"

She gets up at the crack of dawn, takes a bath and enters the kitchen. The kitchen is her work shop where the artist and the scientist in her compete and collaborate with each other to bring out the best. It is a large family that she has to feed and the demands are varied. A husband who goes off to work in the morning and doesn't return until evening, he doesn't carry a lunch pail with him so the first meal of the day has to be nutritious and sustainable (add fibers, lentils or pulses that digest slowly and release energy over time), an older daughter who always rushes out in the morning (what is it with college kids and getting up late in the morning:-)) without time for a sit down breakfast (make something that is quick and easy to eat, and no there were no cereal bars available at the time), oh she needs a lunch box too as she doesn't get home until late in the evening (something that is not too dry nor too watery to carry easily on the bus). And then there are 3 younger ones in different grade schools that need to be fed nutritious meal as well(in goes vegetables, some ghee to make it rich and healthy). All taken care of? well not really, this dish was made just last week and this vegetable was in 2 meals ago, the same old, same old is not going to cut with this family..
Sounds familiar? I am sure it does ring a bell with most of you reading it. I try to close my eyes and imagine this routine of nammamma for decades. At the beginning of her married life, she was part of the larger, joint family with parents in laws, sister and brother in laws that she took care of and towards the end it was the extended family of sons and daughters in laws and the grand children. The routine kept changing shape like boggarts do depending on the phase of life she was in but the busy schedule itself didn't change much. There were hardly any back up plans or substitutes for her work and much was taken for granted..
I was probably the pickiest of all her children. While the rest of the family was happy eating what was prepared, I would be the one troubling her to make 'something else' but never telling her what I really wanted :-). Her immediate reaction whenever I said I was hungry was to make something and feed me, I get it, I am a mom now and that is a very easy to idenitfy with 'mommy nerve'! After a long day of being in the kitchen, all she probably wanted to do was to sit back, have some 'me' time and read a book. The moment one of us started the hunger siren she would be scrambling to get something infront of us. Even with my nitpicking, there were always a number of favorites that I would never say 'no' to and she knew the trick very well :-). Spicy dishes have been my weakness and if she offered me something from that genre, I would immediately back off my protests and sit down to eat. I think that was the beginning of reverse psychology moms so effectively use on kids :-)
This Sautekaayi saasve is one such dish I never refused. The recipe is unimaginatively simple. There is no cooking involved - chop the vegetable, grind a spice paste with all raw ingredients, mix the two together. You have a tantalizing side dish/salad ready to eat in a matter of minutes. This recipe is from the heart of Malenadu/Malnad (known for its simple, homely and mouth watering dishes with a big emphasis on fresh coconut  and mostly sweetened with jaggery:-)). Malnad cuisine is a great example of food made with easily available ingredients and the vegetables are almost always from the backyard as the region is blessed with abundant rains and fertile soil. The food is saatvik, onions and garlic are rarely used.

Saasve is the Kannada name for mustard. The dish is also called saasve in this case as mustard is the central flavor in it. Coconut and roasted gram add body and taste to the curry while mustard elevates it with a unique flavor. Since there is no cooking involved (if you discount the seasoning ofcourse), this is also called hasi (raw) gojju (curry). I like to eat it as a 'dressed up' salad but it is great to mix with rice or have with rotis.

What do you need to make Sautekaayi saasive? 
1 big cucumber (I used the English cucumber which are tender and hardly have any seeds)
To Grind:
small key lime sized tamarind
1/2 Tsp jaggery
3/4 Tsp salt (adjust to taste)
1/2 cup water
1 Tbsp roasted chana/kadle
3/4 Tsp mustard
1/2 Tsp cumin
1-2 green chilies (adjust to taste)
1/2 cup grated fresh coconut

Seasoning: 
1 Tbsp oil
1/2 Tsp mustard
1 dry red chili (broken into pieces)
pinch of asafoetida
2-3 curry leaves

How do you make Sautekaayi saasive? 
  • Wash, pat dry the cucumber. 
  • Peel and chop into tiny pieces (see picture for to get an idea of the optimum size, smaller or bigger is your choice :-))
  • Take all the ingredients listed under 'To Grind' and grind to a smooth paste. 
  • Mix the ground paste with the chopped cucumber. Add water if needed to bring to your desired consistency. Remember cucumber leaves additional water when mixed with salt, so start with a slightly thick gravy. 
  • Heat oil on medium heat, add items under 'seasoning' and let mustard pop. Switch off the stove.
  • Add the seasoning to the gravy, mix and let it sit for 10 mins before serving. 
  • How easier than this can making a curry get :-))
Notes: 
  • If you are using regular cucumbers that are mature, remove the tiny bits from both ends, peel and remove the seeds before chopping it. 
  • Soak tamarind in a couple spoons of water to soften it up before grinding. 
  • I like to refrigerate this for about an hour before eating since I mostly eat it by itself as a salad. The resting time helps the flavors mingle together. 
  • This curry needs to be a balanced on all the tastes - sweet, sour, salt and spice. Feel free to adjust to suit your palate. 

Sunday, June 15, 2014

Ele kadubu also called Kai Kadubu - a succulent sweet dish from the deep interiors of Karnataka

I am back with a regional delicacy from the interiors of Malnadu/Malnad in Karnataka. It is a sweet very unlike anything you may have eaten thus far but has the ability to hook you on the first bite and keep you asking for more :-). I would say this is a very elegant and artistic dessert that is fit for a weekend indulgence with family or to treat friends on occasions. It has a succulent coconut jaggery filling wrapped in a thin layer of ground rice and steamed in fresh turmeric or banana leaves that impart their natural flavors to the dish. I am talking about Ele Kadubu (~Steamed dumpling made in leaves) or Kai kadubu (dumplings made with coconut) as it is called in the Malnad region. This dish is very popular in South Karnataka/Mangalore region too and goes by the name of 'Genasale'. I have seen this dish also called Pathol/Patholo on the borders of Karnataka and Maharashtra.

What is so special about this steamed dumpling? The way it is made, there are other similar (from an end product perspective) looking dumplings, I have one of them here. But the Ele kadubu varies from this version in the way it is prepared using a leaf (Ele ~ leaf and usually fresh turmeric leaves are used) and if you are not used to dishes cooked in leaves, you obviously have the question mark on your face now asking, "Why"? Here is why.. fresh turmeric leaves impart a beautiful aroma to the dish and from a very consumeristic goal, it reduces clean up effort since all you have to do is, unwrap the leaf, eat the kadubu, put the leaf into the backyard composter for reuse. Let us back up a little bit to the aroma advantage, this is slightly hard to describe but all I can say is for you to trust me on this and believe that wrapping in turmeric leaves makes the dish totally delectable.
I remember having talked about our precious turmeric leaves in Mysore home in one of my earlier posts. Once when doddamma (amma's older sister) visited us, she exclaimed at the fresh green turmeric leaves in the yard and was really surprised at the ignorance of her city bred sister's family. So the sisters got together and made this out of the world dish for us :-). Doddamma lived her entire life in the heart of Malnad and was an awesome cook. But then that was long time ago and somehow nammamma never took to making this often as she made the sweet version the other way. Sometimes, one experience is all it takes for something to make a lasting impression. I fell in love with this kadubu.
A couple of years back, while in India, DD & I went to meet up an old collegue of mine. His parents live with him and aunty had made a delicious lunch of vegetable pulav, raita, home made papads, rice, rasam etc and I was already feeling like a bloated boat when she brought us the yummy looking sweet. Something popped and I knew exactly where and when I had eaten it before and without my usual, "I don't really eat much sweets" etc, I grabbed a kadubu. DD was looking at me as if I could cover for her but since she didn't get any encouragement from me and not being able to say 'No' to the sweet lady, she took one bite gingerly. I could tell from the gleam in her eyes and the speed at which she went back for the second bite that we were two peas from the same pod :-). Needless to say, I made aunty explain the how & what of the dish in detail. Like I said, she called it Genasale and told me that banana leaves can be used in the absence of turmeric leaves and mentioned that they add chopped jackfruit pieces when the fruit is in season. We came back home completely satiated.
I had this on my list to post for a while now but today is as good as any other. I am hitting my 250th food post with this and so I thought this was a good dish to celebrate with. For someone who started blogging for no good reason other than to record my way of cooking, this number means that I am able to sustain. I know I haven't been going at it regularly but then speed has not been one of my concerns. I am happy to share some stories about the dish with you guys and if some of you try it and like them, I feel I have accomplished what I set out to do. Looking for your feedback as always.
While Arishina (Turmeric) leaf gives the best aroma for this kadubu, you can make it with banana leaves which are easier to procure. We have banana plants in pots, started with one and in 2 years they have become three. They are not fruit bearing but I just love the green leaves as they sway happily in the wind. We bring the pots inside during the cold months but they get to enjoy sun shine just like the rest of us during the summer. I used the leaves from my small plant.

We got a couple pieces of jack fruit from the store the other day and I decided to make the ele kadubu with jack fruit. The only problem at my home is that DD takes after her ajji (grand mother) and loves jack fruits and they get over in minutes when we bring some home. I stuck a bargain with DD to keep some pieces of the fruit aside for the kadubu and used them the next morning. The jack fruit I got was slightly orange-ish in color, very sweet and extremely aromatic. I also made some savory ones with an urad dal filling just to make it a complete brunch. Yummm!

Don't you think this makes for a beautiful Father's day breakfast/brunch? Happy Father's day to all you wonderful dads! 
What do you need to make Ele Kadubu? 
For the batter
2 cups rice (sona masoori)
1 cup grated coconut
pinch of salt
1/2 -3/4 cup water
For the stuffing
1 cup grated jaggery
1 cup grated coconut
1 Tsp water
1/4 Tsp freshly powdered cardamom
2 Tbsp chopped jackfruit (optional & seasonal)
Others:
A few banana leaves
Tsp of ghee

How do you make Ele kadubu?
  • Soak rice for 4-6 hours, longer soaking softens rice further and makes it easy to grind.
  • Wash, rinse the soaked rice and grind it with 1 cup of coconut and a pinch of salt until really smooth.
  • When you feel the batter between your fingers, there should be no grainy texture.
  • Prepare the sweet filling like so: Heat a pan, add the grated/crushed jaggery and Tsp of water and mix in on medium heat until jaggery dissolves. Add the grated coconut and cardamom powder. Mix well and switch off.
  • Wash, pat dry the banana leaves and hold them for a couple of seconds on the hot stove. This step not only removes any insects on the leaf but also softens them and makes pliable for folding over.
  • Take a softened banana leaf, lay it on a flat surface, spread a drop of ghee all over on it.
  • Put a Tbsp of the batter on top and spread into a thin layer.
  • Put the sweet stuffing on top leaving a small gap from the edges.
  • If using jackfruit, add the pieces on top.
  • Fold the leaf in the middle gently and put it in a steamer container. I use my idli stand.
  • Prepare the rest of the kadubus in the same way, arrange them in a steamer basket or on idli plates and steam cook for 12-15 minutes or until a knife pushed through the kadubu comes out clean.
  • Let cool for a minute or so after switching off, peel the leaf layer slowly to uncover the yummy kadubu.
  • Serve it with a drop of ghee for a satiating experience.
Notes: 
  • This kadubu is best eaten warm and fresh. The outer layer tends to become hard and chewy if kept for long or refrigerated. If you make a large batch, do not peel the leaves while storing, re-steam them to warm up just before serving. 
  • The consistency of the batter should be thicker than regular dosa batter, it should be easy to spread but not runny so you cannot fold the leaf over. 
  • I made a simple khara (savory) filling with urad dal - soak, grind urad dal (or replace it with moong or chana dal if you like that taste better) corasely along with a couple of green chilies and ginger. Steam this for 10 minutes to par-cook. Once cool, crumble the steamed dal. Make a seasoning of mustard, curry leaves and add the crumbled urad dal and roast on low heat until cooked and sorta dry. Add grated coconut, salt to taste. Use this to fill the kadubu for a delicious savory version. 

  • You can reuse the banana leaves a couple of times but I would suggest starting with enough pieces so you can steam them at one go. 
  • Spreading a drop of ghee on the leaf gives a glossy finish to the kadubu and upps its taste.

Friday, December 13, 2013

Menthya saasve - one of the forgotten curries from Malnad region

Been a while since I as here last, thank you to all those who checked in after me. Things are ok and I am doing well. Had to take a forced break as work got intense and I had voluntarily added something to my list to be completed by year end. Target complete and here I am with a couple of alphabets to add to the end of my name on my professional signature :-). It was mentally exhausting and physically difficult to go back to some serious school age studying (which obviously I had not done in a long time) but gratifying at the same time. DD has been equally busy the last week as she is going through a series of exams before her winter vacations start and then will have to get ready for the exams after the vacations :-(. I was completely drained last evening and dozing off at 6.30 in the evening while she was still chirping away and working on her homework. I asked her how she does it and she looks me in the face and quips, "Amma, do you realize you are old?", cheek of the kid to call her own mom old, I never said anything like that to my parents, EVER :-). Well, I promise I wont bore you with too much non foody stuff. Here I am back and rearing to go with my blogging.
A couple of days ago Srikanta Datta Wodeyar passed away, for those of you unfamiliar with who he was, this can't be more than another piece of news. He was the last of the Wodeyar dynasty which ruled Mysore province for generations. For me, he is part & parcel of my Mysore Dasara celebrations. Though he never was a maharaja (king) in the true sense of the word as post Independent India did away with kings & royalties, he represented a bygone era. Government had made provisions for this crown-less, throne-less king to live in the Mysore palace and also kick start the traditional Dasara procession with a pooja. Now, he becomes only a memory and a tiny bit of history that enriched the region.

For me, food blogging has been all about memories, remembering not just the taste of the food but the people who made them, served them, company you enjoyed with and incidences they were part of. This means that I talk about my family and personal life many times on this blog. Hope you enjoy reading them as much as I do writing them. I have a very homely recipe today that you will not find in any restaurants ever, sometimes simplest of the things make the most sense, bring absolute joy and contentment in life.

When you reach the western ghats in Karnataka and stop at someone's home in a place such as Chikmagaluru or Shimoga or further interior at Balehonnuru, the food takes on a completely different shape, flavor and taste. I believe the taste is enhanced because it is made with ingredients locally grown or available and not tainted by long journeys packaged and shipped from a different part of the World. While it limits the ingredients available to you, your chef's ingenuity shines bright as you come up with so many variations unrecognizable from the previous one. This region is known for its Tambulis (yogurt based cooling gravy), chutneys (abundant use of ingredients such as banana stem, banana flower etc), or the very unique saasve which is generally a gravy either with or without vegetables but definitely with ground raw mustard.
Nammamma made many of the Malnad region cuisine at home as part of our daily food but her repertoire was limited compared to those of my two Doddammas (aunts) who lived in the heart of Malnad for most of their lives. For us city bred Mysoreans, a visit to doddamma would be a gastronomical experience in the enchanting world of Saasve, gojju, paladya, mosaru bajji, tambuli along with an array of happala (papads) and sandige (I still can't translate this to anything justifiable :-)). I have followed this doddamma in all the small village-y places she has lived around Mysore most of my school breaks. Small, low ceilinged kitchens with a small window that served no actual purpose of bringing in light or air but was mainly installed as a formality where you squat infront of a stove placed on the floor (kitchen platforms or shelves were too fancy for these old houses) while Doddamma roasted a spicy horsegram papad or a sweet jack fruit papad directly on the flame or charcoal and gave it to us. The banana leaf spread infront on the floor would already be steaming with hot rice, ghee and saaru (not Rasam but close enough, I will reserve my saaaru Vs Rasam discussion for another day). On one corner of the banana leaf would be either a palya (stir fried vegetable), paladya/bajji (yogurt based gravy) or a saasve (if vocabulary challenged, you can call this chutney but the flavor is very distinct and different). The meal plan was simple, had to have some protein source (saaru with lentils fit the bill perfectly) and then you would have a vegetable or two. And you end the meal with buttermilk. You had to have extreme mind control not to eat those banana leaves too :-)
One of my friends is from malnadu and married into a family in the deepest part of the region, so all her strings to Malnad food are intact. On one of my India visits, she made this saasve which was out of the world and brought back memories of having tasted it in my Doddamma's kitchen once. So I went right after her for the recipe and recreated it at home and here is a much loved menthya saasve for all of you to enjoy. It makes a great side dish for rotis also but you can go ahead and create your own Malnad experience by spreading a green banana leaf and serving it with hot white rice. Mix it in with a drop of ghee and enjoy. Come back and let me know if you were able to stop licking your fingers anytime or even smelling the fingers after you had washed them :).

Saasve (or saasive) means mustard in Kannada. Keeping the ground masala same, there are umpteen varieties of this saasve as you can use different vegetables in place of fenugreek seeds. The one I have today is bisi(hot) saasve as the masala is boiled after it is ground. There are hasi (raw) saasve varieties where you just add the ground masala to a vegetable (raw such as cucumbers or radish) or to a cooked vegetable (such as fried okra) along with a ladle full of yogurt. May be I will post one of those some other time. I haven't used any vegetables today and the surprise ingredient is fenugreek seeds, no I didn't make a mistake when I said 2 Tblsp of fenugreek but I will tell you this - you wont bite into any bitterness here, the seeds lose their bitterness in this dish, instead lend a wonderful aroma and taste to the dish and makes it very delicious. Remember to keep the salt, spices and sourness in balance and to your liking. Enjoy!
What do you need to make Menthya saasive?
2 Tblsp fenugreek seeds
1/2 Tsp mustard seeds
1 Tblsp oil
4-6 curry leaves
pinch of asafetida
To grind:
Key lime size tamarind
2 Tblsp grated coconut
1 Tsp mustard
3-4 green chilies (adjust to taste)
1/8 Tsp turmeric powder
3-4 sprigs of cilantro
1 Tsp brown sugar or grated jiggery
1/2 Tsp salt (adjust to taste)
How do you make Menthya saasive?
  • Heat oil in a pan, add mustard and fenugreek seeds. Keep the heat on medium to low and fry the seeds stirring frequently until mustard pops and fenugreek turns deep brown. Take care not to burn either of them.
  • Add the curry leaves and stir it in.
  • Mean while prepare masala - grind all ingredients under 'To grind' with 1/2 cup of water into a very smooth paste.
  • Add the ground paste to the roasted fenugreek, add water to make a thin gravy consistency and let it boil on low heat for 10 minutes or until fenugreek seeds drink up the masala and plump up.
  • Switch off, let it stand for about 20 minutes before serving with rice or rotis.
Notes:
  • It is important to roast the fenugreek on low-medium heat so the seeds get roasted through.
  • Taste the ground masala and adjust green chilies, salt or tamarind as needed. This is yummy by itself as a chutney.
  • You can use dry red chilies in place of green chilies to make a 'kempu saasve'(red gravy) as we called it.
  • The gravy is a blend of sweet, sour, spice and saltiness. Adjust them to suit your palate.
  • It is important to let the roasted fenugreek boil in the masala and soften before you eat them, this process allows them to soak up the gravy, become soft and lose the bitterness. It is no fun biting into crisp, bitter fenugreek seeds.

Wednesday, October 31, 2012

Cabbage Pathrode - perfect non-greasy rainy day snack

It is raining outside for the last 2 days and I am telling myself to stay away from my standard abode of deep fried snacks in this tempting weather but the cravings are just getting worse with every falling raindrop :-). Thoda Khatta, Thoda meetha, Thoda thika is what I want and the recipe below is a perfect blend of all these tastes and more. Oh yes I didn't need to put a pan full of oil and fry something either. This is a hands down win-win situation.

For people from Karnataka, Pathrode is either a Malenadu/Malnad or Mangalore delicacy, there are various ways of making this delicious recipe as the masala may change its shape & form from family to family. There are other versions of Pathrode elsewhere in India - such as the Patra from Maharastra or Gujarat. While the pathrode made with colocasia leaves still holds the top slot in popularity, the easier to make cabbage pathrode gives a tough competition.

A Mangalorean aunty who lived next door made these cabbage pathrode which were a new taste and treat for us Mysore people. I was a tiny tot who only remembers the taste even to this day but was not a kitchen enthusiast to ask for the recipe from aunty :-). I think amma had this recipe memorized at some point but somehow this dish kind of dropped out of the radar as the aunty moved to a different city and we lost touch with their family. There is a (or was a) Woodies restuarant on Commercial street in Bengaluru that had cabbage pathrode on their menu but as I remember it was on a week day only and I never got to try it.

Then when I started working, I had a friend A from Mangalore whose mom cooked delicious food but A could care less as she was totally oblivious to the joys of cooking. I had to pester her for this recipe for almost 3 years before she sent me an email with 'Hey N, here you go, I finally remembered to ask my mom about the cabbage pathrode recipe, you need coriander seeds, red chilies, little bit fenugreek, and a little bit jira... and etc' :-). It was hilarious and I still store a print out of that email safely tucked away in my cook books. But that gave me a decent start and I went on to play with the ingredients list and get the proportions to tickle my family's taste buds the right way. So here is a tried and tested cabbage pathrode recipe.

Cabbage pathrode is sweet, tangy, fiery chili spicy all at the same time along with coriander and cumin lending their unmistakable flavor. Play around with the red chilies or tamarind  or jaggery quantity to enjoy it the way you like most.
What do you need to make Cabbage Pathrode? 
Makes about 20-2x2x1 inch pieces
2 cups finely chopped cabbage
1.5 cups idli rava
2 Tblsp oil (divided use)
To roast & grind:
3 Tblsp urad dal
1/2 Tsp fenugreek seeds
1/2 Tsp cumin seeds
6-8 dry red chilies (adjust to taste)
To grind: 
1X1 inch piece tamarind/1 Tsp tamarind concentrate
1 Tblsp coriander seeds
1 Tblsp crushed jaggery/brown sugar
2 Tblsp chopped onion
3 Tblsp grated coconut (fresh or frozen)
1.5 Tblsp salt (adjust to taste)

How do you make Cabbage Pathrode? 
  • Heat 1 Tblsp oil, add urad dal, cumin, fenugreek seeds and red chilies and roast them on medium heat until urad dal turns bright pink (2-3 minutes)
  • Grind all items listed above along with the roasted ingredients from the step above into a coarse chutney, add about 1/2 cup water as needed. 
  • In a mixing bowl, mix together idli rava, chopped cabbage and the ground masala paste until it incorporates uniformly. 
  • The consistency of the mixed batter should be like the akki rotti batter, should hold shape when rolled into a ball without crumbling but should not be watery. 
  • Here are two ways to make the cabbage pathrode, you can make small lemon sized balls and steam them or your can pat the batter into a steamer vessel to about an inch thickness and steam them. 
  • I prefer steaming them as one flat slab as it is easier to cut into pieces and roast later on. 
  • Steam (like idli) for about 20 minutes, switch off and enjoy with coconut chutney or ketchup as a side to your evening cuppa.
3 ways to enjoy Cabbage Pathrode:
Right off the steamer:
  • Enjoy the steamed pathrode without any embellishments 
Roasted pathrode pieces: 
  • When the steamed pathrode cools down, cut them into desired shapes
  • Heat a flat griddle, arrange the slices on top, drizzle a few drops of oil and roast them on medium heat until the surface turns light brown and crisp. 
  • Enjoy it as a snack with a dollop of ketchup or chutney.
Seasoned Pathrode: 
  • Break the steamed pathrode into crumbs. 
  • Make a seasoning with a Tblsp of oil, pinch of asafoetida, 1 Tsp mustard, a few curry leaves and optional dry red chili pieces. 
  • Add the pathode pieces into the seasoning pan, mix it and let cook for 3-4 minutes. 
  • Enjoy a bowl of the seasoned pathrode, use it as a side dish. 
Notes: 
  • Do not add too much water to the batter - it dilutes the taste and doesn't steam to perfection. 
  • Steaming the pathrode is the same as making idlis - use your regular cooker and cooker vessels or idli cooker and idli plates.
  • Taste the masala after you grind it - it should be tad bit high on all tastes as it will mellow down upon mixing it with the idli rava. 
  • You can use the ground masala as a perfect accompaniment to dosa or idli if you like spicy chutneys.
  • Coriander seeds are  not roasted in this recipe.
  • It is important to roast the ingredients on medium heat and make sure urad dal gets cooked well, else you get that uncanny, unpleasant raw urad dal taste in the pathrode.

Tuesday, May 15, 2012

Ginger tambuli - cool yogurt based side dish for the summer

Kannadiga homes such as the one I grew up in have lot of tambuli and bajji varieties. Bajji is usually referred to mosaru bajji with yogurt and not the fried onion bajji/bhajia, btw those are called pakodas. Tambuli is considered to have the cooling effect on your body and is a usual fare at home meals during the hot months.

We in the Pacific NW have been having beautiful weather for the last couple of weeks with glorious sun shines, warm temperatures and beautiful Rhododendron and Azaleas blooms covering the entire plant. The landscape here is so different from others we have lived in and makes a pretty sight all through the year. I love it all including the gray skies and rain showers, it reminds me of my visits to Chikmagalur, a small town nestled in the western ghats in Karnataka known for its coffee plantations. Chikmagalur is also part of the region known as Malnadu famous for its tasty food and unique recipes. My doddamma and family lived there and that is where I have tasted the best roasted jackfruit papad and horse gram papad. More about it in another post.
Tambulis are quintessential Malnadu recipes and Nammamma says eating hot rice with tambuli and ghee as the first morsel of food on a hot day is good for health. I can eat ginger tambuli for an entire meal as I love the ginger taste. Tambuli is usually thinner in consistency compared to chutneys but can be used as a dip or chutney by making it a little thicker.

Here is a very easy tambuli recipe with fresh ginger as the star ingredient.
What do you need to make ginger tambuli? 
1 cup peeled, chopped to bite size ginger
2 Tblsp coconut - fresh or frozen
1 cup fresh yogurt
1 Tsp cumin seeds
1 Tsp black pepper corns
3-5 fresh cilantro stalks
1 Tsp cooking oil
1 Tsp salt (adjust to taste)

For seasoning: 
1 Tsp ghee (clarified butter)
1 Tsp mustard seeds
1 Tsp cumin
How do you make ginger tambuli?
  • Wash, clean the ginger roots, peel them and chop them into small pieces.
  • Heat oil in a pan, add cumin and pepper corns, let them sizzle for a minute.
  • Add the chopped ginger pieces and stirring frequently, fry until ginger turns light pink and the raw smell disappears, takes about 8-10 minutes on medium heat.
  • Let it cool to room temperature. 
  • Bring the fried ingredients, coconut, cilantro and salt to your grinder/blender and blend it to a smooth paste using the yogurt. 
  • Adjust consistency to your taste by adding smoothly whisked yogurt.
  • Prepare seasoning - heat ghee on medium heat, add mustard and cumin seeds, let the seeds crackle. Pour the seasoning on top of the tambuli. 
  • Mix it in with rice or enjoy as a side dish/dip to your rotis.
Tips: 
  • Choose fresh and tender ginger roots for best taste, do not use old/mature ginger as it tends to be stringy. 
  • Cut ginger into thin pieces to help cook faster and evenly. 
  • Fry ginger on low-medium heat as it has to get cooked thoroughly.