Showing posts with label Mysore special. Show all posts

Friday, October 28, 2016

Saagu - home made version of vegetable medley from the heart of Mysore region

Anyone that likes Indian food is familiar with the deep fried pooris that are popular all over the sub continent, right? Growing up, I was completely unaware of the fact that the entire universe outside of my little world was making pooris from wheat flour. Because nammamma made them with rave/sooji/semolina always :-). She rolled them small and a little thick so they puffed up completely and were crispy, flaky and delicious when hot. But she always reserved a few to roll into very thin pooris and deep fry them at the end, these would be flat and kurkure like papads and anna loved to eat them dipped in warm milk & powdered sugar :-), yumm, this was a short cut to Karnataka's much loved delicacy called "chiroti"!!  North East India (especially West Bengal) makes pooris with maida or All purpose flour and they are called Luchis. I don't know how many of you have eaten rave poori or even know poori made with rave, but this is how nammamma made them.
It is a little bit more work to make the rave pooris compared to the ones from wheat flour as rave doesn't have the same gluten advantage as wheat flour. It needs a lot more kneading to get it to a smooth dough consistency. In the old world kitchens, one of the gadgets was a long wooden pole called 'Vanake/Onke' and we had one in Mysuru kitchen. This wooden pole is smooth and used to pound the dough for poori, obbattu, etc.. Nammamma would mix the semolina with a little water into a crumbly mixture that would not resemble a dough by any comparison, put it into the stone grinder dip and start to pound it with the vonake, sprinkling water as she went to make a smooth and tight dough.
Depending on the quantity, this would take anywhere between 30-45mins and done in batches. The dough needs to rest before making the pooris. I don't have the gadgets she used in my kitchen, though I could have used the mortar and pestle, I chose to use my upper arm power and knead it with all my might for about 8 mins. So if you want to taste these delicious rave pooris, start with the fine semolina (called chiroti rave) and add water slowly as you work the dough. Remember to give it a rest of atleast an hour before proceeding to roll and deep fry them in oil. These taste delicious and you should try it atleast once.
I don't remember nammamma making pooris frequently, it almost always remained a 'special' day dish meant to treat someone on their birthday or when folks were visiting. The infrequent appearances made it all the more appealing and we would wait eagerly for the 'poori day'. Paired with the vegetable saagu, it was always something we looked forward to and it would always be a lip-smacking foodie experience. My little family loves pooris, though I make them mostly with wheat flour just avoiding the extra work involved. I pair it with chole or potato saagu/palya to go with it sometimes, we all love this saagu combination the most.

But I digress, poori is not the focus of this blog post, it is actually what accompanies the poori aka the decadent, flavorful vegetable saagu. Saagu is served all over in restuarants and darshinis in Karnataka. Set dosa-saagu is a delicious combination though it can be eaten with any dose/dosa. It makes a perfect accompaniment with rotis, phulkas and ofcourse pooris.

But there is a marked difference between the hotel served saagu and this home made version. This is a more saatvik version, there is no onion/tomato sauteed in oil, infact there is no oil at all in this recipe. How cool is that? It might as well be because it is generally savored with the oil overloaded pooris :-). The hotel versions also add saunf (fennel seeds), a spice that nammamma hardly ever used. While I like a well made hotel saagu, I prefer this home made version better. The taste is different but delicious none the less.

Pooris are always made and served right out of the oil and they are relished hot and fresh. Pooris are quick to make especially if you have a person to roll them out and one incharge of the frying. Very soon fluffy, golden, puffed up beauties would be lifted off the hot oil and placed into a serving platter. On poori days, plates would be set and everyone would sit on the floor. Atleast one big platter full of pooris had to be ready so everyone got a couple of pooris in their plate to start off. But when the family is large and full of "poori hungry" people, a time would soon come when the rate of consumption far outbeat the rate of production :-) and that is when the saagu was a life saver. While we waited for the poori to drop into the plate, we would be eating saagu without wasting time and licking the plate (I know, absolutely no table manners!) clean so every time a new poori came to the plate, another serving of saagu had to be done as well :-)
The most common vegetables are green beans, carrots, peas, potato, cauliflower and chayote squash. The criteria is two fold - the vegetables should hold their shape on cooking and should not impart any unnecessary flavor/smells in the dish. That means, those smelly stinky radish, cabbage, kohlrabi are out as are the slimy okra and eggplants :-). The amount of veggies is a personal preference, while some like more veggies and just enough gravy to connect them all, some prefer a few veggies floating in the flavorsome gravy. I like a balance, with both gravy and the bites. Nammamma never added cauliflower because it was not a vegetable she preferred to use :-). I have grown to like it and my family loves all things cauliflower, it goes well with the rest of the vegetable choices in this saagu. It doesn't change the saagu in anyway, so feel free to skip it if you don't have it handy. I didn't have it when I made it this time.
This gravy does not have the usual herbs(curry leaves & cilantro) used in the south indian cooking and there is no seasoning/tadka either. The flavoring agents are cinnamon, cloves and poppy seeds. Go ahead and try this super flavorful, creamy saagu for you next poorisession.

What do you need to make saagu?
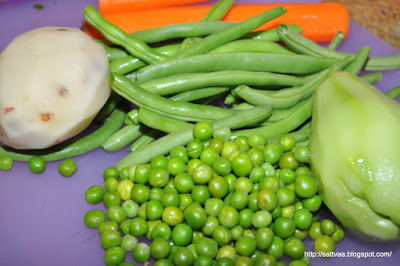
2 cups of mixed vegetables (green beans, carrots, chayote squash, potatoes, green peas) - I used about 1/2 cup of each
1 Tsp chopped cilantro (optional for garnish)
1 Tsp salt (adjust to taste)
pinch of turmeric (optional, just to bring a little hue to the gravy)
To grind: 
1/2 cup coconut
1 inch piece of ginger
2 -1inch piece of cinnamon
4 cloves
1 Tbsp chopped onion
1 Tbsp gasagase/poppy seeds
1 Tbsp roasted gram/kadle
6 almonds (soaked in hot water and de-skinned) - This is my addition
4-5 green chilies (adjust to taste)

How do you make saagu? 
  • Clean and chop vegetables keeping the size and shape similar on all of them. 
  • Cook the vegetables in 1.5 cups of water until they are about half done but still crunchy (about 6-8 mins on med heat). 
  • Grind all ingredients listed under to grind with 1/4 cup of water to a smooth paste. 
  • Add the ground paste to the cooked vegetables along with salt and cook for about 10mins on low heat until well blended and starts to boil. 
  • Switch off the stove and add cilantro on top. Cover and let it rest.
Notes: 
  • Common saagu problem & correction: A good saagu has a creamy consistency and homogeneous texture. If the water is separating from the vegetables when you boil, the amount of thickening agents(coconut, roasted gram or almonds) is to be adjusted. You can grind another Tsp of roasted gram with a spoon of water and add to the gravy to thicken it. 
  • Vegetables need to have an opportunity to boil in the ground masala paste, cook them only half done before adding the paste and then continue cooking on low heat. 
  • Almonds do impart a rich taste to saagu, however take care not to over do the nuts as it tends to make the gravy texture very different from the Mysore saagu. Stick to the quantities given above for 4 servings of delicious saagu. 
  • There is no seasoning in this dish and it tastes awesome without it. 

Thursday, October 27, 2016

Green beans (ಹುರಳೀಕಾಯಿ) palya - glorious in its simplicity, an all time favorite stir fry

Palya in Kannada is the name for a vegetable stir fry. There are no bells or whistles on this dish, it is a vegetable in its purest form, sauteed in a teeny bit of oil and seasoned with a minimal number of flavors, this recipe is a must on occasions both auspicious and otherwise. Festival menus are generally multi coursed meals with a defined structure. In Kannadiga festivals or weddings, the meal is served on a fresh banana leaf, and it begins with a sampling of all items as the first course. You get a spoonful of everything served on the leaf before the meal can officially begin and then there are well defined courses that follow one after the other each meant to carry you to a higher gastronomical ecstasy from the previous one (if such a thing is possible):-). These meals are well balanced with all the required nutrition as long as you are disciplined enough to stay in control.
What I appreciate most about the way food is served in Karnataka is that you get an idea of the dishes to come in the bird's eye view picture painted in the first course. The only ones you don't see at the beginning are the very special 'dessert of the day' and the 'always present and always last course' yogurt. This serving style lets you be the responsible citizen and decide what & how much of each item you want to eat during the meal :-). Good system, huh?
Even with all the special food on the banana leaf, my preference has always been on the fresh palya and kosambri(salad made with lentils and either cucumber or carrots) at the top half of the leaf. These two items somehow hold an irresistible allure for me. The first course or the sampling course would conclude when hot steaming rice is served in the center of the banana leaf with a spoon of tovve (gently seasoned lentil broth) and a dollop of ghee on top. While the elders were expected to wait until this stage was reached and the customary prayer was said, the little children are generally excused if they cannot extend their patience or hold out on being kids :-). When we were little kids, the palya and the kosambri would be gone within a minute of it being put there :-).
This palya is not only made on special occasions but is a very frequently spotted dish on every day meals as well. Called poriyal in other regions palya has the stamp of Mysuru cuisine. There are no spices (ground or whole) used in this recipe. Fresh green chilies and curry leaves impart the subtle flavors to the natural taste of the vegetable. The south Indian special asafoetida is the only bold flavor you will notice in this dish. Even in the absence of spices or complex tastes/flavors this stir fried vegetable manages to capture attention both on a wide spread festive platter or as part of a simple everyday meal. DD calls this palya version 1 since I make different variations with combinations of vegetables.
There isn't much interms of recipe here but it is something I relate directly with home meals. Almost everyone in the Mysuru region make this pretty much the same way, may be with minor alterations. Nammamma, true to her style of cooking added generous amounts of grated coconut, a small spoon of sugar which makes this palya unusually delicious. This unassuming, simple dish is a reminder of simpler, carefree days from childhood for me.
What do you need to make green beans palya?
1/2 Lb tender green beans
2 tbsp grated fresh coconut (if using frozen, make sure you bring thaw it)
2 green chilies
1/2 Tsp salt (adjust to taste)
1/2 Tsp sugar
1 Tsp lemon/lime juice
3-5 curry leaves
Seasoning:
1 Tbsp oil
1/2 Tsp mustard
1 Tsp urad dal
1 Tsp chana dal
1/8 Tsp asafoetida
How do you make green beans palya? 
  • Wash and pat dry the green beans, chop the two ends off and chop the beans into tiny bits (smaller the better :-))
  • Slit the chilies vertically and chop them fine.
  • In a big kadai, heat 1 Tbsp oil and add the seasoning ingredients and roast them on low heat. 
  • Once the dals are golden brown, add the finely chopped green beans, chopped chilies, chopped curry leaves, sugar, salt and mix well with the seasoning so the oil coats the vegetable. 
  • Cover and cook on low heat for 8-10 mins until the beans are tender but retain a slight bite. 
  • Add grated coconut and lemon/lime juice, mix well and switch off. 
  • Makes a great side dish for chapatis or rotis as well. 
Notes: 
  • You can slit the green beans vertically and chop them into bits to get smaller pieces.
  • Roasting the seasoning ingredients on a low heat ensures that they hold on to their crunchiness for longer. 
  • If you are feeding little kids or people with low tolerance for the heat from the chilies, you can make a coarse paste (without any water) in a mortar and pestle instead of chopping which gets in the bites. Adjust the amount of chilies to suit your taste. 
  • The quantity I have here is small and does not need any water to cook as long as you keep the heat on low and cover and let it cook in its moisture. 

Sunday, September 13, 2015

Kodubale - gluten free snack from nammamma's kitchen

It has already been 2 weeks since we came back and DD is well into her classes and getting busier by the day. Thanks to all of you who wrote back just to cheer me up last week from my 'missing DD' mood, it means a lot. We have kept ourselves busy and Flora has helped quite a bit with her antics too. On one of her early morning outing last week, she got bitten by something (we still do not know if it was a raccoon she fought or just an anthill she inadvertently put her face in). We have searched high & low in the backyard and there are no traces to confirm our theories either way. She came inside with a bloody lip, teary eyes, swollen and a very sad face. That being a Saturday morning, she kept sticking to one of us for 2 hours before we took her to the vet. After a couple of shots to kill infections and bring inflammation down and loads of TLC, she is now back to normal - being her stupid and lovable self. It was a distraction for both of us as we got busy looking after Flora and reporting her recovery to the little girl :-)
BH & I recently went to a small town in the deep South as we were looking for things to do while DD was getting settled in her college. It was a historical tour of the town which considers itself to be the home of the forever classic 'Gone With The Wind' :-). If you like a well written fiction based on real events and have not read this, please, please read it, I am sure you will enjoy it. Based in the civil war era and American reconstruction, this epic sage of love, loss and war has been one of my all time favorite novels. I devoured this book first time when I was in elementary/high school and have gone back to read it multiple times since then, and I am a fan of the irresistible Scarlett O'Hara as much as I love the cocky Rhett Butler. It was a dream come true to ride through the town where houses and estates from the time stand proud having been restored. Simply put, a classic novel that continues to outlive the time it was created in.
House by the railway tracks that served as the confederate hospital
Though BH has no such affiliation to the book or the equally well made movie that followed it, he was a great sport and patiently waited as I savored my moments in that town and helped me make memories:-). I picked up a couple of keepsakes (thus sealing the fact that I was a tourist :-)), thought the spoons looked cute with their Rhett Butler and Scarlett faces :-). Something cool for the photo props - ultimately it is all about the food blog!!
When I think about food from childhood, it almost seems like a different era. Nammamma is not able to cook anymore, the memories are all there, very fresh, every movement associated with the recipe is etched in the brain but it feels like it is never going be the same again. As I grow older, I realize that some things have changed forever. Probably that was why the recent brush with 'Gone with the wind experience' was more real than fictional in nature :-(
On to food matters now - As little Krishna's birthday followed immediately after my celebration of Varamahalakshmi last week, I made some of the standard items for little Krishna and we sent our first package off to DD after the pooje. These kodubales were on the menu as DD loves them.

Given my (and my family's) love for this dish, it probably should have been on the blog long before now. But somehow I kept hesitating as it never seemed to be the same as my benchmark though everyone who ate it said it was one of the best kodubale they had eaten. Beating or matching nammamma at her signature dish is a tall order. A few months back when I made this, big brother took a bite and just kept eating. The look on his face somehow made me feel very good about those kodubales. And finally satiated, he said, "they taste almost like amma's" :-) and that was all the certificate I was waiting for.

First of all, let me introduce this strangely named snack to you if you aren't familiar with it. 'Bale' in Kannada is bangle/bracelet and refers to the round shape of the snack that you can slide down your wrist  just like a bracelet. 'Kodu' is the horns of animals such as cows or buffaloes :-) and it just refers to how they are shaped. Some people pull the end long enough over the first circle to make it look almost as if it was double layered (reminds me of the spring bangles we wore as kids :-)). The size and shape is purely personal preference.
Although nammamma made these kodubale for a long time and we had all taken it for granted, the first time I realized their importance and greatness was when my uncle (amma's older brother) and family moved to Mysore after a long tenure at the country's capital. Uncle & aunty were coming back to live their retired life after many years of having stayed in the north and nammamma was very excited to have her brother and sis-in-law stay in the same city. My cousins, all of them grown up came to settle the parents down and we went to visit them with a basket of kobbari mithai and kodubale - two of amma's signature dishes. The warmth of the reunion was almost over shadowed by the joy of eating those delicious kodubales for my cousins as they went all ga-ga over those home made beauties :-). From then on nammamma made kodubales for them every occasion one of more of them came visiting. Looking at their excitement made me realize how lucky I was to have them at home all the time :-)

When we made these in Mysore, it was always in multiples of 4 cups (4cups is a standard measure called 'SEru' in Kannada) and more than one coconut was broken and grated. The gas stove obviously was moved down to the floor from its usual spot on the kitchen counter to enable nammamma to sit down comfortably and we kids volunteered to help her with the process. There was akka who always rolled kodubale in uniform size and shape and stacked them in dainty little stacks, little brother who was the muscle man and would mostly knead the dough to perfection as amma instructed and I would do my bit of service by making some kodubale ready. But me & little brother were mostly there to eat everything we could sneak from the raw dough (it is delicious!) to the cooked kodubale unless it was being made for a festival offering in which case eating was totally banned :-(.
There are many versions of kodubale that I have come across - I have a Telugu equivalent called Chegodilu of it already on the blog. I have eaten the small, cute looking kodubale in bakeries in India made mostly from maida (all purpose flour) and dalda (a preferred substitute for butter by the store owners) that have a flaky texture and then there are many version of kodubale made with a mixture of rice, wheat flours (roasted/unroasted) etc. For me personally, nothing, ever can replace the kodubale nammamma makes. And in the days when she made these in bulk, they were the most sought after snacks among the family and friends. These are rich in taste, perfect in texture and crispiness. Here is the kodubale recipe from nammamma's kitchen, make it, enjoy it and treat the recipe with love!

I probably made about 1/4 of the quantity nammamma would make on regular basis. It still took me a couple of hours to get them all done. I have a packet of dry red chilies that are extremely spicy and I am using them in limited quantities. You can use red chili powder instead of the whole red chilies if you prefer. My kodubales are a little lighter in color due to the fact that my chilies while hot are not very colorful.
What do you need to make Kodubale? 
2 cups rice flour
1/2 cup kadle/fried gram/chutney dal
3/4 cup grated coconut
6-8 dry red chilies
1/4 Tsp asafoetida
1 Tsp sesame seeds
2 Tbsp hot oil
Oil to deep fry
curry leaves
1 Tsp salt (adjust to taste)

How do you make Kodubale? 
  • Powder fried gram, red chilies, asafoetida and salt in a blender until fine. 
  • Add coconut to this mixture along with 1/2 cup water and blend to a smooth paste. 
  • Take rice flour in a wide bowl. 
  • Add sesame seeds, finely chopped curry leaves and pour in the ground mixture.
  • Mix lightly with fingers until all ingredients come together, Note: they will still be wet and crumbly at this stage.
  • Heat 2 Tbsp oil in a small pan and pour it over the rice flour mixture (the oil should be hot enough to sizzle when it comes in contact with the flour).
  • Let it stand for 2 minutes and then mix everything together. 
  • Heat  oil for deep frying in a wide & deep kadai/pan. 
  • Taste check the crumbly mixture, adjust salt, chili powder to taste. Remember the spicyness mellows down once you deep fry them. 
  • Take a couple of handfuls of the crumbly mixture onto a flat surface or countertop and start adding water little by little. 
  • Cover and keep the remaining flour mixture. 
  • Form a dough by mixing just enough water to get a consistency of that of soft chapati dough. 
  • Knead this dough - here is how you do it, use a light pressure with your top of the palm and fingers and keep rotating the ball of the dough for 3-4 minutes until it feels supple and soft to touch. DO NOT USE THE SQUEEZE-ROLL MOVEMENT YOU DO FOR ROTIS OR BREAD. This requires a much gently touch. 
  • Pinch off a key lime size of the dough, roll it gently into a long pencil, turn the end to meet together, press them together and make a bangle. 
  • Make 5-8 (or as many as your oil pan can hold at a time) kodubales ready in the same manner.
  • Once the oil is hot, reduce the heat to medium and slide the kodubales ones by one into the oil.
  • Curb the urge to flip them over immediately, let them come to the surface on their own (20-25secs) and let them cook for atleast a minute before gently flipping them over. 
  • Let both sides cook well to get a golden brown color before taking the kodubales out onto a tissue lined plate. 
Notes: 
  • Never fry kodubale in a hurry, have patience and the temperature of the oil is key to good kodubale. The oil should immediately form small bubbles around the kodubale when you drop them in but the kodubale takes a few seconds to come to the surface. 
  • If the oil is too hot, the kodubale turns brown quick but will become soggy & soft once it cools down. 
  • If the oil is not hot enough, the kodubale takes longer to cook, develop bubbles on the surface, absorb oil and turn heavy. 
  • Kneading is important to get a smooth dough that doesn't break as you roll and bend them. 
  • The thickness of the pencil and the size of the bangle is a personal preference. The thicker they are, the kodubales take longer to cook and may turn soft if under cooked. If they are too thin, they tend to burn faster or become too crispy. 
  • Coconut is what gives that brilliant taste to this version of kodubale :-), do not skimp on it. 
  • I use saffola or peanut oil for deep frying both of which can withstand high temperatures without going rancid. 
Railway tracks - one of the prime focal points of the battle

Sunday, February 22, 2015

Masala Puri - a chat you can never have enough of..

The Groundhog peeped out a couple of weeks back, I didn't get a chance to chat with it and ask its opinion about an early spring but I am pretty sure the weather is warming up. I notice warm sun in late mornings & afternoons, glorious Daffodils lighting up the pathway with their bright yellow colors and fragrant Magnolias are showing up their pretty pinks or lovely whites. We moved our hibiscus plants outdoors last week, still holding on to the remaining pots with sensitive plants inside. Time to put the heavy jackets inside and walk up exposed to some direct wind and sun :-)
With inlaws rested a bit, we drove up the mountains yesterday, a little chilly for them still but totally enjoyed the views and the accumulated snow. As always, had packed food for lunch from home, stopped and took pictures everywhere as is the habit and reached back home in the evening. DD is getting ready for school start tomorrow after a week of mid winter break. Didn't seem like she had a lot of time to lazy around as she has been working on one or the other project but she looks much more relaxed than what she did a couple of weeks back.

To celebrate the holiday week, I made masala puri yet again today. If I had posted recipes in the order of my love for them, this would have been at the top of the list but then I don't do that, do I? Infact, some of my favoritest recipes are yet to come just because I always feel that I don't do justice to them either with the pics or with words when I post them :-). This one has reached many palates, tried times over, gathered compliments from all around and when friends have asked for the recipe, I have just shared it offline to their incredulous, "You mean, you don't have it on the blog yet?", I know, it is strange but finally here it is, a much loved dinner menu at home - masala puri from the South of India. First of all this is not poori - the deep fried, leavened bread Indian cuisine has made famous world over. This does have pooris (though much smaller, flatter, crisper and crunchier) but has a lot more on top of the pooris (or papdis as they are referred to).

Yes, we eat this as dinner and don't make anything else when I make this for a weekend dinner, usually Sunday nights. And yes, yes, this is from the South of India. Though, Mumbai & Kolkata are touted as the chat centers of India with their innumerable versions of chats (quick, spicy eats), I haven't seen this version of chat outside of Mysore & Bengaluru regions. The ultra common sev puri, dahi puri etc do not stand a chance next to this masala puri (that is my opinion and I think it is totally justified :-)). If you are stopping to have a chat anywhere in Mysore or Bengaluru in the evenings, give this a try. I promise you it will be totally worth it and a great change from the usual favorites.
When chats had still not come of age in our little, quaint Mysore, there were not so many outlets to enjoy them. With health conscious parents at home, we never had outside food on a regular basis either. There was a Maharaja (yep, most things in Mysore are royalty atleast by name :-)) hotel which had a chat center for public. That is where I first had my masala puri and fell in love with it. I don't ever look around for anything if the guy (or girl) is making masala puri as I enjoy it more than all other possible combinations.

Yep, chats are basically combinations of certain basic ingredients. You will find things like chopped onion, tomatoes, cilantro, boiled, mashed potatoes in almost every chat in addition to the chat chutneys. Then there is something crunchy (like pooris or puffed rice), spicy (like sev). Mix & match them the way it pleases you personally. So, why is the masala puri special? Because, the masala (spicy gravy or ragda) is a perfect blend of tastes and when mixed with other chat essentials and served piping hot is nothing but a purely magical experience.
This recipe needs some planning and has prep work to bring everything together. I have tried to deconstruct the process to make it easier for anyone preparing it for the first time. Read the recipe completely once before you embark on the journey, make sure you have the ingredients.

What do you need to make Masala puri? 
25-30 small chat puris (make at home or buy from the store)
1.5 cups dried green peas
For the masala/spicy gravy: 
1 cup onion roughly chopped
1 cup tomato roughly chopped
2 cloves garlic
1 big bay leaf
1 inch piece ginger - peeled
2-3 green chilies (adjust to taste)
1.5 inch piece of cinnamon
3-4 cloves
5-7 black pepper corns
1.5 Tsp salt (adjust to taste)
1 Tsp garam masala powder
1/2 Tsp amchoor (dry mango powder)
1/2 Tsp red chili powder
1 Tbsp oil
For serving masala puri: 
puris as needed
finely chopped onion
finely chopped tomatoes
1 potato - boiled, peeled and mashed into small chunks
finely chopped cilantro
tamarind-date chutney
Thin sev(fried gram flour noodles) - for garnish, you get this in Indian grocery stores
red chili powder
roasted cumin powder

How do you make Masala puri? 
Making of masala/spicy gravy
  • Soak dried green peas in hot water for about 3 hours or in cold water over night. 
  • Rinse and wash the soaked peas, and put them in a pressure cooker along with the bay leaf, 3 cups water and 1/2 Tsp salt
  • Cook (with weight on) for 1 or 2 whistles (peas should be cooked soft but hold their shape firmly)
  • Let the cooker cool down completely. 
  • Meanwhile, heat the oil in a pan, add cinnamon, cloves, clack pepper and saute for a minute until you get the cinnamon smell. 
  • Add crushed garlic cloves, slit green chilies and ginger and saute for 30 seconds. 
  • Add onions and continue to fry until onions turn translucent. 
  • Add tomato chunks and let them all cook for 3-4 minutes until slightly mushy. 
  • Switch off and let cool. 
  • Open the pressure cooker, with a slotted spoon, take out about a cup of cooked peas and keep aside. 
  • Take the cooked onion mixture and the rest of the cooked peas and grind them to a smooth paste in a blender. (Make sure everything is cool before grinding)
  • Heat a big pan or use the pressure cooker like I do, pour the ground paste, add 2 cups of water and salt. Let it come to a good rolling boil on medium heat so the onion & tomato smell disappears. 
  • Add the dry powders (red chili, garam masala & amchoor), taste and adjust spices as needed. 
  • Remember the gravy thickens as it cools down. If you are not using it immediately, make the consistency watery. 
  • When you serve masala puri, the gravy has to be piping hot. 
Assembling masala puri (this is a totally personalized way of assembly, adjust any of the ingredients to suit your taste)
  • Take a wide plate, crush 5-6 puris so they become bite sized pieces, spread them to make a bed of puris.
  • Add a spoonful of cooked peas you reserved earlier. 
  • Add chopped onions 
  • Add chopped tomatoes
  • Add potatoes
  • Sprinkle red chili powder
  • Sprinkle roasted cumin powder
  • Pour a couple of ladles of the hot gravy on top
  • Add spoonful of tamarind-date chutney
  • Top it with thin sev and chopped cilantro and extra onions if you like
  • Take a spoon, start from the side of the plate and dig in :-)
Notes: 
  • Never use frozen peas in this recipe
  • Dried yellow peas can be an alternative to green peas but I prefer the green ones for their taste. 
  • The gravy needs to be hot (both temperature and spice level) for this dish. When you eat this on the streets, you typically cry (with joy and happiness) :-)
  • If you forgot to soak the peas overnight, you can use the short cut and soak them for a couple of hours in hot water. 
  • Do not overcook peas else they become completely mushy. 
  • Play around with the gravy - I experiment with green chilies, black peppers, cinnamon and cloves depending on the mood of the day. 
  • Skip garlic if you don't like it, I started using it recently since both DD & BH love the flavor. The advantage with this recipe is that not a single flavor stands out, they all mix in the melting pot of the gravy and lose their individuality to create a wonderful mixture.