Showing posts with label cooking with greens. Show all posts

Sunday, March 29, 2015

Avarekalu-Menthya soppina bhaath - a single pot rice dish needing no pre-made powders

Before I forget to wish you all, Happy Sri Rama Navami to all my readers celebrating the birth of Lord Rama. By the time I got to writing this post, Ramanavami for 2015 had already slid into the past making me late again with my wishes. But as I always say, "better late than never". Hope you all had a good celebration, ours was simple with kosambari, panaka & hesaru bele payasa. Filling, very satisfying and saatvik :-).

On my not posting regularly, I won't even go there :-(.  I was thinking yesterday of making a really catchy poster to adorn my home page and say something to the effect of, "Gone missing, will be back as soon as life slows down a teeny bit" but then I thought if I have the time to think up and make up fancy posters, I might as well sit myself down and write the posts for some of the recipes that have been languishing in the draft folder for a while now. Ironically enough, I was attending a 3 day talk last weekend about life management and managing time was the topic of day-1 :-).

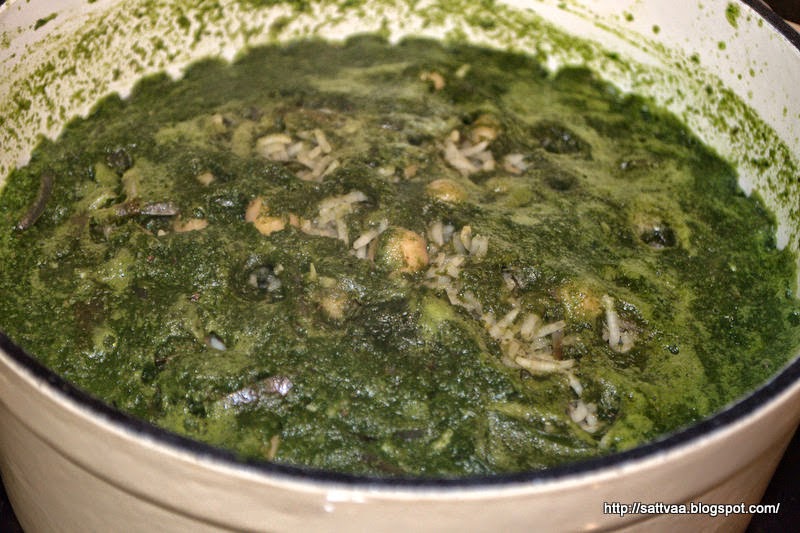
Here I am with a family favorite and extremely easy to cook up, one pot rice dish that brings together 2 of my favorite ingredients - fresh fenugreek leaves for its characteristic fragrance & taste and avarekalu (papdi lilva) for the love of beans :-). I have another delicious version of rice made with fenugreek leaves that uses Vangibhaath powder, check it out here if interested.
I believe I have already professed my love for avarekalu and written my ode to this humble beans many times over on the blog, here, here and here. Recently a reader from Michigan reached out to ask some questions about averekalu and I felt as glad as he did when he wrote back a week or so later to say he did find them in his local grocery store and made yummy dishes with it. It feels good to come across folks with similar tastes and I am glad my little posts spread some (avarekalu) love to others living away from home.

Nammamma made this version of the bhaath towards the end of avarekalu season when the beans would be mature and plump but not very juicy or fragrant. Back home in Mysore, the beans would first announce their arrive with that very distinct fragrance and as soon you picked them, your hands would undoubtedly be coated with a thin layer of sticky substance (we called it 'sone' in kannada, not sure if it has a name in other languages) which was all part of the avarekalu experience. Adding methi or fenugreek leaves perfectly complements the flavor in this rice. I made this rice recently knowing fully well that my few weeks of avarekalu enjoyment was coming to an end here.

This dish does not need any pre-made spice powders and is very easy to prepare. It has carbs(rice), protiens (beans), nutrients & flavor (fenugreek leaves) and hence makes a perfectly wholesome meal. This can be done in a single vessel from start to end - less cleaning, less wastage and environment friendly :-)
What do you need to make averekalu-menthya bhaath? 
2 packed cups of fresh fenugreen leaves
1-1.5 cups avarekalu (Papdi lilva)
2 cups rice (use sona masoori preferably)
1/2 cup chopped onion
1/2 Tsp cumin
1 inch piece of ginger
1 inch piece of cinnamon
2 cloves
4-6 black pepper corns
3-4 green chilies (adjust to taste)
1/2 cup coconut (fresh or frozen)
1 Tsp salt (Adjust to taste)
2 Tbsp oil
How do you make averekalu-menthya soppina bhaath?
  • Chop washed fenugreek leaves. 
  • Wash and soak rice for about 20 minutes (this speeds up the cooking process)
  • Take a heavy bottom pan (or pressure cooker) and heat it on medium heat. 
  • Add cinnamon, black pepper & cloves and roast for about a minute until they warm up and become fragrant. Take them aside and let cool. 
  • Make a rough powder of the spices when cool, add ginger, green chilies and coconut to the blender jar, use 1/4 cup water and grind into a fine mixture. 
  • Add 1 tbsp oil into the pan (or cooker) and let it heat up. 
  • Add cumin and when it sizzles, add chopped onion and let it sweat lightly.
  • Add chopped fenugreek leaves and fry until they wilt, 2-3 minutes. 
  • Add the averekalu (or other beans you choose) to the pan and mix it with the fenugreek leaves. 
  • Add salt and mix them together. 
  • Add the ground masala mixture and let it cook for just a minute. 
  • Taste and adjust salt if needed. 
  • Drain all the water from the soaked rice and add it to the pan. 
  • I use 1:2 (rice:water) ratio for making these rice preparations, and add 3 & 3/4 cup (discount 1/4 cup used for grinding) water into the pan. 
  • Let it come to a boil. 
  • Close the pressure pan with the weight and cook it for 3 whistles. 
  • If you like to open cook, reduce heat to low, cover the pan and cook until rice is soft. 
  • Let it stand until it is warm. 
  • Fluff it gently with a spoon, and serve it warm with any kind chips, fryums or yogurt based raita. 
Notes: 
  • You can precook rice (make sure you use the right amount of water to get fluffy rice) and mix the rest of the ingredients, I think the flavor is more enhanced when you cook them all together. 
  • If you don't get avarekalu, replace it with mutter or green peas, frozen lima beans or other beans you prefer. 
  • The spice comes from the black pepper, ginger & green chilies - adjust them to your liking. 

Monday, September 8, 2014

Palak paneer - ever green choice in Indian restuarants

A big apology for being MIA (missing in action) for the past 2 weeks. Totally unplanned and the longest I have stayed away from the blog without a valid excuse (such as travel, sickness etc). So what is my invalid excuse this time? Been busy :-), yep truly busy but more than that I find that my brain is scattered all over the place not letting me sit and focus on the blog. I keep adding drafts and pictures to my folders but when I am done with work and cooking in the evening, I am just exhausted to create something fresh :-(. The first week went by ok since I have been doing a weekly post anyway, but the second week was a guilt trip and every day I would tell myself that I would sit down and nurture my blog baby but when I did sit down, I would be looking into an empty brain too tired to generate any thoughts. I would glare at the pictures, write a title and then feel sorry for myself and shut the laptop down :-). Since it wasn't healthy for me, I finally told myself not to worry but enjoy the break period. It wasn't like I lost interest in cooking but it was just finding the energy to blog about it. Now after 2 weeks, I am back again (with no promises to do this daily or multiple times a week, but as frequently as I am able to write). And I do miss visiting my favorite blogs, I will be there soon.
So all this MIA act of mine needs a really inviting dish as a come back vehicle, don't you think so? What I have today is an extremely popular side dish in Indian restaurants. And there are umpteen number of variations and family recipes out there, so why am I (a very South Indian from the south of India) blogging about this very common North Indian subzi? I think I have some pearls of wisdom, having (forced to) eaten it every time from rustic, road side dhabas to fancy restaurants with DD since she LOVES it :-). I have enjoyed some versions, hated some, been indifferent to some others. What makes this simple dish a winner? Just a few things to keep in mind as you make it and I will share all I know here. Food is as good as it looks, right? Retain and lock in that naturally vibrant green color for an appetizing subzi (curry) and keep the spices to a minimum to enjoy the inherent taste of the greens.  Freshness of paneer matters a lot, so get good quality paneer from the store or make some at home and here is how.
I made a lot of paneer at home yesterday. BH has a small coffee grinder and powders the seeds every morning and puts it in to the filter for his morning cuppa. He drank his coffee this way for years since we came here and he claimed it was the best coffee. Since we came back from India last month, he started complaining that it didn't taste as good or anything close to his mom's filter kaapi (Indian coffee). Initially I dismissed it as homesickness and then said his taste buds had taken a flight given all the fever and throat infections we fought for a couple of weeks but things didn't improve. And all of sudden a week back, he declared that he was going to stop drinking coffee (!), while he is not an addict, he definitely enjoyed the brown potion a couple of times if he was home or atleast the mandatory first drink in the morning. He has taken to sipping a cup of hot water now. Strange are the ways of the world :-)
A non coffee drinker myself, I am neutral to his coffee habits but we had a whole gallon of fat free milk that he used in the coffee which threatened to go down the sink if I didn't use it before it got outdated. Now, I didn't want to make fat free yogurt with a gallon of milk (I am sure, it would never have been consumed), so I went ahead and made paneer with it. Healthy bhi and tasty bhi. DD says paneer tastes yummy. I am so proud of myself for not wasting that milk. There is about a pound of good quality roasted coffee seeds in the refrigerator and I have no clue what to do with it. I think I will organize a 'coffee over' day in my neighborhood. I will make some nice snacks to go with it, let me know if you are interested :-)

Given DD's affinity to palak paneer, it was a natural choice for me to make the dish today. The curry and the chapatis were done and ready on the table within 45 minutes of me reaching home from work. As the kitchen was engulfed in the flavor of the curry, BH volunteered to help me with pictures('carrots on a stick' is not at all over rated :-)). All in all, family with happy tummies is a good beginning to the work week. So, here is my palak paneer (cottage cheese in spinach gravy) version - curry made in a hurry.
What do you need to make Palak paneer? 
4 cups tightly packed palak or spinach leaves (I used baby spinach)
2 green chilies chopped fine
1 inch piece ginger
1/2 cup yogurt whisked
1/2 cup onion minced or very thinly sliced
2-3 cloves garlic minced
2 Tbsp cilantro
1 Tsp salt (adjust to taste)
1 Tbsp coriander powder
1 Tsp cumin seeds
1 cup paneer cubes
1 Tsp fresh lemon juice
How do you make Palak Paneer? 
  • Bring water to bubbling stage in a sauce pan. 
  • Add the cleaned palak leaves and push them with a spoon to submerge in water. 
  • Boil for 2-3 minutes and as soon the leaves wilt, take it off the heat. 
  • Drain the water out and immediately run cold water on the leaves. 
  • Let them sit for a couple of minutes and puree in the blender along with chopped cilantro. 
  • Heat oil, sizzle cumin.
  • Add crushed garlic and ginger and fry for a minute.
  • Add minced onion and fry for 3-4 minutes until onion sweats and turns limp
  • Add whisked yogurt, coriander powder and salt.
  • Let it come to a boil (2-3 minutes)
  • Add the pureed mixture and stir it in. 
  • Adjust consistency with water and test for salt. 
  • Once bubbles start appearing, add the cubed paneer, give a gentle mix and switch off. 
  • Add lemon juice before serving.  
Notes: 
  • I used fresh, home made paneer and didn't saute them in oil. If you use frozen paneer, saute them in a Tbsp oil until they turn very light brown on both sides, put them in cold water until ready to use. This retains the softness of the paneer. 
  • I do not add garam masala or tomato as I feel it spoils the color :-). If you like, you can puree a tomato and add it (reduce yogurt in this case and skip lemon juice to balance the tangyness).
  • Use butter instead of oil for a richer taste. Add a Tbsp of cream once you switch off and let it stand for 10 minutes before serving to make it richer. 
  • If you love the bright green color of the curry, it is important to follow these steps: 
    • Do not cover and cook while boiling spinach. 
    • Do not cook for more than 3-4 minutes (you should switch off the stove as soon as the leaves wilt)
    • Drain the hot water and run cold water immediately after taking out of stove.
    • Plan the pureeing so that it doesn't sit out for long before getting added to the curry. 

Tuesday, December 3, 2013

Palak Rice - a post Holiday quick eat

Hey everyone, hope you all had a good Thanksgiving break if you reside in the US or a great weekend otherwise. We had a wonderful time, enjoyed our vacation and came back yesterday early morning. Everything about the tropical heaven from swaying coconut trees to the fragrant jasmines reminded me of home the entire time. We did some hitherto not done activities as a family and liked it very much. Have loads of pictures to sort through, I will post some on the blog or on the Facebook page, look for them in the coming weeks. Until then, here is a quick preview of some of the tropical beauty.
Before we left for vacation last week, I made sure I had emptied the refrigerator except for a few things that either was not going to go bad or I couldn't get to despite my best intentions. While it felt great to not waste any produce, it also meant I had to go shopping as soon as I came back. So when our travel got a little sticky and we ended up reaching home the next morning instead of the prvious late night, I just couldn't get to the stores and had to make do with whatever I got from scraping the bottom of my refrigerator tubs. All I had left was about a quarter bag of spinach, some green chilies, cilantro and ginger. As there was much to catch up on the work front, I made a quick palak rice that fits snugly with a lunch box menu or a hot plate serving.
We love our greens especially Spinach. There used to be a time when I didn't accept a non sticky spinach when I initially came here. Spinach symbolized a slightly okra-like sliminess in India and also the bunches we got home from the greens patch next door always had loads of soil sticking to it :-). Nammamma kept them in a bucket of cold water the previous evening to wash away the dirt before she picked the leaves and separated the stems for cooking. When I got the first bag of baby spinach here which also had a label  'triple washed, ready to use', I was one of the doubters. It took a while to get adjusted to the new Spinach but I have grown to love them over the years especially the reduced part of cleaning and chopping (if you are one of those super pressed for time, go ahead and get the chopped frozen ones to make life easier :-)). For me convenience plays a big role but as long as there is no compromise on the taste or nutrition.

Back to the Palak rice, this is a very flavorful rice, perfect for when you have little time and still craving for home cooked deliciousness. It is a one pot meal with minimal frills attached to the cooking, while the really basic version (like I have below) is perfectly suited for a thread bare refrigerator supplies, you can definitely jazz up this rice with additional veggies or spices if you are so inclined. I have some variations in the last section if you are interested. Try this and let me know how you liked it.
What do you need to make Palak rice?
2 cups rice (basmati or other long grained rice soaked in water for 30 mins)
4 packed cups of cleaned palak/spinach
2 Tblsp oil
1 cup thinly sliced onion
1 Tblsp salt (adjust to taste)
handful of cooked chickpeas/garbanzo beans
Whole spices:
2 pieces of 1 inch long cinnamon
1 green cardamom
4 black peppers
3 cloves
To grind:
1/4 cup cilantro
4 green chilies
piece of ginger
1 Tblsp grated coconut
How do you make Palak rice?
  • Blanch palak for 2 minutes in boiling water, strain the water and reserve it.
  • Puree the palak once it cools down.
  • Dry roast the spices for a minute until they are warm, take it aside into a blender jar.
  • Add green chilies, ginger, coconut and cilantro to the blender and make a coarse paste. Use a couple of table spoons of water you have reserved.
  • Heat oil in a heavy bottom pan or pressure cooker, add sliced onions and salt and cook on medium heat until onions first turn limp and then start to brown up.
  • Add the blended mixture of spices, pureed palak and mix well. Taste and adjust salt or spices to your liking.
  • Wash the soaked rice and drain it. Add the rice to the pan, measure 3.5 cups of reserved water and add it. Add the chickpeas if using.
  • At this stage you can transfer all the contents to a pressure cooker or rice cooker or continue to cook in the same vessel with a tight fitting lid. Cook until rice is done and fluffy.
Notes:
  • You can add a handful of mint while making the paste but I prefer the mild taste of palak in this rice and not necessarily turn it into a pulav. Choice is yours.
  • If you have a ripe tomato on hand, either slice and sauté them with onions or grind them with the masala. This adds a little tartness to the rice and enhances the taste.
  • Skip the chickpeas if you don't have them (I usually keep some boiled beans in the refrigerator or a ready to use can in the pantry), instead you can garnish this rice once done with ghee roasted cashews or paneer/tofu cubes - yummmm. Or add a handful of green peas or other beans of choice.
  • Do not throw away the palak blanched water, use it wherever you need liquid/stock as it is full of nutrients.
  • If you are using the open vessel method, bring the heat down to low and also ensure the bottom of your vessel is heavy and thick.
  • Soaking rice for 30 minutes helps reduce the cook time, this can be done while you are prepping the rest of the things.
  • Blanching palak removes the raw smell of the leaves. As soon as you switch off the stove after boiling the leaves, take them out of the water and run cold water on them to retain the rich green color of the leaves.