Showing posts with label Breakfast ideas. Show all posts

Sunday, January 28, 2018

Cucumber idli - a no soak, grind or ferment sort of idli

We are almost done with a whole entire month of the new year :-). India celebrated 69th Republic day recently and we are ready to move into month 2 of the year. Where does time go??? BTW, how is everyone's resolutions going? I wish you all the strength to stay on top of your list. I didn't have any to start with, made some in the last 28 days and have already broken many of them :-). I totally suck at this resolution thing!!

Let us jump right into food today, shall we? I grew up on mosaranna (yogurt rice with left over rice from the night before) early in the morning to be followed by a hot breakfast later in the morning :-). Now that I have to make it all myself, and also because BH & I like oats, it is pretty much oats cooked the previous evening for the two of us. I do make variations with the base oats just for variety. Our proper breakfasts are reserved for weekends or holidays at home.

If you ask any true blue South Indian to list 5 of their top breakfast choices, idli (these are the light, fluffy, pearly white steamed savory cakes made with rice and lentils) would most definitely make the list atleast 99 times out of a 100 people surveyed, do you agree? This humble breakfast is popular as it is wholesome, has the right mix of carbs and proteins and is oil free to start your day on a perfect note. Though idlis are by themselves pretty close to tasteless, there is a universe of difference between a good idli and a bad one and they can go bad for any number of silly reasons - your grinding of the batter was not correct, temperature was not right for the fermentation, you didn't mix it well, proportion of urad dal and rice was not right, and so on. On the bright side, if you got the batter right and made some fluffy idlis you can serve them with a range of side dishes and take the idli from a simple homely breakfast to something worthy of a spot on a royal buffet. There is so much creative freedom the Idlis provide to mix and match the side dishes ranging from a piping hot sambar to chutneys to pudis to exotic dishes like kadappa or vada curry.
Why this passionate rant about idlis today, you ask? Because I have a recipe for a different kind of idli for you so you can give a break to the normal idli and still appease those die hard 'only idli for breakfast' fans at home :-). Long before MTR and Maiyas made Rave idli (semolina idli) as the no soak, no grind, no ferment alternative to the staple South Indian urad dal idlis, there was a well kept secret in the cozy malnad and coastal Karnataka homes. An idli so soft and delicious, that was a deviation from the regular (and almost boring due to the frequent appearance) urad dal idli, one that was much lighter compared to the traditional fermented idli and one that used up a commonly found vegetable from the backyard. This secret recipe was for the quick akki tari (or broken rice/rice rave) idli, flavored with either the mild and innocuous cucumber or the slightly sweetish pumpkin depending on the season.

The cucumber idli or sautekayi kadubu as it was known in local languages had the dual distinction of being either a savory or a sweet version depending on the eaters' choice. If the household had a sweet tooth or was made of younger kids, the sweet version with a generous amount of jaggery (bella or brown sugar) made its hot appearance for the chilly morning breakfast and if the folks at home preferred a mildly savory/salty version, it was spiced with a few green chilies and cumin. Sometimes I add a small carrot to mix up the colors a little bit.

I am told that cucumber idli is an acquired taste and you should first like cucumber to like this idli. I love cucumbers and so does the family. We like to mostly eat it raw in kosambri or raita but also cook it as part of a majjige huli or regular huli/sambar. So, if you belong in the category of people that turn their nose up at cucumber, this may not be for you. However if you are like me and like the subtle taste of cucumbers, this is a recipe you don't want to miss.
I made this recently for the new year day as we were home and wanted to start the new year off with a healthy start. We usually like to eat it with a side of some spicy chutney like the cilantro+coconut or red chili+coconut or a tangy mint chutney. You can eat it with a good chutney pudi and some home made yogurt too.

So, here is one of those old world recipes that you won't find on any restaurant menu. I like this better than the rave idli because there is no frying, you don't have to add any baking soda or eno to fluff this idli up. And it is obviously a gluten free, vegan recipe if that is a criteria.

What do you need to make cucumber idli? 
Makes 12-13 standard size idlis
1 big tender green cucumber (I use slender English cucumbers with skin on)
1.5 cups of idli rave/rice rave
1 Tsp salt
1/2 cup shredded coconut
4-5 green chilies (adjust to taste)
2 Tbsp finely chopped cilantro
1/2 Tsp cumin
How do you make cucumber idli? 
  • Wash and cut the ends off cucumber. 
  • I do not peel cucumbers for this recipe as I like the slight green tinge it gives to the idli. If you are using regular cucumbers and the skin is thick, go ahead and peel it before grating. 
  • Grate the cucumber in the bowl you are going to mix the batter so no liquid is wasted. 
  • Coarsely grind shredded coconut and green chilies without adding any water and add it to the bowl. 
  • Add salt, chopped cilantro and idli rave to the bowl and mix well. 
  • Cover and set aside for 20 minutes. 
  • Prepare your idli plates by brushing them with a couple drops of cooking oil. 
  • After the resting period, pick up a large lemon size portion from the batter and press it into a ball in the palm of your hand. It should hold the shape without breaking apart. If it feels too dry, add a spoonful of water. 
  • Put the ball into the dip of the idli plate and repeat for remaining batter. 
  • Steam the idlis in medium heat for 18-20 minutes. 
  • Switch off and let cool for 10minutes before removing them. 
  • Enjoy with any spicy chutney or sambar of choice.
  • Sweet idli version: If you have a sweet tooth, skip the green chilies and coarse grind coconut with 2 Tbsp of jaggery (indian brown sugar) and add it. Reduce the amount of salt in this version. Rest of the process is same as above. 
Notes:
  • Depending on the water content in your cucumbers, you may need to adjust the idli rave quantity slightly. Remember you are looking for a batter(after the resting period) that comes together into a ball and is not dry. Hold a portion of the batter in your hand and if you can set it into the idli mould without it breaking all over you, you are good to go. 
  • Resting the batter and steaming idlis on medium heat is important, it gives the time to the raw rave to cook completely and not stay grainy or dry. 
  • Use medium sized (not too fine but a little grainy) idli rave for this recipe. If it is too coarse, the idlis turn dry and a fine rave will make your idlis go flat. 

Sunday, January 7, 2018

Back to some basics and alternative grains - Ragi Rotti

Are you all now well versed in writing 2018 in the year column :-)? I am not, it usually takes me over a month before I start to hear the warning bell ring in the head telling me that a new year has come. But I am noticing that with each passing year and the rarity of hand written notes, it is taking me longer to get used to writing the new number. Ready or not, here is 2018 and well on its way to being a entire week old too. Hope the new year is treating you well and vice versa. I hope you are all keeping up your resolutions for "a better you" if you are the resolutions person. Mine are more 'make it today, break it tomorrow' types :-)
I alluded in my last post that I was doing some experimental cooking, some of it was driven out of necessity. Growing up I had never heard of the nut allergies or gluten intolerance that seem to be so prevalent now. I am a person that grew up eating and enjoying everything vegetarian and edible. On one of the regular annual visits to the doctor where I was whining about that eternal problem of the expanding waist line, she suggested (I think more in the way of getting me off her back than anything) that I stop eating any wheat or wheat products. Looking at my incredulous look she made it sound more gentle than it had the first time by saying that I might want to reduce the wheat in my diet. Thinking back, I am convinced that what she was really telling me was to cut down on the portions and start spending some of those calories by way of exercise :-).
I get it that the medical professionals have to be political in some of these situations and make their professional advice sound less harsh and not as a personal attack on how I choose to live my life! The risk of being overly diplomatic especially with people like me is that their advice gets misconstrued to my personal advantage which is exactly what happened here too. I took what I liked from her expert advice, discarded the rest and twisted some of her advice to what I wanted it to be :-). Poor doctor and then I go back to her again in a year with the same complaints!! I remember the elderly doctor we had in Mysore when we were little kids, I am sure he had no such qualms about sugar coating his treatment or dispensing his advice gently. He infact had pushed the needle into my arm when nammamma had taken my feverish little brother to him for check up and I had simply toddled along side. Why he was giving a shot for a common clue is a question I have asked my physician sister, but..:-). We both survived the experience without any lasting harm :-)
So buoyed by my physician's advice, also because I have been seeing many friends and relatives start talking about gluten allergy and intolerance, I came home resolved (see what I mean by me being a resolute person, I have these multiple resolutions going all through the year and don't need Jan 1st to tell me it is time) to eat less gluten, cut down on bread and wheat in other forms. Instead of taking my doctor's advice for what it was, I decided to erase wheat out of my plate and replace with something else that was equally delicious (and possibly have the same effect since I wasn't reducing any quantity!!). That is how I landed on my other favorite grain aka raagi or finger millet. This is called poor man's food in many rural areas in India especially rural Karnataka. I love raagi mudde and so does DD. Give us both a platter of hot raagi mudde and pour  ladles of spicy bassaru, we will happily GULP it. But BH is in a different category. GULPing is what he cannot do and chewing a raagi mudde is not a pleasant experience. So, I usually make rice on days we have raagi mudde at home.
I will be honest that when I first tried my hands at raagi rotti, the edges tore and there were cracks all over the rotti surface, not a beautiful presentation. But over multiple trials I have perfected the ratio of water to dry flour and some kneading techniques to roll out a puffy, layered and perfectly soft rotti. Here is the recipe with all my tips and tricks written down. Oh, before I go on I want to clarify that rotti is not the 'pat on a griddle' type of rotti (ofcourse you can make raagi rotti similar to akki rotti which is one of the dishes that gets instant attention because of its popularity in Karnataka) but this one is more like 'rolled flat with a rolling pin' type of roti/rotti. BH fell in love with these soft rotis, so now we make this very often at home. It works perfectly for any meal of the day and stays soft even when it gets cool making it a great candidate for lunch boxes or travelling. I have made this for dinner and carried left over in my lunch box and they remain soft.

After all the elimination of wheat and re-introduction of raagi, if you thought I will be posting a Before and After picture, it is not happening. Mainly because Before is still the same as After :-). The expanding waist line is not going anywhere except in circles. That is a story for another day.
But all jokes aside, raagi is traditionally considered a super grain and also due to its low glycemic index, it is released slowly into the blood stream making it a great food choice for diabetics as well. If you are looking for gluten free options but love your rotis and leavened breads too much, this is a great replacement for the wheat rotis that are so common. One of my little nephews was recently diagnosed with Celiac which instantly removes wheat and all gluten sources from his plate :-(. It is plain hard for the mom to tell him he can't have his favorite pooris in lunch box anymore. We made these raagi rottis when he came home last time and my little nephew loved these hot off the griddle with a smear of tuppa (home made ghee/clarified butter), brought a big smile to the mom's face and made the aunt's day :-).

Note on pictures - As you can clearly tell these are pictures from different days, it goes well with any kind of side dish. Also there are 2 different batches of raagi hittu or flour and the color in one is brown-pink while the other is darker tending towards black but both tasted delicious.

What do you need to make raagi rotti? 
Makes 5 standard size rottis
1 cup water
3/4 cup raagi flour + 1 Tbsp for dusting
1/8 Tsp salt (optional, skip it if you prefer)
2 Tsp oil (divided use)

How do you make raagi rotti? 
  • In a sauce pan, add water, couple drops of water and salt (if using) and bring it to a gentle boil on medium heat.
  • Add dry flour as the boiling starts and reduce the heat to low. 
  • Do not touch the flour at this point, let the water continue to boil and soak the sides of the dry flour. 
  • Once all the dry flour looks wet, with a stick of a strong ladle (I use the wood churner called kadegOlu), starting from the center of the heap using a circular motion, mix the flour with the water briskly so there are no lumps and everything comes together. 
  • Switch off the stove, cover and let it rest for 2-3 mins, this dough doesn't have to get cooked completely as in raagi mudde since it gets cooked again on the griddle. 
  • Take a wide plate and add a tsp of oil and scoop out all the dough on to the plate and leave it for just a minute so you can handle the dough with your hands. 
  • Knead the dough using the palm and fingers of your hand as you do with wheat flour dough for rotis/bread for about 3mins to get a soft, non breaking pliable consistency. 
  • Break the dough into equal sized portions and roll them into balls. 
  • Use a wet paper towel to keep the remaining dough balls moist while you are working on one rotti. 
  • Take a ball on your rolling surface, dip it in dry flour, flatten it slightly and using a rolling pin roll them into a uniformly thin rotti. Use a light hand and you will see this dough spreads easily into shape. Use dry flour to dust as needed.
  • Heat a flat griddle/tawa and shake off any extra dry flour from the rotti and place it on the hot tawa. I always roast these on medium flame to give it time to cook. 
  • Once the underside of the rotti starts to get some bubbles, turn it over. Cook on both sides until you get light brown spots on the surface. 
  • This rotti puffs up easily with a gentle press with a soft cloth or a flat spoon. 
  • Take it out and smear a light dab of ghee before serving. 
  • These stay fresh and soft for a day. Serve it with any dry or gravy side dish of choice.
Notes: 
  • What I have described above is one way of making lump free dough. If you feel uncomfortable with this here is an alternative way to ensure no lumps are formed: Mix a Tsp of flour in the cold water along with drops of oil and salt and bring it to boil. Lower heat and start adding dry flour in spoonfuls and continuously mix until all the flour is used. Proceed with the next steps in the recipe instructions above. 
  • 3/4: 1 ratio works well for most batches of flour, sometimes it make take a couple of spoons more or less depending on the quality of flour. Pics show the consistency of the dough, the idea is to get there by adjusting the water as needed. 
  • If the dough feels very soft and watery when you have used up all of the 3/4th cup, add a bit more dry flour, mix it in cover and cook. If the dough feels very tight while mixing the first time, add a couple of spoons to make it softer. 

Sunday, April 2, 2017

Kuttida avalakki - a home made mix to make a delicious gojjavalakki in minutes

Long, long ago, there were two friends. As kids they grew up together, went to school together. One was called Sudhama and the other was named Krishna. They stayed in a boarding school (Gurukula) with their teacher and his family along with other students. The two of them bonded very well over the course 7 years of schooling. They were inseparable and could be spotted together in all activities in the school. Years pass, schooling comes to an end, they graduate and are both very excited to go out in to the world and start their adult lives. As it happens at every graduation, both Krishna & Sudhama are sad to be going separate ways, hug each other and promise that they will keep in touch always. And as it happens in most cases, they both become busy in their lives and the friendship, staying in touch takes a backseat.
Krishna goes back home and becomes very successful at what he does while Sudhama faces hard times and struggles to even feed his large family. Krishna's fame extends all over the kingdom and one day reaches Sudhama's little town on the other side. Sudhama's wife is worldly wise, a mother bent on making ends meet and taking care of her family. She talks to her husband and asks him if he would visit his rich friend and get something to help them get over their difficulties in life. Sudhama who is very proud tells her that he would never go begging from his friend. The wife doesn't give up easily and keeps telling the husband about how things could change if only he would do as she said and finally Sudhama relents and sets out on his journey to meet Krishna.
It is a long journey, Sudhama's wife comes up with a couple of handfuls of humble avalakki (poha) so the husband doesn't starve on his long journey. She puts it into an old cloth piece, ties up a knot and gives it to her husband. With no mode of transport to carry him quickly to his destination, Sudhama walks all the way, for many days and finally reaches Krishna's home town. It is a much bigger city, one he has never been to and is dazzlingly beautiful. Krishna being who he is, everyone knows exactly where he lives, so after finding out the address, Sudhama makes his way hesitantly towards the palace. The guard stops this dirty looking, travel weary person at the door and questions his intention. Not believing his story of knowing Krishna from childhood, the guard is suspicious though he goes in to report a visitor.
Krishna is relaxing in the afternoon sun with his wife Rukmini after a heavy lunch and orders the guard to bring the stranger in. Sudhama by this time is already scared and is thinking of the shame that awaits him as the guard pushes him into the inner chambers where Krishna is sitting. As soon as Sudhama enters, Krishna jumps out of his seat, runs towards him and embraces him in a bear hug. At that moment, there is no line between the poor & rich, successful and not-so-successful, they are both two good friends who had shared many, many memories together.
Krishna playing the host, washes the feet of his guest, makes him comfortable, gives him food to eat and when they sit down after food to catch up where they had left off years ago, Krishna asks Sudhama what he had brought for his friend as he was visiting him after many years. Sudhama is very ashamed and tries to avoid the question as he has nothing to offer. Krishna is insistent and playful and says that even if Sudhama had forgotten his friend, his wife would never send him empty handed and snatches the old thaili (cloth bag) that Sudhama is carrying. Inside it, he finds another small cloth tied into a knot. Krishna eagerly opens it up and squeals with joy when he sees the remaining couple of morsels of dried up avalakki (which was Sudhama's journey food) and greedily pops some into the mouth. His eyes close contentedly as he remarks, "Well dear friend, are you so selfish that you wanted to hide this delicious avalakki from me and eat it all by yourself"?. As he puts his hand for another morsel, Rukmini gently tells him, "hasn't there been enough already, my Lord?". Krishna, smiles and puts the thaili away and goes back to chatting with his old friend.
Sudhama has a great time with Krishna, as if they had never been away, enjoys the hospitality but never feels up to asking Krishna for help. After a couple days of stay, he bids farewell and heads back home. His heart is full having seen his old friend and he doesn't remember the poverty back home or the reason for his visit. As he approaches his home, he is shocked to see a palatial home in the place where his shack stood and even more surprised when his wife and children run towards him, well dressed and looking well fed and happy. He realizes Krishna's magic and is thankful for the friendship.
I don't know how many times I have listened to this story from nammamma and anna growing up. It was a story that had all the emotions in right proportions, there was friendship, there was surprise, there was happiness and joy. The charm never fades away and depending on your age and stage in life, you can interpret it at different levels. I am sure many of you would recognize this very popular story from the great epic. I have listened in rapture to these stories when little, read many versions of them myself as I grew up, questioned a number of times, and have gone back to re-tell them to my daughter when she was a kid. It is an endearing story of two friends and how nothing can come between a true friendship. For me, it also is a story that establishes the power of humble avalakki, eating a handful of which made Krishna shower all the riches on his poor friend. Ok, I am a little totally biased here :-).
Avalakki (also called poha or beaten rice or flattened rice) is such a versatile ingredient and makes many delicious dishes. It is also considered as something that can be consumed while you are fasting unlike regular rice. Avalakki also happens to be one of the most preferred travel companion in many south indian homes, as it stays good and is non messy to carry while on the road. One of my doddamma (mom's elder sister) always had this mix in her bag when she traveled as she had many self imposed restrictions on what she would/could eat and always fell back on her trusted avalakki mixture. I loved it so much even in its dry mix state that I would beg her to give me a couple spoons. Once the spicy, tangy, sweetish mix popped into the mouth, I would be the happiest girl in town :-).
Last week I was traveling on work and was away from home for the entire week. While I have become good at spotting vegetarian choices during lunches & dinners and have learnt to successfully stay cheerful on an overload of salads, bread and potatoes, I love to start my day off with something that reminds me of home as the delicious taste, the familiar smell helps me live off of it for the rest of the day. Today's recipe is something we as a family always carry while travelling on longer trips.


As usual, I made the mixture last weekend before heading out, packed a small ziplock bag and left some at home for BH. While I was perfectly fine eating the bf at the hotel for the first 2 days, I was craving for something other than cereals and fruits by day#3 :-). I mixed a few spoons of the avalakki mixture in a cup in the room when I got up and by the time I got ready 30mins or so later, fluffy, aromatic avalakki was ready for me to dig into. Just for fun, I took a picture of my bf on a whim and posted it on my personal fb the other day. I was thrilled to see so many friends writing in to say how this is their travel companion too. And there were many recipe requests that made me make another batch today and post it on the blog. We are not traveling this week but the mix will be eaten up more than happily for bf in the coming days :-), I have a big fan following for this recipe at home.

So what is special about this recipe? It is a dry mix that can be carried easily and made into a yummy treat just by soaking it in water for a short while. Kuttavalakki or kuttida avalakki refers to the process of pounding the avalakki and the rest of the ingredients together to make the mix. I don't use the old world gadgets anymore and nor do I hand pound the mix, rather it goes into my blender. So may be I should rename this as 'mixavalakki' or 'blendavalakki', what do you think :-)?. Whatever the name maybe, this is one delicious dish for sure, so go ahead and give it a try and take it with you on the go. Instead of soaked oats, you can enjoy soaked avalakki for a change. I list curry leaves below but I didn't have them today so you will not see them in my pictures.

What do you need to make kuttavalakki? 
Makes about 5 cups of mix
3 cups medium thick avalakki/poha/beaten rice
3/4 cup lightly packed grated dry coconut/kobbari (can be replaced with desiccated unsweetened coconut)
2 Tbsp crushed jaggery (can be replaced with brown sugar)
1 Tbsp salt (adjust to taste)
1/8 Tsp asafoetida/hing
To roast: 
2.5 Tbsp chana dal/kadle bele/split bengal gram
2 Tbsp sesame seeds (use either polished or unpolished white sesame and not black)
1 Tbsp urad dal/uddina bele/split black lentils
1 Tbsp coriander seeds
1/2 Tbsp black pepper
1 Tsp cumin
1/2 Tsp fenugreek seeds
1.5 Tbsp (or a key lime size) tamarind
3-4 dry red chilies (I use a mix of mild Byadagi and spicy guntur varieties for a balance of color and heat)
Seasoning: 
1/4 cup oil
1 Tsp mustard
1 Tbsp chana dal
1 Tbsp urad dal
2 Tbsp peanuts (more or less as you like)
1/4 Tsp turmeric powder
1-2 dry red chilies (optional and can be omitted)
8-10 curry leaves chopped small

How do you make kuttavalakki? 
  • Pick avalakki for any dirt and keep aside
  • Pick seeds, pith and strings from tamarind and make small flat pieces. 
  • Heat a heavy bottom pan and add chana dal from the 'To roast' list. Give it a minute head start on medium-low heat and add urad dal. 
  • Roast the dals, stirring frequently until they turn light golden in color. 
  • Add all the remaining ingredients listed under 'to roast' and stirring frequently roast them until you get a nice fragrance of the spices. Take care not to burn any of them. 
  • Add hing and grated coconut (reserve a Tsp for later) into the pan, stir it once and switch off. 
  • Let the roasted ingredients cool completely. 
  • In a mixer jar, take all the roasted ingredients and grind into a fine powder. 
  • Add salt, grated jaggery and give it another run of the blender. 
  • Take this into a wide mixing bowl or plate. 
  • Add avalakki/poha to the blender (in batches if you need to) and make a coarse powder. 
  • Add this to the same mixing bowl/plate. 
  • Heat oil in a seasoning pan, add all the ingredients listed under 'seasoning' and roast on low heat (lower the heat and longer the the roasting time, the dals and peanuts retain their crunch better) until mustard starts to pop and the dals turn golden pink. Add reserved coconut gratings. 
  • Switch off and pour it over the ground mixture. 
  • Let it all cool completely before mixing in (use your fingers and hand) to make a homogeneous mixture. 
  • Once cool, you can either make it into gojjavalakki (see below) or store it for later use in a dry ziplock bag or container. 
How do you turn the mix into gojjavalakki?
  • Take 2-3 Tbsp of the dry mixture into a bowl (or a cup or glass depending on where you are). 
  • Add quarter cup of water, thumb rule is to add enough water to form a thin layer on the top surface of the mix and every grain of the mix is soaked. 
  • Do not mix and touch it for about 15mins (thicker the avalakki variety, takes longer to soak but no longer than 30mins). 
  • After the soak time, using a fork, fluff it up all around and enjoy. 
  • If you have access to some home made yogurt, add a dollop on the side or mix it up right in and enjoy. 
Notes: 
  • Tamarind I get here is usually very dehydrated and does not contain moisture, warming it up in the hot pan makes it softer and easier to grind. If you have wet tamarind, ensure you spread it out to make it a little dry. 
  • While grinding the spice mix, take care to not run the blender for long, pulse it if you need to and get a dry powder. Running the blender continuously makes sesame seeds give out their oil and turns the mixture wet. 
  • Amount of jaggery, salt, and tamarind is mainly to taste here. Experiment and find your balance. Remember that the dry mixture taste gets diluted once you add water, so accommodate your quantities for that. 
  • Color of your gojjavalakki depends on the chilies and turmeric used, you can see the difference in colors between my two batches in the pics above. Not a big deal unless you are very particular about the aesthetics :-)
  • The dry mixture stays well for a couple of weeks and longer if you refrigerate it. 
  • Make sure the mixer/blender jar is dry and devoid of any moisture before you make the powders. 
  • Do not use the thin variety of avalakki for this recipe, it just makes it all lumpy and mushy. 
  • Nammamma used to spread avalakki in the sun to freshen it up but since I don't make her 'huge' quantities, I use it directly from the packet.
  • I am very liberal with dry coconut as it enhances the taste :-), reduce the quantity if you wish to.
Kuttavalakki wisdom: 
  • Thicker variety of avalakki absorbs more water and takes a few minutes longer to fluff up.
  • If you make a very fine powder of poha, the final product turns soft and mushy instead of fluffy.
  • After the soak time is up, make sure you fluff it up with a fork completely (from the bottom up) so it is homogeneous. 


Sunday, May 15, 2016

Sabudana Thalipeeth - a Maharastrian delicacy made my way

Hope everyone's weekend was fun and fulfilling. Mine is (I have a few more hours left in the day and I definitely will milk it to the last possible minute:-)). With showers coming down strongly for the last 2 days, it has been a little cooler than it was earlier in the week. The trees and shrubs in the yard are doing a happy dance, fresh from their bath, the dust is washed off the leaves and they look spotless, brighter and happier.

I worked from home due to a really minor and freak fall I had at work (no worker's compensation material, this one :-)), lesson learnt - dont try to walk on a foot that is asleep, and don't lean on a chair handle that is not fixed. The foot swell up to a small pumpkin size and refused to go into the shoes. It was like Cinderalla's much bigger sister trying to squeeze her foot into the dainty little glass slippers, I gave up and opted to work from home for last 2 days. There was so much to catch up coming back from the 4 day long vacation and the working from home just seemed to stretch the days longer. I was exhausted completely when I wrapped up late Friday evening and the positivity of the vacation had almost wore off.
After 3.5 days of icing and keeping the foot elevated, it has shrunk to almost the original size and I am able to walk around normally. Getting up and walking around in the slightly wet, totally green and beautifully fragrant yard helped me to bounce back. We did our (hopefully) last round of spring cleaning this weekend, yeah it takes all of spring and then some to get it done :-), and are now just waiting excitedly for DD to get home next week. 3 weeks of summer bliss after that.

I recently read an article by a very popular Indian nutritionist named Rujuta Diwekar here. I will say it is one of the more comprehensive write ups about the food we eat, trends in people's food habits and the changing fads and notions about super foods at any given time. I say comprehensive because it almost touched on both sides of the coin and one term that resonated with me is the 'yo-yo' concept of adapting a certain trend as the super food only to find a few years later that it never was a super food and then jump to something different. I guess we humans take joy in transient things in life and are always on the look out for something??
I liked the detailed explanation in that article about why not to go after certain food fads, and her championing locally grown food. However, I personally feel that there is a need for tailoring the traditional food habits to the modern life too. Given the life style differences between our generation and that of our parents & grandparents, it simply is not realistic to assume that we would digest and benefit from the food in the same way they once did. My physical activity is nowhere to close to that of what my parents did, I sit infront of my laptop for more than 8 hours a day by way of work and then some more hours of browsing, emailing, personal work on the machine. I have to make a conscious effort to get my limbs moving while my parents got their 10K steps easily as part of their daily chores. It was much easier for them to digest the 2 spoons of ghee than it is for me :-). While I like her argument of continuing the traditional food habits, I would still tailor those to suit the current life style. If I were a farmer working in the field or someone doing manual labor every day, 2 spoons of ghee would have been a necessity perhaps, but for now it is a luxury that grows on my waistline :-). She is the nutritionist, I am not. So my opinion is my own and I am not asking anyone to follow it.
Talking of traditional food, here is one. Simple, delicious and preferred on 'vrat' days. Now that concept of 'vrat' when you are supposed to be eating light or fasting entirely is one of the most misused terms in Indian culture. Don't get me wrong, there are folks that do an honest 'fasting' and then there are some who just eat better tasting, richer food in the name of fasting/vrat :-). There is a funny poem in Kannada which goes like this, "aache mane subbamange, ivattu ekadasi upavasa, eno swalpa tintarante, avalakki, uppittu, paayasa .." :-). I won't attempt to translate it as it will spoil the fun for me but here is the synopsis of it - a lady named Subbamma was fasting on a day and she was eating a food mountain that had a multitude of dishes. Mostly, vrat days are those when people do not eat certain ingredients or ingredients in certain forms, the most common one being rice. So there is no cooked rice consumed on vrat days but there are a lot of great food and in some regions vrat foods are way more delicious than the every day, common man food.
My parents also would not eat rice on certain nights for dinner for religious beliefs and we would actually fight to get a bite of the delicious uppittu or avalakki or rotti instead of our boring anna-saaru for dinner. One of my aunts didn't eat rice in the evenings at all and her tiffin items were so sought after that she always made extra quantity for us kids :-).

This thalipeeth (or rotti) is a favored dish during vrat time in the western region of Maharashtra in India. But since I don't follow vrat, I end up making these whenever we fancy eating them. That is the best part about these traditions, they don't stop you from making/eating these delicacies on non vrat days :-). Traditionally, boiled potatoes are used in this recipe as the binding agent, I chose to add my favorite jicama instead. It works well and tastes delicious, less starchy than the spuds.

5/16/16 update: Thank you all for your interest in the recipe and questions about Jicama (pronounced as Hee Ka Ma). I realized I should have given some details about this vegetable since it is not a common one we use. Jicama is a tuber grown widely in South America (and other parts of the world) and is used commonly in Mexican cuisine. It is a tuber, usually round in shape and has a thick outer skin that needs to be peeled off. You can eat it raw or cooked, it imparts a crisp, slightly sweetish taste to the dishes. Find more information here. I have used these in cutlets and also salads.

What do you need? 
Makes about 7 thalipeeths (good bf for 2 people)
1 cup sago/sabudana/sabbakki
1 small jicama
1/4 cup peanuts (raw or roasted)
1 Tbsp finely chopped cilantro
2 green chilies (finely chopped
2 Tbsp Rajgira flour (replace with rice flour if you like)
3/4 Tsp salt (adjust to taste)
2 Tsp oil to roast thalipeeth
How do you make? 
  • Wash sago in 2-3 changes of water, soak in water just above the sago level(about a cup) in a wide pan over night or atleast 5 hours. 
  • You will get plumped up (it doubles in size) sago and if the amount of water is right, it will all be soaked in. 
  • If you had added extra water, don't fret, just take the entire soaked sago into a colander and let it sit and drain for 10-15 minutes before using.
  • If you had less water, don't  fret either, sprinkle a couple Tbsp water on the sago and let it sit for another 15-20 minutes
  • And finally, if the soaked sago is a little mushy, don't fret at all :-) as it helps in forming a dough easily. Remember you are looking for a soft, soaked sago with no running water accompanying it.
  • Wash, peel jicama and chop into quarters. Take it in a microwave safe bowl, cover with water and cook until soft and given in when pressed (about 10mins and I removed the bowl after 5 mins and set it back again)
  • If you are not a MW user, go ahead and boil the jicama pieces in a pot of water until they are tender. 
  • Take them out of water, let cool down and grate. You need about a cup of grated, boiled jicama for this recipe. 
  • If you are using roasted peanuts, just crush them (you can make a powder if you like or keep some pieces for the bite in the thalipeeth, choice is yours)
  • If using raw peanuts, roast them dry in a pan until the skin develops golden spots, let cool, remove the skin by rubbing the nuts together ina ziplock. Crush or powder them. 
  • Or you can even use the peanut powder if you have it ready at home :-) and save some work. 
  • Take a wide bowl (where you can work your hand muscles), add soaked sago, crushed peanuts, salt, chopped cilantro, green chilies and grated jicama. Use the hand and fingers to bring them all together into a mushy dough. 
  • Add the flour and mix well. If you take a handful of mixture it should stay as a ball and not break/fall apart at this stage. 
  • Heat a flat griddle on medium heat. 
  • Take an aluminium foil, put a couple drops of oil and spread it around. 
  • Pinch off a big lemon sized piece from the dough, place it in the center of foil and pat into a circle of desired thickness and size using your fingers. Dip your fingers in water to help the patting process and avoid sticking of the dough. 
  • Spread a couple drops of oil on the griddle, place the sheet with the thalipeeth side down and let it cook for a minute. 
  • Gently lift and peel off the sheet after a minute and let the thalipeeth cook for another 30seconds or until you notice the underside get golden brown spots all over. 
  • Flip it and let the other side cook for a minute. 
  • On medium-low heat, a thalipeeth takes about 2.5-3 minutes to cook completely. Do not do this on high heat. 
  • Transfer the cooked thalipeeth to a plate and enjoy when it is hot with a cup of yogurt of chutney/chutney pudi of choice. 
Notes: 
  • Sago should be soaked until soft for this recipe, do not use if it is dry, add some more water and let it soak.
  • Jicama starts off fibrous(like kohlrabi) when it is raw but gains a little starch as it is cooked and works its charm.
  • You can use a plastic sheet to pat the thalipeeth, and transfer them onto your hand and then to the griddle if you like :-). I prefer the ease of aluminium sheets as they can be put on the hot griddle and left there for a minute before peeling off of the thalipeeth. Plastic will not stand the heat. 
  • If you have access to banana leaves, go ahead and use them, they are the best :-)
  • The flour helps absorb excess moisture and make the dough pliable. If you choose not to add any dough at all, be gentle while patting, transferring and flipping the thalipeeth as it will easily break.
  • This thalipeeth tastes best when eaten right off the griddle, it tends to become stretchy as it cools down due to the inherent sago texture. 
  • Use potatoes (as in the classic, traditional recipe) by all means, I sometimes like to experiment with locally available veggies. 

Sunday, May 1, 2016

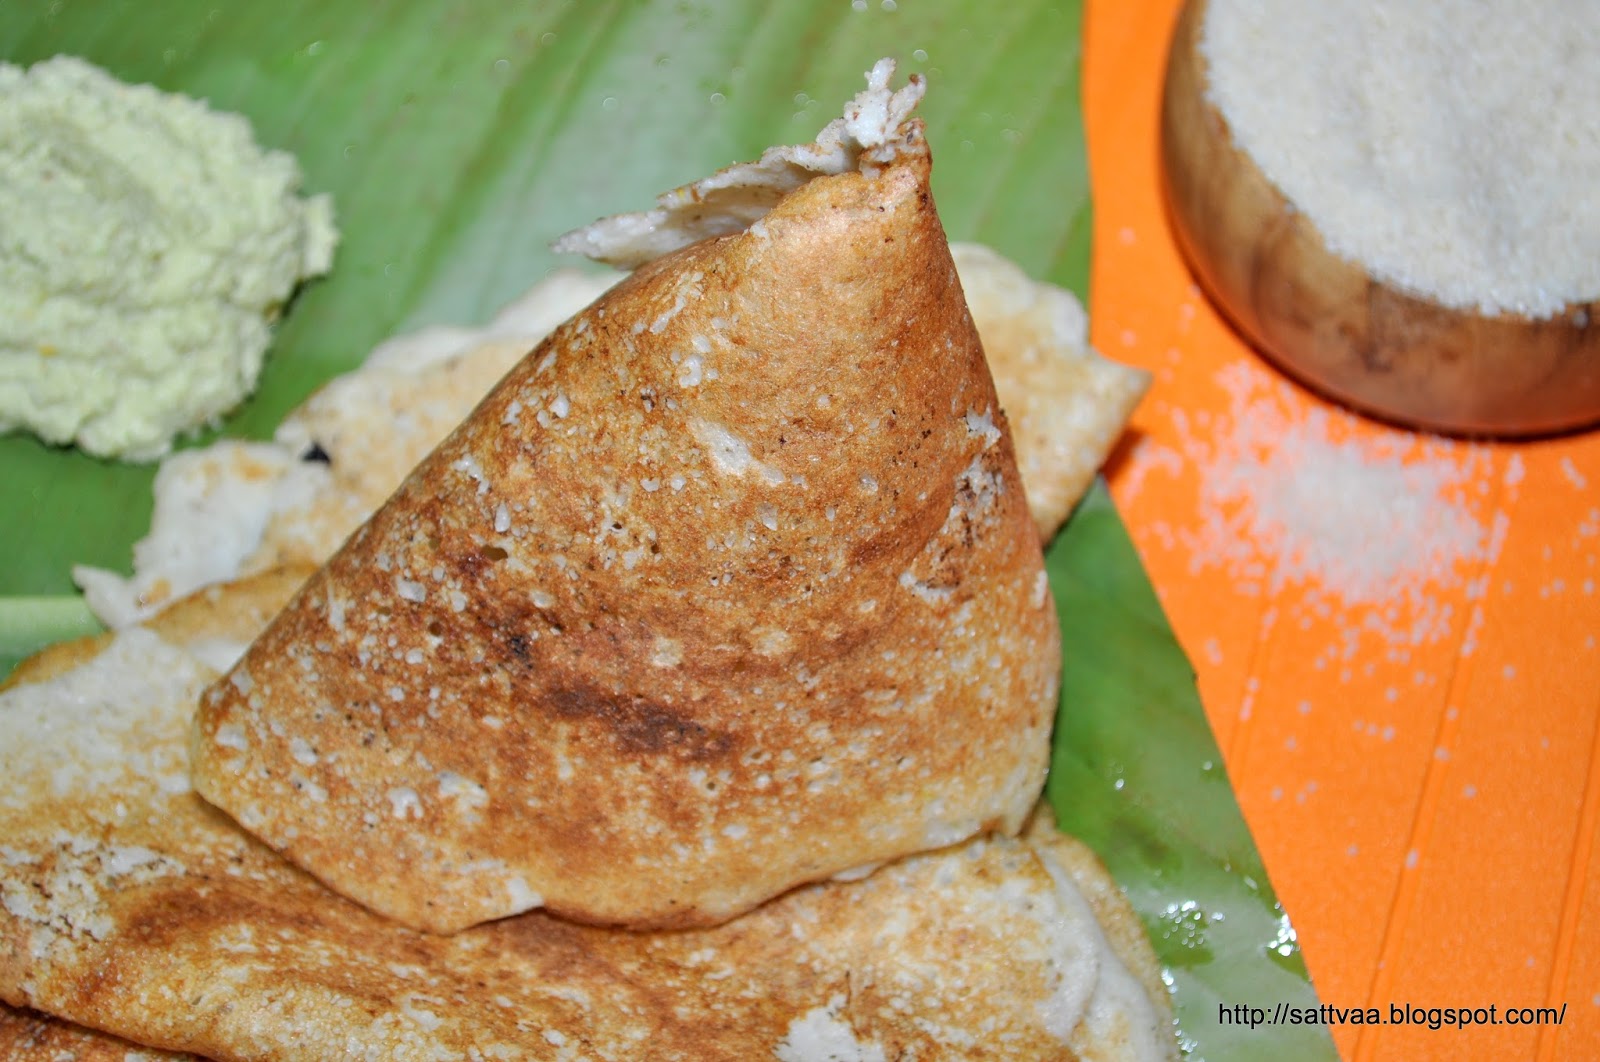
Boodukumbala kaayi (Ashgourd/winter melon) dose - changed perspective with a swapped in ingredient

Changing one's vision changes one's sight - Acharya Vivek

Random rambling alert on today's blog post:-). If you like to go to the recipe directly, please feel free to do so below. Let my ramblings not dilute the delicious dish I have today, I will say only this - this is a dose/dosa recipe that changes your perspective on dosa, the ingredients that are in the recipe are not what you would expect from a typical South Indian dose recipe, but then with so many changes around you, what really is typical anymore? Your last chance to scroll down to the recipe before the ramblings come down in an avalanche :-) and here is a teaser of the dish..
I wrote the quote at the head of the post today for a reason, that single sentence seemed to convey so much that I have been grappling to take in recently. Stereotypes broken, traditions created a-new.. isn't that part of life and while I am looking wide eyed around me, this quote finds its way into my inbox as if to summarize all that is happening.

I grew up in a small city, culturally vibrant, educational hub for some of the best education possible at the time, nonetheless small and contained. I also grew up in a family that was interested in music, literature and arts as well as scientific education. I am grateful for all of this and what it has made me in life today. But as life takes me to different places through different experiences, I learn every step of the way that my values are solidified with what I know thus far and the only way to broaden horizons is to be accepting of things that I may not know of and keep an open mind.
Music has been an integral part of life for me and I am no stranger to music concerts. But we went to a certain kind of music concerts always, mainly the classical kind. There was no dearth of concerts in Mysore and the music lovers in the city didn't need excuses to arrange concerts either. There were big scale concerts around Rama Navami and Dasara but rest of the year used to witness multiple music programs sponsored by various sabhas (organizations). I went to many, many concerts with family and enjoyed them all. Big brother studying in the Northern part of India introduced us to the joys of Hindustani classical, high school and college days saw me listen to many light classical ghazals, post marriage I enjoyed a lot more Lata, Rafi, Kishore Kumar style with BH and then as DD grew up into a music loving teenager, I was introduced to many of her favorites in Pop, jazz and all the new age genre. I love all kinds of music as long as it suits my mood at that time, but have really not attended many non classical concerts in my life. BH & I went to one last evening by a very popular musician, classically trained but into Indian movie music.
It was almost an eye opener, everything about the program was so different from my mental image of a music concert :-). The big stadium, the dancing crowd, loud speakers, flashing lights and the musicians engaging the audience all of it seemed to contrast and almost defy everything I held as part of my definition of a music concert where audience are engaged in a very subtle and gentle way, the most visible movement you see is a nod of the head or a pat on the knees as you try to keep with the percussion and the musicians themselves are more inward than outward. My initial reaction was one of total hesitation but as I got into the music, I found it totally enjoyable and in no time was enjoying the real music behind all the glitter. Great experience and only because I was ready to lift the veil off of my perceptions and change the vision!! Thanks to the local chapter of Sankara Eye foundation for organizing the program as they also fund raised for a good cause.
Today's recipe is one of changing the vision too. Millets started showing up as part of super healthy food on the blogosphere a few years back. There has been so much discussion about embracing healthy foods such Oats and Quinoa Versus the Desi grown millets. I accept that I am not an early adapter of changes, I let things settle down a little, feel comfortable before jumping on any band wagon. Though I kept hearing about the millets from various sources, I didn't spend a lot of energy researching them until much later. The only millet I was familiar with was Raagi or finger millet which I love and then jowar or sorghum. Raagi is a regular at home with the famed Raagi mudde and jowar has been silently sneaking into the kitchen for years since we love jolada rotti. Other than these two, I had pretty much stayed away from the millets, or rather was ignorant and uneducated about the existence of other millets.

For my background as a South Indian from Mysore, no meal is satisfying without the fluffy, white steamed rice. Most of us do not even consider brown rice as edible, it is almost snobbish the way people like me turn their noses to anything but the light, pearly white, super fluffy sona masoori rice :-). If you were to feed me a sticky jasmine rice, you would have to be a very patient, gently coaxing mentor :-), otherwise chances of success would be highly diminished. As we grew up, and also due to the lack of easy accessibility to rice made me add lot of wheat (another grain I was familiar with) and then slowly steer towards the easily reachable oats, quinoa and barley. Over the years, I have experimented with these different, possible supplements for my white rice. I still love my white rice but have successfully incorporated other grains and seeds in to the daily routine. And yes, brown rice makes its way into our kitchen too.

When I first heard of millets, I had no clue what they were. Nammamma never made anything like this, nor did amma. A year or so back, on a trip to my local grocery story, I found an entire shelf of packets that had different looking ingredients. Out of curiosity, I picked up each one of them and read the labels and then one of them caught my attention. The label said kodo millet and had the name in multiple Indian languages and the Kannada name was 'Harka'. This took me to a favorite novel of mine I have read and re-read many times by a famed Kannada author called S.L.Byrappa and there is a reference of Harka in that book as a rice substitute but the part I remembered was how people in plague ridden parts of the state had no access to rice for many months and had to survive on lesser desired things such as Harka which caused familial fights. While reading the book, I had never bothered to find out what harka was but here it was glaring in my face after all these years in my adopted country.

I brought small packets of every single variety of millet home that day and tried to cook with it. More than cooking, I was somehow trying to relate to and connect with all those ancestors that had lived the nightmare of the plague in those times. Millets are actually seeds very much like Quinoa which is the modern day super food and have higher fiber content than rice and better nutrition than polished rice too. I have been experimenting with these millets for almost 2 years now but haven't really written a lot about them. They are great rice supplements if you are looking for one and you can have them with any side dish just like rice. Depending on the variety, you may find and need to adjust how you cook or use them as some of them are bigger in size than others and may take longer to cook.
Initially I started adding them to my dose and idli batter while still keeping a major portion of rice. But once we got over the initial hesitation, I extended the proportion of millets and now have recipes which do not use rice at all. I am not saying rice is bad, my family has consumed rice all their lives and lived a pretty healthy life but as times change and if you are actively looking for other ingredients, millets are ready to take that spot without hesitation. Of the varieties I have used, 2 of my favorites are the foxtail millet (navane in kannada) and the little millet (Saama in Kannada). I find kodo millet to be dry and also the packages that I got had a lot of dirt that had to be picked. I don't get barnyard millet all the time here so no specific bias on that one.

Foxtail millet is good if you are making rice varieties (Ex: tamarind rice, chitranna etc) as it holds shape and can be cooked fluffy. Little millet is perfect for batters as it soaks and grinds easily. It is also great in and recipes like pongal, BBB etc since it tends to cook to a mushy consistency. Unlike quinoa, the millets do not have a smell or taste of their own thus making them invisible super ninjas as you replace them with rice in any recipe. Today's recipe is a coastal Karnataka favorite made with rice and ashgourd, I replaced the rice with little millet. Ashgourd is summer vegetable, when the mercury hits high and you are craving for something watery and cool, this is a go to vegetable. This dose is delicious whether you make it right out of the blender or let it sit for a few hours. All I had to do was change my vision to find better sight :-), go ahead and give it a try. If you are hesitant to try millets, make this dose with regular rice. Either way it is a keeper recipe!!

If this interests you to try other millet recipes, let me know with a comment on the blog post, I will get to post them sooner than following my lethargic pace :-)
What do you need? 
2-2.5 cups grated ashgourd
2 cups millet
1 Tsp fenugreek seeds
1 Tbsp urad dal (you can skip this if you like)
1 Tbsp poha or avalakki (thick variety)
1 Tsp cumin seeds
4-5 green chilies
1 Tsp salt (adjust to taste)
couple Tsp oil to roast dose
How do you make? 

  • Wash, pick any dirt from the millet and soak it in water along with fenugreek, urad dal and poha for 4-6 hours. Do it overnight if you have time or if you are using the thicker millets like foxtail millet. 
  • Wash, peel the outer skin and grate the ashgourd. Collect all the water it releases while grating and reserve for later use. 
  • Drain the water you have used for soaking and add the ingredients to a blender along with cumin and green chilies. 
  • Add all the grated ash gourd reserving about 2 Tbsp for later use to the blender and blend into a smooth paste. 
  • The water from the grated ashgourd can be added while grinding to get the required consistency, use it a little at a time to avoid making a very watery mixture. 
  • Once the ingredients have turned into a smooth paste of pouring consistency, take it out into a bowl and add the remaining grated ashgourd. 
  • Add salt to the batter if you are making dose right away or wait until you are ready to make them. 
  • Heat your dosa pan or griddle on medium heat, and once the pan is hot, take a ladle full of the batter and spread it in a circular motion. 
  • This can be made as thin or as thick as you choose. 
  • Add a few drops of oil around the edge of the dose, and let it cook covered on one side for a minute on medium heat. 
  • When the underside is golden, gently nudge the dose from the pan and flip it over. 
  • Cook on the other side for 30secs and take it out onto a plate. 
  • Repeat for the remaining batter or as many doses as you need.
  • Serve hot with ghee and chutney of choice. 
Notes: 
  • I used sawa/little millet this time but have made it with foxtail also. You can use either of these or other millets such as kodo, barnyard or little millet. Soaking millet makes it soft for grinding and makes the dose soft too. 
  • If you like thinly spread dosas, grate a small piece of the gourd in the small hole of the grater. The rest of the gourd that goes into the blender can be done on the big holes. This makes it easier to spread. 
  • The dosas get a nice golden color with the fenugreek so do not skip that. 
  • Urad dal is optional in this recipe and I don't add it sometimes. 
  • You can make this dose with the watermelon rind instead of the ashgourd. 
  • If you like crispy dose, don't cover it while cooking and cook on one side only. 
  • I add green chilies and cumin for flavor as both millet and ashgourd are sort of bland, you can omit these ingredients and eat it with a side dish if you choose.