Showing posts with label Rice Items. Show all posts

Sunday, January 25, 2015

Vangibhath - One pot rice dish, a quintessential kannadiga staple

Another week passes by with much happening and here I am on a Sunday evening with a delicious, traditional recipe from home. Many of you have asked me for this recipe in the last year or so, I had to put it off until now to make sure I got consistently great results with my powder before I shared the recipe with you all. There are some recipes that though you have the exact measurements, something seems to be lacking when you make them. If you ask nammamma, she would say, "kai palagabeku" which translates roughly to "you need to become more experienced with practice". I believe I have reached that stage with Vangibhaath powder now.

Vangibhaath is a traditional rice preparation in Karnataka, attend any wedding or other auspicious ceremonies, you will get to enjoy the taste of this divinely delicious item. Though vaangi is not a kannada term, it is more closely related to vankaya (brinjal in Telugu) or vangi (Brinjal in Marathi), the name vangibhaath has stuck in Karnataka homes. This is prepared very differently from the bhaath in Maharashtra which uses goda masala.

Vangibhaath is typically flavored with spices such as cinnamon, cloves, nutmeg, mace and coriander seeds. The heat comes from both black and red pepper. Spices are toned down from the sweetness of coconut and the unmistakable asafoetida is added for flavor. Once the powder is ready, you can go creative with the usage. Brinjals do not have to be the 'be all, end all' vegetables for this recipe, you can use green peppers, colored peppers, combination of vegetables such as green beans, carrots, green peas etc. Whatever choice of vegetables makes you happy (within a certain boundary ofcourse, don't use radishes in vangibhaath :-)). You can make a super yummy masala upma by throwing a spoon full of this powder while making uppittu or upma. You can even use this powder to make quinoa bhaath like I did here.
This has to be the very first recipe I cooked as a new bride when I got married. With a brinjal crazy FIL, anything with eggplants is heartily welcomed at the dining table in our home. Those were the days, I was not a very confident cook in the kitchen especially in a new kitchen. But the bhaath turned out delicious (secret being the powder nammamma had sent with me) and I was crowned the defacto vangibhaath queen. Like everything else, nammamma always made this powder in large quantities and used to store, I prefer to make small batches and finish it off quickly.

In Mysore home, the preferred brinjal for the bhaath was always the light green, long ones called eeranagere (village where the vegetable came from) badanekaayi(brinjal in kannada). I do not remember amma using any other brinjals for this recipe. These brinjals were slender, devoid of seeds and held their shape without going all mushy on you upon cooking. I have not seen the green brinjals in ages now and make do with the Japanese purple eggplants. Do not use the big eggplants as they tend to be more fleshy and collapse into a watery mess after cooking. You need to take a few precautions while cooking eggplants from an aesthetic and taste perspective. I have noted a few lines below on what works for me, feel free to follow suit. If you get the green eggplants, good for you, make the bhaath and don't forget to send me some for taste :-)
On a recent trip to Chennai when we were in India, cousin L made Vangibhaath for all of us and it tasted delicious as always, she said her powder recipe has an ingredient called dagad phool or stone flower. I had never heard of it until then, not something used in South Indian spice powder preparation. L even swore that dagad phool was what made the difference to Vangibhaath and offered to pack me some of it to carry. It looks like dried, crumpled paper that you lift midway from getting burnt at the fire, doesn't have any smell in its raw form but I was told that it adds a woody, smokey aroma to the powder when roasted and mixed. I am a little bit of a stickler to traditional recipes in certain areas especially when trying to reproduce the smells and tastes from nammamma's kitchen. She made one of the best vangibhaath in the entire world :-) and I like to stick to her tried, tested and enjoyed recipe.
If you happen to find dagad phool in a store near to you, go ahead and use it but I will promise that the powder recipe below (without dagad phool) makes a delicious vangibhaath. This is how my mom made it always and I believe I have her recipe nailed down correctly.

Before we go into the recipe details, here are a few things I want to discuss with you, please pay attention especially if you are a first timer to this recipe, just making some grand declarations, nothing serious :-).
  • There is no onion, tomato or garlic in Vangibhaath, it is a saatvik preparation and do not add these ingredients unless you are ok turning it into a fried rice of some sort. 
  • Amount of tamarind depends on your tolerance for tartness, so use judiciously. Nammamma used to soak dry tamarind, extract the juice, let it boil for a few minutes with the vegetables until the water evaporated, I however take a short cut with the ready made tamarind concentrate. Saves me some time, adds instant sourness, no liquid to evaporate or raw smell to boil. Choose whatever works for you. 
  • Kannadiga Vangibhaath traditionally uses a long grained rice like sona masoori. Any long grained non sticky rice should be good. I am personally not in favor of using Basmati variety for this as the innate flavor of rice conflicts with the spices. 
  • Eggplants in Vangibhaath should be cooked fully but hold up shape. 
  • I add potatoes just to make it DD friendly as she is psychologically averse and allergic to eggplants :-)
  • Vangibhaath is a slightly spicy rice dish with cloves, pepper adding to the heat, so nammamma always adds a small bit of jaggery while preparing it. I like the taste and continue the tradition. 
So here is the recipe for Vangibhaath from Nammamma's kitchen, hope it brings back memories of your own and also stands up to the expectations. Would love to hear from you all. By the way, the best side dish for vangibhaath is a cool yogurt raita. 

And for all my Indian friends, HAPPY REPUBLIC DAY!
What do you need to make Vangibhaath powder?
1/4 cup chana dal
1/8 cup urad dal
1/2 cup coriander seeds
1 Tsp cumin seeds
1/2 Tsp fenugreek seeds
1.5 inch piece cinnamon
4 cloves
6-8 black pepper corn
small piece of nutmeg
2-3 pieces of mace/jaapatre
4-6 curry leaves
1 Tbsp dry coconut grated
1/8 Tsp hing
8-10 dry red chilies (mix hot & mild varieties)
1/8 Tsp Turmeric powder
1 Tsp oil
How do you make Vangibhaath powder?
  • Add oil to a heavy pan and heat it on medium high. Add the dals and roast for a minute. 
  • Add the rest of the ingredients except for dry coconut and asafoetida and roast them stirring frequently until the dals turn bright pink in color and the spices give out a beautiful aroma. 
  • Add dry coconut, asafoetida, mix it once, switch off and let cool. 
  • When completely cooled, grind in a dry mixer jar or spice grinder to a powder, a rava like texture is perfectly acceptable.  
  • Keep in a closed container until ready to use. If you make in large quantities, freeze the powder, stays fresh for months. 
What do you need to make Vangibhaath? 
Brinjals - cut into 1/4 inch thick X1 inch long pieces - about 2 cups
Potatoes - cut into 1/4 inch thick X1 inch long pieces - about 1 cup
3 Tbsp of Vangibhaath powder
1/2 Tsp crushed jaggery
1/2 Tsp Tamarind concentrate 
1 Tbsp salt (adjust to taste)
3 cups cooked rice - sona masoori or long grained rice
4 Tbsp oil - divided use
1/4 Tsp ghee

Seasoning
1 Tsp mustard
1 Tsp chana dal (optional)
1/2 Tsp urad dal (optional)
2 Tbsp peanuts
few curry leaves
pinch of hing
pinch of turmeric powder

How do you make Vangibhaath? 
  • Wash and cook rice so grains are fully cooked but stay separate
  • Put into a wide bowl and let it cool down. 
  • Parboil potatoes until just tender, drain all the water. 
  • Heat 1 Tbsp oil in a wide skillet, add drained potatoes in a single layer, sprinkle a pinch of salt on top and roast them until they develop golden brown covering. 
  • Keep aside.
  • Heat another Tbsp oil, add brinjal pieces, cover and cook on medium heat for 2 minutes, remove cover, mix and cook for another minute covered. 
  • The steam from the covering will help brinjals cook faster and evenly. Once they are soft but still hold shape, add salt. 
  • Mix in potatoes, add tamarind concentrate, crushed jaggery and give a gentle mix. 
  • Add the powder, mix well, cover and cook for 2 minutes on low heat so the vegetable soak in the spices. 
  • Take it out and spread it on top of the cooked rice. 
  • Prepare seasoning, pour it on the rice+vegetables. Let it all cool down. 
  • With gentle fingers, mix them together so the rice grains absorb the spices, and juices.
  • Add a 1/4 Tsp ghee, mix and set aside for atleast 30 mins before serving. 
Notes: 
  • If you are making a big batch of powder, skip the dry coconut as it spoils faster than other ingredients. You can add a handful of grated dry coconut to the seasoning for a slightly different but delicious variation. 
  • Add cashews instead of peanuts if you prefer. 
  • Secret of good vangibhaath is in roasting the ingredients for the powder. If you watch the chefs in weddings, they roast the spices in a lot of oil as they want to enhance the taste and also get it done quickly. To achieve the same results without the oil, you need to be patient while roasting the spices. Giving the dals a little head start ahead of other ingredients helps get them all crunchy and cooked. 

Sunday, August 24, 2014

Gobi Bhaath (Cauliflower Rice) - Subtle and mellow on spices, huge on flavors

Cauliflower or Gobi is a winter vegetable in India, I find it in all seasons here. Small insects inside the florets are expected norm in Indian cauliflowers and that is why they are dunked in hot salt water before cooking, here the florets are all insect free and ready to use. If inclined, I can even get a chopped and ready to use packet of Cauliflower florets, though I prefer to get a nice, fresh head of the vegetable and cut it myself :-).

No one who cooks, cooks alone. Even at her most solitary, a cook in the kitchen is surrounded by generations of cooks past, the advice and menus of cooks present, the wisdom of cookbook writers" - Laurie Colwin

Cooking for me is all about memories and reminiscing the experiences, every dish I cook brings back something from the past and hence it never tastes the same even if I follow a recipe to the tee. But it is also about making new memories and experiences as we journey along in life, agree?
We went to watch a movie called '100 foot journey' yesterday, DD was reluctant to accompany since it promised to be a gastronomically inclined movie. For all the passion I have in cooking and food in general, my only child doesn't exhibit the same traits. I am a totally positive person and think that she is a late bloomer :-), we will wait and see. While she enjoys good food, she doesn't dissect to smell, taste and enjoy every morsel like I do. On the good side she is happy with most of what she is fed.
Back to the movie, it is full of food, in every conceivable way :-), why not since it tries to show case Indian and French cuisines, right?. There is a funny feud very well portrayed by 2 actors I love to watch (Helen Mirren as Madame Mallory and Ompuri as Papa Kadam), and the rest of the cast is great too. The blaring music, bold flavors and bright colors of Indian cuisine & culture contrasts completely with the subtlety of the French food, and the two groups end up just 100 feet apart from each other. While one is native and established with a Michelin star, the other is uprooted from familiar territory and trying to find a home in an unknown country, the only common thread is food. But food in the two camps is totally desperate in the ingredients, way of cooking, serving etc. War breaks between the two establishments, until Madame Mallory finds the potential in the young cook (not chef mind you!) of the newly arrived family and takes him into her fold. The movie touches Michelin starts (if you are a foodie, you definitely would have heard about this) and the innovations that turn cooking into a science in the race after the twinkling stars. He brings her 2 stars within a year and goes off to bigger adventures (no spoiler alert, go watch the movie if you are piqued :-)). Like Papa says, "breaks do break for a reason", they find their heart's desire in that quaint village and discover compatibility where none seemingly exist at the beginning of the story.
But the movie is also about finding the best mushrooms by the side of the stream in the village, feeling the sea urchin and being able to imagine its taste when cooked, looking deep inside your heart and using the wisdom of generations before, feeling & smelling a spice box that has been in the family for generations, making food with your loved ones and enjoying it. I relate more to this type of cooking than the scales & measurements. I am not averse to invention but I want to understand the taste of the familiar first before I go after the unfamiliar. For me recipes in books do not mean a whole lot until they come into my heart and into my pots (lines shamelessly stolen from the above mentioned movie :-)). I love to cook feeling every ingredient. Whether you spoon in spices (Papa) or sprinkle them (Madame Mallory), ultimately it is all about food that touches your senses and brings you visions of home.
I made this cauliflower bhaath (or Gobi bhaath as we call it) for our brunch yesterday. Like I have said before, this vegetable got into my repertoire only after marriage. Amma makes Gobi bhaath using her 'all purpose podi' which is a family favorite. While I make it that way sometimes, I also make this flavorful bhaath that we enjoy. Spices are mild in this recipe, at best sprinkled (I can see Papa Kadam scoffing at it :-)) and do not over power the taste of the vegetable. Gobi itself is cooked tender but does not fall apart and remains moist with the juices of the masala. It is a perfect lunch box item and a full blown meal if you add a yogurt based raita on the side. I do not typically add potatoes but it is definitely an option.
What do you need to make Gobi Bhaath? 
1 medium sized head of Cauliflower/Gobi
2 cups rice (Basmati preferred)
2 small bay leaves
1/4 Tsp turmeric powder
1 Tbsp salt (adjust to taste)
1/2 Tsp garam masala powder
1 Tbsp oil
To grind: 
i/2 cup onion chopped roughly
1/2 cup tomatoes cubed
2 green chilies
1 inch piece of ginger
Dry roast & powder:
2 pieces of 1 inch long cinnamon
2-4 cloves
2-3 pieces of mace
1 green cardamom
pinch of nutmeg
8-10 black pepper corns
How do you make Gobi Bhaath?
  • Chop and separate the florets of Gobi. Keep them dunked in warm water with a little bit of salt for 10-15 minutes. 
  • Take them out, clean once under running water. 
  • Soak rice in 4 cups of water for 20-30 minutes. 
  • Take a big pot that can hold all of the gobi, add water to submerge all the pieces, add 1/2 Tsp salt and 1/4 Tsp turmeric powder, cover and let the water come to a roaring boil softening the pieces. 
  • Switch off, drain all the water and keep the gobi until needed. 
  • Dry roast the spices listed under 'dry roast and powder', use a cast iron pan and on medium heat, roast the spices for 2-3 minutes until fragrant.
  • Take them to a blender and powder them coarsely. 
  • Add the rest of the ingredients listed under 'To grind' and make a smooth paste. 
  • Heat oil in a heavy bottom pan or pressure cooker. 
  • Add the ground masala paste and fry for 2-4 minutes or until the raw smell reduces. 
  • Add the par cooked gobi florets along with the bay leaves and mix them well to coat with the masala. 
  • Drain water from the rice, wash it twice in running water and add it to the pan. 
  • Add 3 cups of water (remember the ground masala adds to the liquid content), garam masala and salt. 
  • Stir in gently to mix, cover and cook on medium heat for 15 minutes or until rice is cooked and fluffy. 
  • Switch off and let it stand for 5-10 minutes before using a spatula to fluff up the rice. 
  • Your fragrant gobi masala rice is ready. 
  • I served it with a simply delicious tomato-onion raita made with fresh tomatoes from the backyard. 
Notes: 
  • Take care not to over cook gobi pieces the first time, they will continue to cook along with rice. 
  • Cut gobi into big pieces so they do not disintegrate on cooking. 
  • You can add par cooked potato pieces & green peas to the rice. 
  • Garnish with chopped cilantro before serving. 
  • If you like crunchy gobi pieces in the rice, cool the par cooked gobi completely, roast them in a couple of tbsp of oil until they are cooked and crispy, add these to the rice before serving and fold them in. 

Wednesday, February 12, 2014

Achari Chole Pulav - pulav made with freshly roasted pickle spices

I promise I won't talk about weather today, not even the declared emergency in the Southern states and the layers of ice.. I am completely done with (just reading about and hearing of) the weather this year, I can't imagine how people affected directly are managing. I personally am enjoying the temperatures here with a little bit of snow thrown in for variety last weekend which by the way is completely gone and the roads are safe and clear.

Now onto other interesting topics :-). After having worked at my last company for 6 years, 2 of which remotely (yep, I was the working woman in my pajamas :-)) which kind of explains the flexibility I had to do other things, I finally bid adieu to that work and have accepted an offer to work in the Marissa Meyer style :-), I get up, get dressed, go to an office and work. I am on that 'in between' 2 weeks right now before starting off in another 10 days. Working from home while has its perks also comes with its list of woes, first & foremost from people asking me incredulously, "How do you do that?". It is simple really, just draw the lines on what can and cannot be done during your work hours and you will keep the productivity high come rain or shine :-). That was a phase of life, I accepted and enjoyed but it is now time to change some gears, I am looking forward to my new stint, will keep you all posted.
Obviously this is a change and like all changes it will take some time to become used to. Does that mean I am going to stop blogging? Heck, no, not a chance. This activity has brought so much of personal satisfaction I can't even begin to describe it to anyone, it has been an anchor on bad days and made me feel like a soaring bird on better days. As I start my new adventure, I might skip some beats but I am sure things will fall into place like they always do. Until then, my dearest readers, please hang in there with your support, visits and feedback.

I am using these 2 weeks of break to read, read and read a lot of books that were on my list (like I am either starved or will never again get time in my life to read :-)), it feels like old days in school and college when the first thing I would do after every set of exams was to go to the library and get an armload of books and sit in a corner of the big yard and read to my heart's content. One thing, I couldn't do then was to ever sleep without finishing a book, so there were many long nights. I haven't been able to do that in many years but finally did that last few days :-) and it felt so.. good.

I got a few books this past week, while some are worth talking about, a few were bad choices and better left alone. If there is one thing I would say without an instant's delay when I asked what I like most about this second home of mine is the public library system here. Coming from India, I had spent most of my childhood and young adulthood in libraries I thought had a great collection. My parents being voracious readers themselves, got us books to read from every possible place. If there was a library in the neighborhood, I definitely had been there at some point. But nothing had prepared me for the experience of the easy accessibility of public libraries I find here. They are free, they have huge collection and are every where. DD literally grew up in those cozy rooms filled with shelves of books since she was a toddler. The first thing we would do when her summer vacations started every year was to go the local public library and sign up for summer reading though she didn't need any incentive for reading. I am glad she enjoys reading just for the fun of it.

So back to the list of books I enjoyed recently, here are some. Hope you like some or most of these, do let me know and we can strike a conversation.
ElseWhere by Richard Russo
This is a memoir, a beautiful story of the author's relationship with his mother. Having been brought up by his single mother, it traces how the dependency equation changes as they grow older. The mom is someone who is born and grown up in a small industrial town that is in ruins and wants to get away, but as the memoir unfolds you will see that it is not from that town she wants to really get away but doesn't feel settled and happy anywhere else either. There is a heart breaking diagnosis he makes post her death which seems to give him some understanding of things. For me, all that mattered was the bond that is forged between the mom and the son. It is not a light read definitely, tugs you down at places but I enjoyed it very much. So I went ahead and got another book from the same author, 'Nobody's Fool', haven't started it yet.

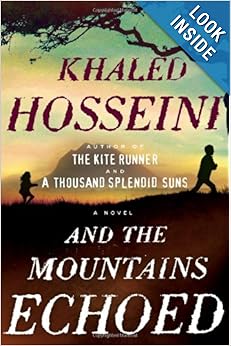
And the Mountains echoed by Khaled Hosseini

Having read his earlier two books, I was waiting for this one to come out but didn't get a chance to get my hands on it until now. There are some books you cannot read in a hurry, they have to be slow reads, pondered over, felt in the bones and that is the only way to enjoy them. KH's books are like that, you cannot read them at one stretch because the subject invariably is heavy at the same time you cannot read a couple of pages (like I am doing my next one here), leave it lying on the night stand and return after a few days/weeks. Like his previous novels, this is set in Afghanistan too but the characters take you around the world to Greece, Paris and California, the story is told in first person by different characters and you can almost feel their life and see it unfold infront of your eyes, very vivid, almost graphic description - that is the power of his narration.

American Pie by Peter Reinhart

Well, there had to be atleast one food related book, right? I was looking for his other book 'Bread Baker's apprentice' but all the copies were out and I am on a hold list for it. I first saw a PR's pizza recipe in a magazine and made it at home last year, it was an instant hit and I fell in love with this master's recipe and techniques. Also, I gradually found out that he is one of the most revered baker, baking instructor and is most passionate about pizza making. This book has recipes at the end (I haven't gotten there yet) but what interested me is his search for finding the roots of this pie and find the best of it. There is a lot of travelogue and history associated with each place he goes to and it is as delicious as a perfectly baked pizza' :-). I am still savoring it.

Back to the recipe today, what I have is a very aromatic, tangy and spicy pulav that is so simple to make you will be licking your fingers longer than it took to actually make the rice. I saw this recipe in a cookery book by one of my favorite chefs who passed away recently - Tarla Dalal. I really salute the lady for her versatility and the sweet nature that seemed to exude in her TV appearances. However, I have found that I do not personally enjoy her recipes when made exactly to the Tee but take an idea from her, apply some of my own personality, the dish will invariably be a hit. This is what I mostly do with TD's recipes, a little change here, an addition there, some variation and I am good to go. This achari chole pulav can be made on any day with some basmati rice, a can of garbanzo and some spices. There are no vegetables here and hence is perfect for the day when you have just cleaned up your refrigerator and not yet restocked it.
For a South Indian by birth and nurture like me, pickle masala has a different connotation than what it includes in North Indian pickles. Mustard, red chilies and fenugreek are the common spices but North Indian pickles add some more. While I do not necessarily enjoy these spices in pickles, I have realized I love those flavors in curries and this rice. TD's recipe asks you to just roast the whole spices in oil but I feel they make a better impact when coarsely powdered to release their flavors. You can do it either way.
What do you need to make Achari chole pulav? 
1.5 cup basmati rice
1.5 cups cooked garbanzo beans/chole
1 cup long sliced onion
2 Tblsp oil
1 cup yogurt (slightly sour and a day old works best)
1 Tsp salt (adjust to taste, remember pickle has loads of slat already)
1/2 Tsp cumin
1 bay leaf
1/8 Tsp turmeric powder
1/2 cup chopped mint
1 Tsp mango pickle/thokku (use good quality flavorful pickle for best results)
2 green chilies
Achari masala:
1 Tblsp mustard
3/4 Tsp fenugreek seeds/methi
3/4 Tsp nigella seeds/kalonji
1 Tblsp fennel seeds/saunf
4-5 red chilies
How do you make Achari chole pulav? 
  • Soak rice for 25-30 minutes.
  • Wash and rinse in 2 changes of water.
  • Make a coarse powder of the achari masala.
  • Heat oil in a heavy bottom pan or pressure pan, add cumin and bay leaf.
  • Once cumin sizzles, add onion, let brown slightly and turn limp, stir once or twice.
  • Add the ground powder and roast for 30-45 seconds.
  • Add chopped mint, yogurt and pickle and mix well.
  • Add chole and let it cook on low heat for 7-8 minutes to get the flavors to the core of garbanzo beans.
  • Add the washed rice, give a gentle mix and add 1 cup of water(See NOTES below).
  • Cover with a tight fitting lid, simmer the heat and cook for 15 minutes. 
  • Open the lid and check if it needs additional water, adjust accordingly, cover back and continue to cook for another 5-7 minutes. 
  • Switch off & let it sit for 10 minutes before opening the lid again and fluffing the pulav with a fork. 
  • Steaming hot, bursting with flavors pulav is ready to serve. 
Notes: 
  • Basmati rice especially when soaked before cooking takes less water, you will also need to count the amount of liquid that is already in the pot as yogurt. Adjust water accordingly. I would start with that 1 cup and sprinkle a couple of spoons if the rice looks very dry at the end of the first 15 minutes of cooking. 
  • The quality and taste of the pickle you use matter a lot in this rice, mango pickles (just the masala part with no mango pieces) work best especially the Andhra avakkaya or the thokku. Original recipe uses green chili pickles as an alternative.
  • You can add paneer cubes marinated in the pickle flavors to this pulav for added protein and taste. Toss paneer cubes in 2 Tbsp of yogurt mixed with 1/4 Tsp of the pickle masala powder and a pinch of salt, keep aside for 20-30 minutes. Add them towards the end of cooking process. Use directly if you have fresh paneer or toast them lightly in oil if using the frozen variety. 

Friday, January 4, 2013

Ottu shavige - Dreamy white, Indian angel hair pasta with rice flour

Some memories are a full 4D IMAX experience, don't you agree? They have picture, sound, smell and taste. All I have to do is close my eyes to relive those moments. Some other memories leave you searching for details but you can't forget the impact they have had on you. Both are good and needed for a wholesome experience. Since the time I posted my Lemony rice noodles recipe here using a short cut, I have been craving to write about the real deal. What is the big deal, you may ask? It is, it was a huge deal growing up and lot of planning and preparation went into making those melt in the mouth ottu shavige(ottu~pressed, shavige~noodles).

Anna spent a year in Mangalore as part of the usual government transfers while we stayed back in Mysore for schools & other things. Anna used to visit us once a month or so and we would all be eagerly waiting for him to reach home from the bus stand. Once when he came, he had a heavy box on his shoulder and we were all dying of curiosity until he had his dinner and opened the box. He had bought a ottu shavige maker in Mangalore (I don't think it was easily available in Mysore at that time) and brought it with him on the bus and carried it home. Thus started our ottu shavige experiences. This sturdy machine dished out huge quantities of ottu shavige for many, many years until it was retired to a top shelf (to give company to many other 'not anymore used' large family utensils) quite recently.

While Anna didn't really cook on a regular basis, there were days he would enter the kitchen and make something so delicious and spoil us that we refused to eat if nammamma made the same dish equally well :-). Making Ottu shavige was like a festival, it would be on the menu if family was visiting or if there was a reason to celebrate. I have a picture of my parents in our Mysore kitchen both bent around the ottu shavige machine on the floor, nammamma feeding the steamed balls into the machine and moving the plate underneath to ensure the noodles didn't form a lump in one place while Anna kept turning the handle above to produce those thin noodles - well I don't have an actual photo, it is in my heart. Making the basic noodles is only half the job done, and there several options to serve it depending on whether you like a sweet shavige or a savory one. Nammamma usually prepared one sweet kind and one savory kind, look for serving suggestions below.

There are 2 ways of making the ottu shavige, the first one involves preparing the dough, making the noodles and then steaming them which is very popular in Tamil Nadu & Kerala and the second one is where the dough is prepared, balls steamed and then noodles made which is what nammamma does and I follow this 2nd method. If you have the press kind of murukku maker, the first one is better suited and if you are using the rotate kind of murukku maker, the second option works well. I don't have a ottu shavige maker but make do with this fantastic murukku maker I found in my Indian store, if you get the dough right and employ a strong, muscular person in the kitchen you can make this on large scale without breaking a sweat :-).

When nammamma made the ottu shavige, she prepared the rice powder at home. Rice would be washed, drained and set to dry inside in shade until the moisture is gone. Then it is fine powdered and used in Ottu Shavige or Bili Rotti. I buy the idiyappam flour from the store which works perfectly well and skip one step to make it easier. If you have the time and inclination, go ahead and make the rice powder at home, see detailed procedure at the end of this post.
What do you need to make basic Ottu Shavige? 
Serves 4 adults for a heavy breakfast, makes about 6-8 steamed balls
3 cups idiyappam flour** or home made rice powder
4 cups water
1/2 Tsp oil
**I used Nirapara brand and the proportion of water & rice powder works perfectly.

How do you make Ottu Shavige?
  • Heat water with the 1/2 Tsp oil in a big pot and bring it to boil.
  • Add the rice flour and let it cook on medium heat for 2-3 minutes while the water boils over the flour and makes it all wet, do not disturb this for the 2-3 minutes. 
  • When water has bubbled over all the dry powder, take a strong wooden spoon and vigorously mix the powder in to the water to form one big mass.
  • Switch off the stove and let it stand for a few of minutes until you can comfortably handle the dough (the dough should not cool off though).
  • Keep a wide bowl of cold water ready to dip your hands in. 
  • While the dough is still warm, dip your hands in the cold water (but do not carry any extra water to the dough)and pinch off tennis ball sized dough, knead a little to make a smooth cylindrical shape, arrange them in a pressure cooker or steamer vessel. 
  • When all the dough is made into balls, steam it in the pressure cooker or steamer for 15 minutes - Do not use the pressure cooker weight, this is similar to making idlis. 
  • Switch off the stove, get your murukku press ready and wet the inside walls of the murukku press with a few drops of water. While the steamed balls are still hot, put them inside the murukku maker and press into strings of thin noodles. 
  • We like this thin and I use the smallest hole plate for the murukku maker, you can change it according to your preference. 
  • Press the shavige into a wide plate, moving the murukku maker around the plate so the strings form a sparse layer and not become lumpy. Transfer over to a big bowl by inverting the plate on top of the bowl and leave it to become cool before you season them. 
How do you serve Ottu Shavige (some suggestions, follow your heart and taste buds)?

Savory variation 1: Lemon Shavige
Heat 2 Tblsp of oil, add 1/4 Tsp asafoetida, 1 Tsp mustard, 1 Tblsp chana dal, 1 Tsp urad dal, 2 Tblsp peanuts, a few curry leaves, 1/4 Tsp turmeric, 2-3 chopped green chilies. Roast them until the dals and peanuts are crisp. Pour it over the ottu shavige, add salt to taste, lemon juice, 2 Tblsp grated coconut and mix gently breaking the long strands ever so softly. 
Savory variation 2: Hasi chutney shavige
See procedure here

Savory variation 3: Chutney pudi shavige
Take a bowlful of the white noodles, add a couple of spoons of home made chutney pudi, 1/2 Tsp oil and a pinch of salt to taste. Mix  it in gently and enjoy.

Sweet variation 1: With Gasagase payasa
Serve the rice noodles with a bowl of warm gasagase payasa. Pour the payasa on top of the noodles, mix gently and slurp it in. 
Sweet variation 2: Ellu-bella
Roast 2 Tblsp of white sesame seeds for 2 minutes. Powder them in a dry grinder, add 2 Tblsp of grated jaggery, a pinch of cardamom powder, 1 Tblsp grated coconut and mix it all with fingers. Add this to the white noodles and enjoy the flavorful sweet shavige.

Others: In Kerala and parts of Tamil Nadu, the white noodles are typically served with stew.

Procedure for making rice flour at home for ottu shavige:
  • Wash 2 cups of rice in 2-3 changes of water and drain the water. 
  • Spread a thin cotton cloth inside the room and spread the washed rice on top of it. 
  • Let the moisture go away by drying it in shade for a couple of hours. The rice should feel dry & brittle to touch.
  • Make a powder of this dried rice and sieve it get a very fine powder, take the residue back and run it in your blender. Repeat until all the flour is superfine. 
  • Store it in air tight containers for use in ottu shavige or rotti etc. 
  • 2 cups of rice yield about 2+1/4 cups of the powder.
Notes: 
  • There is a very huge difference in taste and texture between the store bought rice noodles and the home made ones and it is definitely worth the effort. 
  • If you are using store bought idiyappam flour, follow the rice to water proportion on the package. 
  • Do not let the dough become cool before making balls or before pressing them into noodles. This will render shavige hard and also make it very difficult to run the murukku maker. 
  • I don't put salt while making the dough as we usually eat it both sweet & savory, mixing salt later works as well. 
  • As you can see, this is a 2-people task atleast until you get comfortable with it. So make sure you ask for help in the kitchen.

Tuesday, October 2, 2012

Lemon Rice - very basic, very delicious

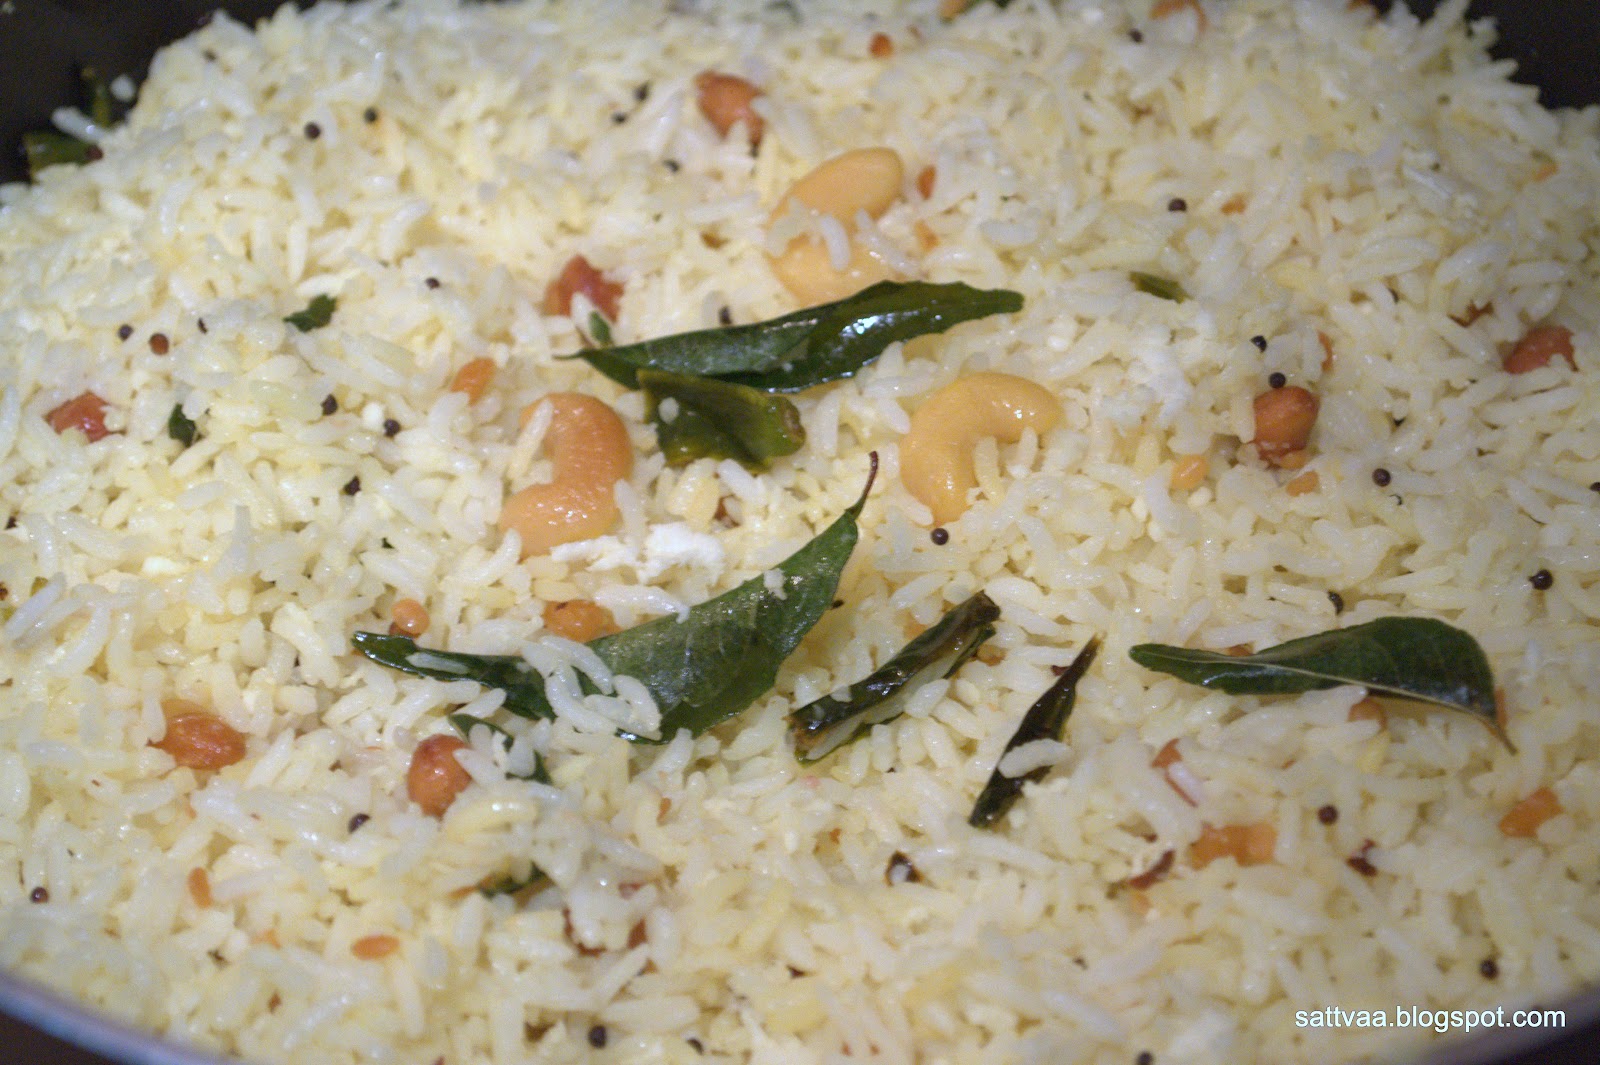
Lemon rice has been one of my favorite lunch box recipes for ages. There is something about recipes that makes them click as lunch box recipes and I know what I am talking about since I have been carrying lunch box from my high school days. I love single pot rice items including the humble, every day staple like yogurt rice, I take variations with poha, quinoa. BH is on to salads or oats with vegetables and chickpeas. Our lunch boxes get dressed up with ildis or chapathis/paranthas but never with Dosa :-).

When I got married, amma not only cooked for all of us office goers at home but since she heard that I was used to lunch boxes from nammamma, she started making lunch for me specially. The son never was in the habit of carrying lunch from home so it was a new experience for her making lunch. She went out and bought a 3 tier lunch box (the steel tiffin carriers you see in India) which I never had before and started packing me lunch. I was, to say the least very uncomfortable with this arrangement for one I could never finish all that was stuffed into those boxes and secondly I felt extremely guilty for not only leaving home without any daughter-in-law chores done but also making my MIL prepare lunch for me.

Being the new DIL, I didn't have the heart or guts to tell her not to take the trouble of getting my lunch ready. However I told her that I would carry the breakfast for lunch too with some mosaranna (yogurt rice) to fill that 3rd box. She had made Dosa one morning and packed dosa and chutney with the usual mosaranna. BH & I, while on our way to work, decided on a whim to take a day off and go on a picnic. We packed some naan and curry from a dhabha, called home to let them know and went away. At lunch time, I opened my lunch box also and the dosa had become a cardboard and was in stark contrast to the buttery curry and melt in the mouth hot naans. I always said no to lunch boxes on the days we had dosa breakfast from then on :-).

Back to the lemon rice, this is a very humble (see the ingredients list and you will know what I am talking about) and standard item in most South Indian homes with regional variations. This is called 'Chitranna' in Kannada. Once you have the basic recipe, you can play around with this lemon rice to either dress it up or down depending on your preference and the occasion. Look for some ideas at the end of this post. I made this lemon rice for the Ganesha habba recently and the post has been in my draft ever since.
What do you need to make Lemon rice? 
1 cup rice (preferably Sona masoori variety)
1/4 cup fresh squeezed lemon juice (more or less based on tartness you prefer)
1 Tblsp grated coconut (fresh or frozen)
1/4 Tsp turmeric powder
1 Tsp salt (adjust to taste)
For seasoning:
2 Tblsp oil
1 Tsp mustard
1 Tsp Urad dal
1 Tsp chana dal
1 Tblsp peanuts
1 Tblsp cashew nuts (optional)
6-8 curry leaves
3-4 green chilies - chopped into small pieces
1/2 Tsp asafoetida

How do you make Lemon rice? 
  • Cook rice (rice cooker, open vessel or pressure cooker) so the grains are completely cooked but separate. 
  • Spread the rice in a wide plate, add salt and let it cool.
  • Heat the oil in a pan, add the mustard, dals, peanuts and cashew nuts (if using) and fry until mustard starts to sizzle. 
  • Add the chopped green chilies, asafoetida, turmeric and curry leaves and continue to fry until green chilies form small blisters, switch off and pour it over the rice. 
  • Add the grated coconut, lemon juice and mix everything together gently so the rice doesn't get mushy. 
Notes: 
  • Use fresh lemons for the lemon juice if you can, the taste is different when you use bottled or preserved lemon juice. 
  • Make fresh rice for this simple recipe to taste truly delicious. 
  • You can skip coconut but I would strongly recommend using it.
  • When you cook rice, add a few drops of oil to get a fluffy texture. The rice should be cooked well, else the lemon rice turns dry.
  • Add turmeric towards the end to the seasoning to avoid burning. 
  • Add the lemon juice to the mixture only when the rice has cooled down.
  • If you are using frozen coconut, thaw it and bring it to room temperature before using.
  • Use longer pieces of green chili to make it easier for little hands to pick them out. I slit them vertically before cutting them into pieces to increase the chili heat.
  • Increase the amount of turmeric powder upto a 1/2 Tsp for a brighter yellow color, I like it mildly off white. Too much of turmeric brings a faint bitter taste.
Variations: 
  • Add cubed, par boiled and shallow fried potatoes for a carb rich lemon rice. 
  • I add cooked green peas to the rice for some proteins. You can use frozen peas, just thaw them to room temperature and add them in the seasoning with the green chilies.
  • Garnish with finely chopped cilantro or coriander leaves for added flavor.