Showing posts with label One pot meal. Show all posts

Sunday, March 29, 2015

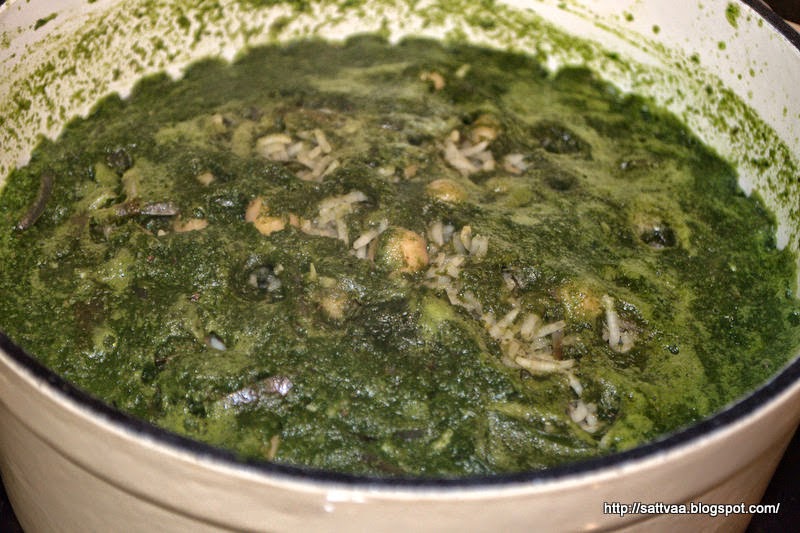
Avarekalu-Menthya soppina bhaath - a single pot rice dish needing no pre-made powders

Before I forget to wish you all, Happy Sri Rama Navami to all my readers celebrating the birth of Lord Rama. By the time I got to writing this post, Ramanavami for 2015 had already slid into the past making me late again with my wishes. But as I always say, "better late than never". Hope you all had a good celebration, ours was simple with kosambari, panaka & hesaru bele payasa. Filling, very satisfying and saatvik :-).

On my not posting regularly, I won't even go there :-(.  I was thinking yesterday of making a really catchy poster to adorn my home page and say something to the effect of, "Gone missing, will be back as soon as life slows down a teeny bit" but then I thought if I have the time to think up and make up fancy posters, I might as well sit myself down and write the posts for some of the recipes that have been languishing in the draft folder for a while now. Ironically enough, I was attending a 3 day talk last weekend about life management and managing time was the topic of day-1 :-).

Here I am with a family favorite and extremely easy to cook up, one pot rice dish that brings together 2 of my favorite ingredients - fresh fenugreek leaves for its characteristic fragrance & taste and avarekalu (papdi lilva) for the love of beans :-). I have another delicious version of rice made with fenugreek leaves that uses Vangibhaath powder, check it out here if interested.
I believe I have already professed my love for avarekalu and written my ode to this humble beans many times over on the blog, here, here and here. Recently a reader from Michigan reached out to ask some questions about averekalu and I felt as glad as he did when he wrote back a week or so later to say he did find them in his local grocery store and made yummy dishes with it. It feels good to come across folks with similar tastes and I am glad my little posts spread some (avarekalu) love to others living away from home.

Nammamma made this version of the bhaath towards the end of avarekalu season when the beans would be mature and plump but not very juicy or fragrant. Back home in Mysore, the beans would first announce their arrive with that very distinct fragrance and as soon you picked them, your hands would undoubtedly be coated with a thin layer of sticky substance (we called it 'sone' in kannada, not sure if it has a name in other languages) which was all part of the avarekalu experience. Adding methi or fenugreek leaves perfectly complements the flavor in this rice. I made this rice recently knowing fully well that my few weeks of avarekalu enjoyment was coming to an end here.

This dish does not need any pre-made spice powders and is very easy to prepare. It has carbs(rice), protiens (beans), nutrients & flavor (fenugreek leaves) and hence makes a perfectly wholesome meal. This can be done in a single vessel from start to end - less cleaning, less wastage and environment friendly :-)
What do you need to make averekalu-menthya bhaath? 
2 packed cups of fresh fenugreen leaves
1-1.5 cups avarekalu (Papdi lilva)
2 cups rice (use sona masoori preferably)
1/2 cup chopped onion
1/2 Tsp cumin
1 inch piece of ginger
1 inch piece of cinnamon
2 cloves
4-6 black pepper corns
3-4 green chilies (adjust to taste)
1/2 cup coconut (fresh or frozen)
1 Tsp salt (Adjust to taste)
2 Tbsp oil
How do you make averekalu-menthya soppina bhaath?
  • Chop washed fenugreek leaves. 
  • Wash and soak rice for about 20 minutes (this speeds up the cooking process)
  • Take a heavy bottom pan (or pressure cooker) and heat it on medium heat. 
  • Add cinnamon, black pepper & cloves and roast for about a minute until they warm up and become fragrant. Take them aside and let cool. 
  • Make a rough powder of the spices when cool, add ginger, green chilies and coconut to the blender jar, use 1/4 cup water and grind into a fine mixture. 
  • Add 1 tbsp oil into the pan (or cooker) and let it heat up. 
  • Add cumin and when it sizzles, add chopped onion and let it sweat lightly.
  • Add chopped fenugreek leaves and fry until they wilt, 2-3 minutes. 
  • Add the averekalu (or other beans you choose) to the pan and mix it with the fenugreek leaves. 
  • Add salt and mix them together. 
  • Add the ground masala mixture and let it cook for just a minute. 
  • Taste and adjust salt if needed. 
  • Drain all the water from the soaked rice and add it to the pan. 
  • I use 1:2 (rice:water) ratio for making these rice preparations, and add 3 & 3/4 cup (discount 1/4 cup used for grinding) water into the pan. 
  • Let it come to a boil. 
  • Close the pressure pan with the weight and cook it for 3 whistles. 
  • If you like to open cook, reduce heat to low, cover the pan and cook until rice is soft. 
  • Let it stand until it is warm. 
  • Fluff it gently with a spoon, and serve it warm with any kind chips, fryums or yogurt based raita. 
Notes: 
  • You can precook rice (make sure you use the right amount of water to get fluffy rice) and mix the rest of the ingredients, I think the flavor is more enhanced when you cook them all together. 
  • If you don't get avarekalu, replace it with mutter or green peas, frozen lima beans or other beans you prefer. 
  • The spice comes from the black pepper, ginger & green chilies - adjust them to your liking. 

Sunday, January 25, 2015

Vangibhath - One pot rice dish, a quintessential kannadiga staple

Another week passes by with much happening and here I am on a Sunday evening with a delicious, traditional recipe from home. Many of you have asked me for this recipe in the last year or so, I had to put it off until now to make sure I got consistently great results with my powder before I shared the recipe with you all. There are some recipes that though you have the exact measurements, something seems to be lacking when you make them. If you ask nammamma, she would say, "kai palagabeku" which translates roughly to "you need to become more experienced with practice". I believe I have reached that stage with Vangibhaath powder now.

Vangibhaath is a traditional rice preparation in Karnataka, attend any wedding or other auspicious ceremonies, you will get to enjoy the taste of this divinely delicious item. Though vaangi is not a kannada term, it is more closely related to vankaya (brinjal in Telugu) or vangi (Brinjal in Marathi), the name vangibhaath has stuck in Karnataka homes. This is prepared very differently from the bhaath in Maharashtra which uses goda masala.

Vangibhaath is typically flavored with spices such as cinnamon, cloves, nutmeg, mace and coriander seeds. The heat comes from both black and red pepper. Spices are toned down from the sweetness of coconut and the unmistakable asafoetida is added for flavor. Once the powder is ready, you can go creative with the usage. Brinjals do not have to be the 'be all, end all' vegetables for this recipe, you can use green peppers, colored peppers, combination of vegetables such as green beans, carrots, green peas etc. Whatever choice of vegetables makes you happy (within a certain boundary ofcourse, don't use radishes in vangibhaath :-)). You can make a super yummy masala upma by throwing a spoon full of this powder while making uppittu or upma. You can even use this powder to make quinoa bhaath like I did here.
This has to be the very first recipe I cooked as a new bride when I got married. With a brinjal crazy FIL, anything with eggplants is heartily welcomed at the dining table in our home. Those were the days, I was not a very confident cook in the kitchen especially in a new kitchen. But the bhaath turned out delicious (secret being the powder nammamma had sent with me) and I was crowned the defacto vangibhaath queen. Like everything else, nammamma always made this powder in large quantities and used to store, I prefer to make small batches and finish it off quickly.

In Mysore home, the preferred brinjal for the bhaath was always the light green, long ones called eeranagere (village where the vegetable came from) badanekaayi(brinjal in kannada). I do not remember amma using any other brinjals for this recipe. These brinjals were slender, devoid of seeds and held their shape without going all mushy on you upon cooking. I have not seen the green brinjals in ages now and make do with the Japanese purple eggplants. Do not use the big eggplants as they tend to be more fleshy and collapse into a watery mess after cooking. You need to take a few precautions while cooking eggplants from an aesthetic and taste perspective. I have noted a few lines below on what works for me, feel free to follow suit. If you get the green eggplants, good for you, make the bhaath and don't forget to send me some for taste :-)
On a recent trip to Chennai when we were in India, cousin L made Vangibhaath for all of us and it tasted delicious as always, she said her powder recipe has an ingredient called dagad phool or stone flower. I had never heard of it until then, not something used in South Indian spice powder preparation. L even swore that dagad phool was what made the difference to Vangibhaath and offered to pack me some of it to carry. It looks like dried, crumpled paper that you lift midway from getting burnt at the fire, doesn't have any smell in its raw form but I was told that it adds a woody, smokey aroma to the powder when roasted and mixed. I am a little bit of a stickler to traditional recipes in certain areas especially when trying to reproduce the smells and tastes from nammamma's kitchen. She made one of the best vangibhaath in the entire world :-) and I like to stick to her tried, tested and enjoyed recipe.
If you happen to find dagad phool in a store near to you, go ahead and use it but I will promise that the powder recipe below (without dagad phool) makes a delicious vangibhaath. This is how my mom made it always and I believe I have her recipe nailed down correctly.

Before we go into the recipe details, here are a few things I want to discuss with you, please pay attention especially if you are a first timer to this recipe, just making some grand declarations, nothing serious :-).
  • There is no onion, tomato or garlic in Vangibhaath, it is a saatvik preparation and do not add these ingredients unless you are ok turning it into a fried rice of some sort. 
  • Amount of tamarind depends on your tolerance for tartness, so use judiciously. Nammamma used to soak dry tamarind, extract the juice, let it boil for a few minutes with the vegetables until the water evaporated, I however take a short cut with the ready made tamarind concentrate. Saves me some time, adds instant sourness, no liquid to evaporate or raw smell to boil. Choose whatever works for you. 
  • Kannadiga Vangibhaath traditionally uses a long grained rice like sona masoori. Any long grained non sticky rice should be good. I am personally not in favor of using Basmati variety for this as the innate flavor of rice conflicts with the spices. 
  • Eggplants in Vangibhaath should be cooked fully but hold up shape. 
  • I add potatoes just to make it DD friendly as she is psychologically averse and allergic to eggplants :-)
  • Vangibhaath is a slightly spicy rice dish with cloves, pepper adding to the heat, so nammamma always adds a small bit of jaggery while preparing it. I like the taste and continue the tradition. 
So here is the recipe for Vangibhaath from Nammamma's kitchen, hope it brings back memories of your own and also stands up to the expectations. Would love to hear from you all. By the way, the best side dish for vangibhaath is a cool yogurt raita. 

And for all my Indian friends, HAPPY REPUBLIC DAY!
What do you need to make Vangibhaath powder?
1/4 cup chana dal
1/8 cup urad dal
1/2 cup coriander seeds
1 Tsp cumin seeds
1/2 Tsp fenugreek seeds
1.5 inch piece cinnamon
4 cloves
6-8 black pepper corn
small piece of nutmeg
2-3 pieces of mace/jaapatre
4-6 curry leaves
1 Tbsp dry coconut grated
1/8 Tsp hing
8-10 dry red chilies (mix hot & mild varieties)
1/8 Tsp Turmeric powder
1 Tsp oil
How do you make Vangibhaath powder?
  • Add oil to a heavy pan and heat it on medium high. Add the dals and roast for a minute. 
  • Add the rest of the ingredients except for dry coconut and asafoetida and roast them stirring frequently until the dals turn bright pink in color and the spices give out a beautiful aroma. 
  • Add dry coconut, asafoetida, mix it once, switch off and let cool. 
  • When completely cooled, grind in a dry mixer jar or spice grinder to a powder, a rava like texture is perfectly acceptable.  
  • Keep in a closed container until ready to use. If you make in large quantities, freeze the powder, stays fresh for months. 
What do you need to make Vangibhaath? 
Brinjals - cut into 1/4 inch thick X1 inch long pieces - about 2 cups
Potatoes - cut into 1/4 inch thick X1 inch long pieces - about 1 cup
3 Tbsp of Vangibhaath powder
1/2 Tsp crushed jaggery
1/2 Tsp Tamarind concentrate 
1 Tbsp salt (adjust to taste)
3 cups cooked rice - sona masoori or long grained rice
4 Tbsp oil - divided use
1/4 Tsp ghee

Seasoning
1 Tsp mustard
1 Tsp chana dal (optional)
1/2 Tsp urad dal (optional)
2 Tbsp peanuts
few curry leaves
pinch of hing
pinch of turmeric powder

How do you make Vangibhaath? 
  • Wash and cook rice so grains are fully cooked but stay separate
  • Put into a wide bowl and let it cool down. 
  • Parboil potatoes until just tender, drain all the water. 
  • Heat 1 Tbsp oil in a wide skillet, add drained potatoes in a single layer, sprinkle a pinch of salt on top and roast them until they develop golden brown covering. 
  • Keep aside.
  • Heat another Tbsp oil, add brinjal pieces, cover and cook on medium heat for 2 minutes, remove cover, mix and cook for another minute covered. 
  • The steam from the covering will help brinjals cook faster and evenly. Once they are soft but still hold shape, add salt. 
  • Mix in potatoes, add tamarind concentrate, crushed jaggery and give a gentle mix. 
  • Add the powder, mix well, cover and cook for 2 minutes on low heat so the vegetable soak in the spices. 
  • Take it out and spread it on top of the cooked rice. 
  • Prepare seasoning, pour it on the rice+vegetables. Let it all cool down. 
  • With gentle fingers, mix them together so the rice grains absorb the spices, and juices.
  • Add a 1/4 Tsp ghee, mix and set aside for atleast 30 mins before serving. 
Notes: 
  • If you are making a big batch of powder, skip the dry coconut as it spoils faster than other ingredients. You can add a handful of grated dry coconut to the seasoning for a slightly different but delicious variation. 
  • Add cashews instead of peanuts if you prefer. 
  • Secret of good vangibhaath is in roasting the ingredients for the powder. If you watch the chefs in weddings, they roast the spices in a lot of oil as they want to enhance the taste and also get it done quickly. To achieve the same results without the oil, you need to be patient while roasting the spices. Giving the dals a little head start ahead of other ingredients helps get them all crunchy and cooked. 

Wednesday, February 12, 2014

Achari Chole Pulav - pulav made with freshly roasted pickle spices

I promise I won't talk about weather today, not even the declared emergency in the Southern states and the layers of ice.. I am completely done with (just reading about and hearing of) the weather this year, I can't imagine how people affected directly are managing. I personally am enjoying the temperatures here with a little bit of snow thrown in for variety last weekend which by the way is completely gone and the roads are safe and clear.

Now onto other interesting topics :-). After having worked at my last company for 6 years, 2 of which remotely (yep, I was the working woman in my pajamas :-)) which kind of explains the flexibility I had to do other things, I finally bid adieu to that work and have accepted an offer to work in the Marissa Meyer style :-), I get up, get dressed, go to an office and work. I am on that 'in between' 2 weeks right now before starting off in another 10 days. Working from home while has its perks also comes with its list of woes, first & foremost from people asking me incredulously, "How do you do that?". It is simple really, just draw the lines on what can and cannot be done during your work hours and you will keep the productivity high come rain or shine :-). That was a phase of life, I accepted and enjoyed but it is now time to change some gears, I am looking forward to my new stint, will keep you all posted.
Obviously this is a change and like all changes it will take some time to become used to. Does that mean I am going to stop blogging? Heck, no, not a chance. This activity has brought so much of personal satisfaction I can't even begin to describe it to anyone, it has been an anchor on bad days and made me feel like a soaring bird on better days. As I start my new adventure, I might skip some beats but I am sure things will fall into place like they always do. Until then, my dearest readers, please hang in there with your support, visits and feedback.

I am using these 2 weeks of break to read, read and read a lot of books that were on my list (like I am either starved or will never again get time in my life to read :-)), it feels like old days in school and college when the first thing I would do after every set of exams was to go to the library and get an armload of books and sit in a corner of the big yard and read to my heart's content. One thing, I couldn't do then was to ever sleep without finishing a book, so there were many long nights. I haven't been able to do that in many years but finally did that last few days :-) and it felt so.. good.

I got a few books this past week, while some are worth talking about, a few were bad choices and better left alone. If there is one thing I would say without an instant's delay when I asked what I like most about this second home of mine is the public library system here. Coming from India, I had spent most of my childhood and young adulthood in libraries I thought had a great collection. My parents being voracious readers themselves, got us books to read from every possible place. If there was a library in the neighborhood, I definitely had been there at some point. But nothing had prepared me for the experience of the easy accessibility of public libraries I find here. They are free, they have huge collection and are every where. DD literally grew up in those cozy rooms filled with shelves of books since she was a toddler. The first thing we would do when her summer vacations started every year was to go the local public library and sign up for summer reading though she didn't need any incentive for reading. I am glad she enjoys reading just for the fun of it.

So back to the list of books I enjoyed recently, here are some. Hope you like some or most of these, do let me know and we can strike a conversation.
ElseWhere by Richard Russo
This is a memoir, a beautiful story of the author's relationship with his mother. Having been brought up by his single mother, it traces how the dependency equation changes as they grow older. The mom is someone who is born and grown up in a small industrial town that is in ruins and wants to get away, but as the memoir unfolds you will see that it is not from that town she wants to really get away but doesn't feel settled and happy anywhere else either. There is a heart breaking diagnosis he makes post her death which seems to give him some understanding of things. For me, all that mattered was the bond that is forged between the mom and the son. It is not a light read definitely, tugs you down at places but I enjoyed it very much. So I went ahead and got another book from the same author, 'Nobody's Fool', haven't started it yet.

And the Mountains echoed by Khaled Hosseini

Having read his earlier two books, I was waiting for this one to come out but didn't get a chance to get my hands on it until now. There are some books you cannot read in a hurry, they have to be slow reads, pondered over, felt in the bones and that is the only way to enjoy them. KH's books are like that, you cannot read them at one stretch because the subject invariably is heavy at the same time you cannot read a couple of pages (like I am doing my next one here), leave it lying on the night stand and return after a few days/weeks. Like his previous novels, this is set in Afghanistan too but the characters take you around the world to Greece, Paris and California, the story is told in first person by different characters and you can almost feel their life and see it unfold infront of your eyes, very vivid, almost graphic description - that is the power of his narration.

American Pie by Peter Reinhart

Well, there had to be atleast one food related book, right? I was looking for his other book 'Bread Baker's apprentice' but all the copies were out and I am on a hold list for it. I first saw a PR's pizza recipe in a magazine and made it at home last year, it was an instant hit and I fell in love with this master's recipe and techniques. Also, I gradually found out that he is one of the most revered baker, baking instructor and is most passionate about pizza making. This book has recipes at the end (I haven't gotten there yet) but what interested me is his search for finding the roots of this pie and find the best of it. There is a lot of travelogue and history associated with each place he goes to and it is as delicious as a perfectly baked pizza' :-). I am still savoring it.

Back to the recipe today, what I have is a very aromatic, tangy and spicy pulav that is so simple to make you will be licking your fingers longer than it took to actually make the rice. I saw this recipe in a cookery book by one of my favorite chefs who passed away recently - Tarla Dalal. I really salute the lady for her versatility and the sweet nature that seemed to exude in her TV appearances. However, I have found that I do not personally enjoy her recipes when made exactly to the Tee but take an idea from her, apply some of my own personality, the dish will invariably be a hit. This is what I mostly do with TD's recipes, a little change here, an addition there, some variation and I am good to go. This achari chole pulav can be made on any day with some basmati rice, a can of garbanzo and some spices. There are no vegetables here and hence is perfect for the day when you have just cleaned up your refrigerator and not yet restocked it.
For a South Indian by birth and nurture like me, pickle masala has a different connotation than what it includes in North Indian pickles. Mustard, red chilies and fenugreek are the common spices but North Indian pickles add some more. While I do not necessarily enjoy these spices in pickles, I have realized I love those flavors in curries and this rice. TD's recipe asks you to just roast the whole spices in oil but I feel they make a better impact when coarsely powdered to release their flavors. You can do it either way.
What do you need to make Achari chole pulav? 
1.5 cup basmati rice
1.5 cups cooked garbanzo beans/chole
1 cup long sliced onion
2 Tblsp oil
1 cup yogurt (slightly sour and a day old works best)
1 Tsp salt (adjust to taste, remember pickle has loads of slat already)
1/2 Tsp cumin
1 bay leaf
1/8 Tsp turmeric powder
1/2 cup chopped mint
1 Tsp mango pickle/thokku (use good quality flavorful pickle for best results)
2 green chilies
Achari masala:
1 Tblsp mustard
3/4 Tsp fenugreek seeds/methi
3/4 Tsp nigella seeds/kalonji
1 Tblsp fennel seeds/saunf
4-5 red chilies
How do you make Achari chole pulav? 
  • Soak rice for 25-30 minutes.
  • Wash and rinse in 2 changes of water.
  • Make a coarse powder of the achari masala.
  • Heat oil in a heavy bottom pan or pressure pan, add cumin and bay leaf.
  • Once cumin sizzles, add onion, let brown slightly and turn limp, stir once or twice.
  • Add the ground powder and roast for 30-45 seconds.
  • Add chopped mint, yogurt and pickle and mix well.
  • Add chole and let it cook on low heat for 7-8 minutes to get the flavors to the core of garbanzo beans.
  • Add the washed rice, give a gentle mix and add 1 cup of water(See NOTES below).
  • Cover with a tight fitting lid, simmer the heat and cook for 15 minutes. 
  • Open the lid and check if it needs additional water, adjust accordingly, cover back and continue to cook for another 5-7 minutes. 
  • Switch off & let it sit for 10 minutes before opening the lid again and fluffing the pulav with a fork. 
  • Steaming hot, bursting with flavors pulav is ready to serve. 
Notes: 
  • Basmati rice especially when soaked before cooking takes less water, you will also need to count the amount of liquid that is already in the pot as yogurt. Adjust water accordingly. I would start with that 1 cup and sprinkle a couple of spoons if the rice looks very dry at the end of the first 15 minutes of cooking. 
  • The quality and taste of the pickle you use matter a lot in this rice, mango pickles (just the masala part with no mango pieces) work best especially the Andhra avakkaya or the thokku. Original recipe uses green chili pickles as an alternative.
  • You can add paneer cubes marinated in the pickle flavors to this pulav for added protein and taste. Toss paneer cubes in 2 Tbsp of yogurt mixed with 1/4 Tsp of the pickle masala powder and a pinch of salt, keep aside for 20-30 minutes. Add them towards the end of cooking process. Use directly if you have fresh paneer or toast them lightly in oil if using the frozen variety. 

Monday, January 6, 2014

Peas Pulav - throw in some carbs and proteins together for a delightful, one pot meal

Did I tell you how I lost a 2 page draft ready to be published here? Well, I know I wrote a line about it that did no justice to the loss in my last post which is when the unfortunate event happened. To begin at the beginning, it was the weekend and the day had started quite early as we were running around doing multiple things, we came back home a little tired and after dinner and Sat night phone calls I sat down with my laptop on my lap top. I had my draft of the post collecting thoughts for almost 2 months (since the time I made my last batch of saaru pudi) and sat for 2 hours editing content, working on the pictures, selecting the best looking ones from a sea of about hundred odd pictures (darn digital photography, seriously there is no respect for pictures in this just click, click and click away world) and read the draft more than a couple of times like I always do to eliminate bad content, bad grammar, bad language, bad anything at all and I finally clicked on 'Publish' (I swear I did that and there is no 'Delete' button as far as I can see on the page) and 'poof' it goes into an irretrievable oblivion. There is not even an older version of the draft to fall back on, so much for risk management. What am I supposed to do when this happens at 11.45 pm?? What would you do??? Well, here are the lessons learnt while I am still on a mission to find out how my beautiful post simply got deleted so irreverently by Google blogger when my explicit and only instruction had been to Publish it -
Lesson 1: Draft your posts in a word document and keep saving it or atleast you have the auto save to depend on.

Lesson 2: Don't be conservative and keep the 'preview' window open until you see the published post in another window/tab. Atleast, you can copy & paste the content.

Lesson 3: Don't try to write a blog post when you are tired and sleepy and then try to pass on the blame on an inanimate web tool.

Well, what happened afterwards was a story of true grit as I sat for the next 2 hours trying to remember what I had written and reproduce it, reselect the pictures, align them and finally publish at 1.30 a.m. This simple act proves beyond all reasonable doubt that I do not have any short term memory issues and can still extend my day when I truly want to :-). All is well that ends well and I am really proud of my saaru pudi post. If you haven't seen it yet and if you are looking for a great Rasam/saaru recipe, it is right here.

Now onto today's post. I am back with yet another simple to make, delicious and wholesome to eat rice item. This is not a South Indian staple but is more on the lines of fried rice. There is something very attractive about a fresh pod of green peas and I can't say no to them even at the pricey prices they come. We don't usually see them through the year but when the farmer's market starts in late Spring/Summer, I get fresh, plump and pricey English peas. I grew them a couple of years in pots but the handful of pods they yield was not anywhere close to satisfying our needs. Then when we moved to Washington, I found that these peas make appearance in our local Indian grocery stores at odd times during the year. I have found them in Spring, Summer, Fall & Winter so I really don't understand the rationale but have learnt to enjoy them when I can get my hands on some fresh ones.
The other day I brought home a bag full of peas and shelled them in the night thinking of what to make and as the next day was a working day, I decided on this easy to make peas pulav. This recipe is a very common dish at restaurants in India during lunch time and is typically served with a raita made of sour yogurt and raw onions. It is not spicy at all like many of the restaurant rice dishes and is well suited for a light and satisfying meal if you crave for rice. You can make variations to this peas pulav by adding a few more whole spices (cinnamon, cardamom, star anise etc) but I like to keep it very simple. I had some fresh mint growing in the pot that I used in the recipe which makes the rice very fragrant and the green peas are a sensation in the mouth when you bite into them. Though you can use frozen peas as an alternative, be forewarned that it is a very poor substitute. If you have to wait for the green peas to be season, this is still worth that wait.
So if you have a handful of fresh peas, go ahead and try this mess-free rice item and pack it in your lunch box to go too.

What do you need to make Peas Pulav? 
2 cups rice - I used Basmati rice, you can use sona masoori if you prefer
2 cups fresh green peas shelled
1 cup thinly sliced red onions
1 bay leaf
1 Tsp cumin
6-8 whole black pepper
2 cloves
1 inch piece ginger
2 green chilies
1 Tblsp finely chopped mint leaves/pudina
1 Tblsp oil
1 Tsp salt (adjust to taste)
How do you make Peas Pulav? 
  • Wash and soak rice in 3 cups of water for 20-25 minutes. 
  • Remove the stems, slit the green chilies vertically and cut them into 2 pieces each. 
  • Wash, peel and grate/pound ginger into a coarse paste.
  • Heat a heavy bottom pan on medium heat, add oil. 
  • Add cumin seeds and let them sizzzle. 
  • Add the bay leaf, cloves, pepper corns and saute for 20-30 seconds. 
  • Add the green chilies followed by ginger paste and saute for another 20-30 seconds. 
  • Add the thinly slices onions and saute until they turn limp and lightly pink. 
  • Add the shelled peas and salt and mix it in. 
  • Drain water from the rice, add the soaked rice to the pan followed by the chopped mint leaves. 
  • Add 3-3/5 cups of water (depending on the quality of your rice. Lower the heat, cover and cook for 20 minutes or until the rice is fluffy and cooked. 
  • You can transfer the contents once mint is mixed in to a rice cooker or pressure cooker and let it cook. 
  • I do either stove top vessel or rice cooker or pressure cooker depending on how much time I have and my mood :-). Each of these methods need different levels of 'watching over' to make sure rice cooks perfectly, choose what suits you best. 
  • Let the rice cool down slightly before mixing it in and tasting. 
  • Serve with papad and raita or a steaming hot Dal. Perfect for a rainy day brunch or as a party dish. 
Notes: 
  • Lightly saute paneer(cottage cheese) pieces and add it to the peas pulav before serving. 
  • Add 1/2 Tsp garam masala powder before adding rice to the mixture if you like it to be spicy. 

Tuesday, December 3, 2013

Palak Rice - a post Holiday quick eat

Hey everyone, hope you all had a good Thanksgiving break if you reside in the US or a great weekend otherwise. We had a wonderful time, enjoyed our vacation and came back yesterday early morning. Everything about the tropical heaven from swaying coconut trees to the fragrant jasmines reminded me of home the entire time. We did some hitherto not done activities as a family and liked it very much. Have loads of pictures to sort through, I will post some on the blog or on the Facebook page, look for them in the coming weeks. Until then, here is a quick preview of some of the tropical beauty.
Before we left for vacation last week, I made sure I had emptied the refrigerator except for a few things that either was not going to go bad or I couldn't get to despite my best intentions. While it felt great to not waste any produce, it also meant I had to go shopping as soon as I came back. So when our travel got a little sticky and we ended up reaching home the next morning instead of the prvious late night, I just couldn't get to the stores and had to make do with whatever I got from scraping the bottom of my refrigerator tubs. All I had left was about a quarter bag of spinach, some green chilies, cilantro and ginger. As there was much to catch up on the work front, I made a quick palak rice that fits snugly with a lunch box menu or a hot plate serving.
We love our greens especially Spinach. There used to be a time when I didn't accept a non sticky spinach when I initially came here. Spinach symbolized a slightly okra-like sliminess in India and also the bunches we got home from the greens patch next door always had loads of soil sticking to it :-). Nammamma kept them in a bucket of cold water the previous evening to wash away the dirt before she picked the leaves and separated the stems for cooking. When I got the first bag of baby spinach here which also had a label  'triple washed, ready to use', I was one of the doubters. It took a while to get adjusted to the new Spinach but I have grown to love them over the years especially the reduced part of cleaning and chopping (if you are one of those super pressed for time, go ahead and get the chopped frozen ones to make life easier :-)). For me convenience plays a big role but as long as there is no compromise on the taste or nutrition.

Back to the Palak rice, this is a very flavorful rice, perfect for when you have little time and still craving for home cooked deliciousness. It is a one pot meal with minimal frills attached to the cooking, while the really basic version (like I have below) is perfectly suited for a thread bare refrigerator supplies, you can definitely jazz up this rice with additional veggies or spices if you are so inclined. I have some variations in the last section if you are interested. Try this and let me know how you liked it.
What do you need to make Palak rice?
2 cups rice (basmati or other long grained rice soaked in water for 30 mins)
4 packed cups of cleaned palak/spinach
2 Tblsp oil
1 cup thinly sliced onion
1 Tblsp salt (adjust to taste)
handful of cooked chickpeas/garbanzo beans
Whole spices:
2 pieces of 1 inch long cinnamon
1 green cardamom
4 black peppers
3 cloves
To grind:
1/4 cup cilantro
4 green chilies
piece of ginger
1 Tblsp grated coconut
How do you make Palak rice?
  • Blanch palak for 2 minutes in boiling water, strain the water and reserve it.
  • Puree the palak once it cools down.
  • Dry roast the spices for a minute until they are warm, take it aside into a blender jar.
  • Add green chilies, ginger, coconut and cilantro to the blender and make a coarse paste. Use a couple of table spoons of water you have reserved.
  • Heat oil in a heavy bottom pan or pressure cooker, add sliced onions and salt and cook on medium heat until onions first turn limp and then start to brown up.
  • Add the blended mixture of spices, pureed palak and mix well. Taste and adjust salt or spices to your liking.
  • Wash the soaked rice and drain it. Add the rice to the pan, measure 3.5 cups of reserved water and add it. Add the chickpeas if using.
  • At this stage you can transfer all the contents to a pressure cooker or rice cooker or continue to cook in the same vessel with a tight fitting lid. Cook until rice is done and fluffy.
Notes:
  • You can add a handful of mint while making the paste but I prefer the mild taste of palak in this rice and not necessarily turn it into a pulav. Choice is yours.
  • If you have a ripe tomato on hand, either slice and sauté them with onions or grind them with the masala. This adds a little tartness to the rice and enhances the taste.
  • Skip the chickpeas if you don't have them (I usually keep some boiled beans in the refrigerator or a ready to use can in the pantry), instead you can garnish this rice once done with ghee roasted cashews or paneer/tofu cubes - yummmm. Or add a handful of green peas or other beans of choice.
  • Do not throw away the palak blanched water, use it wherever you need liquid/stock as it is full of nutrients.
  • If you are using the open vessel method, bring the heat down to low and also ensure the bottom of your vessel is heavy and thick.
  • Soaking rice for 30 minutes helps reduce the cook time, this can be done while you are prepping the rest of the things.
  • Blanching palak removes the raw smell of the leaves. As soon as you switch off the stove after boiling the leaves, take them out of the water and run cold water on them to retain the rich green color of the leaves. 

Monday, June 10, 2013

Fada Ni Khichdi - comfort in a bowl, a Pongal equivalent from Gujarat

Welcome to yet another bright, Summery week. I realize I have been going slow on my posts, it is just the weather and I feel like going out and soaking in the Sun whenever I get a chance instead of sitting in front of the laptop which I any way do for a living :-). Yesterday we had our Balvihar annual day celebrations and the kids had some really good cultural programs and presentations including my own teenager that skipped most classes this year citing her exams and school work. With that comes my Summer break until September before we start classes again so few more hours to do other things and enjoy the Summer.

What is your ultimate imagination of 'culinary comfort' or what do you crave for as the 'go to food' that seems to make you all warm and nice inside no matter what the weather is :-)? When I ask this, most times I hear people (including myself) say 'Pongal or khichdi'. I think it is rightly so since a bowl of warm khichdi flavored with home made ghee and cumin and pepper can just melt away the blues. And it provides an easy choice to stock up on some proteins in the vegetarian diet.

This is such a popular comfort food all over India and that is how you see 'Huggi' in Karnataka, 'Pongal' in Tamil Nadu, 'Pongali' or 'pulagam' in Andhra, 'Khichdi' in many parts of Northern India which are regional variations of the same basic concept. You change the dal in some recipes, vegetables added into some others, cook them open or in pressure cookers but ultimately they all serve the same uplifting purpose of making you smile with happiness :-). My ultimate pongal experience is at the Pittsburgh SV temple. If you are one of the lucky people inside the temple at that time, you get to taste this heavenly, delicious blob. A bucketful of pongal vanishes in no time and all you are left with is the lingering aroma of the ghee and the roasted pepper if you miss those few precious minutes.

I already have 2 recipes(3 if you count the sweet version) in this genre on the blog here, here and here, so I wondered if today's post merits its own space on the blog and decided quickly that it did. For one, this version is also loaded up with many vegetables (tastier :-)) and is made with broken wheat instead of rice ((hmm, I told you this was healthy) and lastly it is another addition to my Gujarati recipes.

We had been to a dear friend's house for lunch one weekend. N thinks that I make better food just because I write a blog so when we talked before the lunch she told me that she had made something very simple and hoped that we would all like it. Then she served us with this Fada Ni Khchdi with raita and a few more delicious dishes. I was hooked to the khichdi totally. N is not from Gujarat and when I asked how she made it, she promptly sent me the recipe on email the next day. I also went back to Tarla Dalal's books for reference and found it there. Again, as with any dish, the recipe changes from region to region even in Gujarat and what I have below is my version of this healthy, hearty Khichdi.
We like the consistency to be like the above picture, dal & broken wheat cooked soft and coming together, vegetables cooked well but not disintegrating. Also, I like equal quantities of dal & broken wheat but you can play around with the proportion with 1:3/4 (1 cup dal to 3/4 cup broken wheat). This is a versatile dish that you can mold to suit what you have in the refrigerator and pantry, but is very forgiving and every time turns out delicious. Because you replace rice with broken wheat, this is also diabetic friendly dish.

What do you need to make Fada Ni Khichdi? 
1 cup broken wheat (called Fada in Gujarati)
1 cup moong dal (de-husked)
1/2 cup thinly sliced onions
1/2  cup cubed carrots (wash, peel and cube carrots)
1/2 cup cut green beans (wash, string, chop ends and cut into 3/4 inch pieces)
1/2 cup cubed potatoes (wash, peel and cube potatoes)
1/2 cup fresh or frozen green peas
1/4 cup chopped bell pepper (optional)
2 Tblsp oil (use ghee/clarified butter if you prefer)
3-4 green chilies (adjust to taste) + 1 inch piece of ginger - crushed into a coarse paste
1 Tsp mustard
1 Tsp cumin seeds
2-3 1 inch piece cinnamon
2-4 cloves
1/2 Tsp black pepper
1 bay leaf
1/8 Tsp asafoetida powder
1/4 Tsp turmeric powder
6-7 cups water
1 Tblsp salt (adjust to taste)
1/2 Tsp Red chili powder (optional)
1/2 Tsp Garam Masala powder (optional)

How do you make Fada Ni Khichdi?
  • Wash and soak both moong dal and broken wheat for about 30 minutes or until the dal plumps up and broken wheat becomes soft. 
  • Heat a heavy bottom pan, add oil (or ghee), add mustard and cumin seeds and let it pop. 
  • Add the whole spices (cloves, cinnamon, bay leaf and pepper) and fry for a minute until the aroma surrounds you. 
  • Add asafoetida followed by sliced onions and fry for a minute. 
  • Add the ginger and green chili paste and mix it in. 
  • Add remaining vegetables, turmeric powder and fry for another 2 minutes as they get coated in the oil and turmeric. 
  • Add the soaked and drained moong dal and broken wheat, salt, red chili powder and garam masala (if using) and give it a good mix. 
  • Add salt and water, cover and cook on low heat (stirring occasionally so it doesn't stick to the bottom) until the dal & broken wheat cook till they are soft and slightly mushy. 
  • Serve the khichdi warm with a side of raita or yogurt. 
Notes: 
  • Soaking broken wheat and dal helps to cook them faster. 
  • Cutting vegetables to the same size helps in uniform cooking. 
  • You can add other vegetables (preferably those that do not have a strong odor or flavor) or skip some from the list I have above.
  • Last time I made this, I threw in about 2 Tblsp of chopped fresh coconut pieces, it brought in a wonderful crunch to the Khichdi.
  • You only start with the vegetables to give them a slight head start and coat them with the spices. Do not fry them for too long as they will become mushy by the time the khichdi cooks.
  • I prefer to cook this in the pressure cooker as a faster and healthier option but sometimes (like when I want to take pictures :-)), I cook it in open vessel. Open vessel is easier to control the consistency of the khichdi. 
  • I have seen different thickness of broken wheat (named either fine, extra fine, medium etc or #1, #2 etc depending on the brand) and I usually get #2 or medium which works well in the khichdi and salads.