Friday, March 29, 2013

Carrot cake for Easter and a walk with a stranger

Spring, Easter, bunny rabbits, egg hunt and carrot cakes - there is so much love, freshness and warmth in these that it definitely makes you look out and enjoy the new life all around you. Spring is called 'Vasantha' in Kannada, isn't that a beautiful name? It is the season when life starts anew. Nature that went into hibernation in the cold winter, wakes up, shrugs off all the dust and just like that you see them blooming and creating a wonderland all around you. As the temperature took a dive South last week, I thought Spring was still a distant dream. But the white fluffy snow melted away almost as quickly as it came down and it was back to sun shine and warmth again. It is a beautiful 65F in my part of the world today. Come to think of it, I like all seasons, right now I am basking in the warm Spring weather.
What is your favorite Spring time activity? I love to walk outdoors. As I dropped off DD for her music lessons, I planned my hour and had my target set for a brisk walk trying to spot my favorite blooms along the way. As I walked some distance, I saw an elderly gentleman walking a little distance ahead of me. I tried to walk behind him but since it slowed me down considerably, I excused myself and passed him. A short distance later I had to stop at a traffic signal and he came there too. As we waited for the lights to change, I said Hello and got ready to resume my walk again. As I took a step forward, he suddenly said, "Did you know Nargis?" :-), what a conversation starter, I thought. Although I was thinking I had to go back to my speed walking, I slowed down to walk with him and I am glad I did.

He turned out to be a photographer who had taken Raj Kapoor and Nargis's pictures when they visited his home country Iran. I told him although I had not watched either of them, I had heard a lot about the two great actors from my mother. As we walked on and chatted, he told me a story about an Indian Prince and princess and how the prince fights with snakes to prove his worth to marry her :-). He mentioned that it has been his dream to visit India and visit some of the temples for architecture and history, I hope he gets a chance to do it. After about a half mile or so, he stopped and said, "Nice talking to you, I will be stopping here" and went into the Senior living center. I would have missed meeting a charming gentleman if I had just hurried on, I certainly hope I meet him again another day. As I went on my walk further, I wished with all my heart he had enjoyed talking to me as much as I did to him. For some strange reason, I remembered my mother living far away. I am sure she makes a great conversation and has a lot to share with others too.

I came across this great twist to a classic carrot cake which is almost a symbol of Spring celebrations. The recipe is from a magazine and uses a fruit juice to enhance the flavor of carrots in this recipe. Carrot cake being a favorite of DD, I thought I will try this recipe and it turned out fabulous. I didn't use eggs though and instead went for an egg replacement. The frosting is very simple too with just cream cheese, butter (yeah, some more) and sugar with some vanilla flavoring. This is a layered cake with frosting. Beautiful colors and great tasting cake, it felt like biting into the floating, white, fluffy clouds.

Be forewarned that this cake is rich, it has oodles of butter. Share it with friends. It is alright to eat rich food once in a while, just go for a long walk in the balmy weather to burn off the calories and say Hello to strangers you meet on the way.
Cherry blossoms along the way as we walked
What do you need to make Carrot cake?
Recipe Source: Better Homes magazine
2 cups All purpose flour
1 cup sugar
1 Tblsp baking powder
1/4 Tsp fresh ground nutmeg
1/2 cup (1 US stick) butter - softened
2 Tblsp flax seeds powder (original recipe calls for 2 eggs)
11/4 cup mango juice
1/2 Tsp salt
3 packed cups shredded carrot
1/2 cup chopped walnuts (optional but recommended)
Cream cheese frosting:
8 Oz cream cheese - at room temperature( I got reduced fat)
1/2 stick (1/4 cup) butter
2.5-3 cups powdered sugar (depends on the thickness and sweetness you like for the frosting, I used only 2.5 cups)
1 Tsp vanilla essence

How do you make Carrot cake?
  • Add 6 Tblsp of water to the flax seeds powder, mix it once and keep aside until ready to use (atleast 10 minutes)
  • Preheat oven to 350F, grease and flour two 8.5 inch round cake pans and set aside. 
  • Combine flour, baking powder, salt and nutmeg powder. Mix it with a spoon. 
  • In a large bowl, beat the softened butter (keep the butter outside until it is soft to touch) until creamy. A hand mixer or a whisk will do this job very well. 
  • Add the sugar and continue to whisk until sugar dissolves and incorporates with butter. 
  • Add the gooey flax powder mixture and beat once. 
  • Slowly add the dry flour mixture, mixing continuously with a spoon. 
  • Add 3/4 cup of the mango juice, chopped walnuts and shredded carrot. Mix it well to incorporate. 
  • Pour evenly into the prepared pans and bake it for 25-30 minutes or until a tooth pick comes out clean. 
  • Take the cake pans out and keep it outside for 6-8 minutes to cool. 
  • Remove the cakes from the pans and lay them on a wire rack until it cools completely. 
  • Boil the remaining 1/2 cup mango juice in a sauce pan until it thickens and reduces by half. Let it cool. 
  • Lay one of the cakes in a wide plate, apply a layer of frosting evenly. 
  • Lay the second cake on top and frost the surface (thickness depends on your taste). 
  • Drizzle the thickened mango juice on top for flavoring. 
  • Cut slices and enjoy. 
Cream cheese frosting: 
  • Beat the softened butter and cream cheese until light and creamy. 
  • Mix in the vanilla essence. 
  • Slowly add the powdered sugar until you get the desired consistency. 
Notes: 
  • Flax seeds powder works as a great egg replacement. One egg = 1 Tblsp flax seeds powder mixed in 3 Tblsp water
  • You can pour all the batter into a single pan, bake it and eat it without any frosting. It tastes just great. 
  • The cream cheese frosting is very neutral in taste and hence allows the taste of the carrots to come out stronger. You can frost it any other way you like. 
  • I really think the mango juice and the drizzled mango concentrate made this cake super delicious, but you can skip this and make the traditional carrot cake.
 
Updated on Dec 29, 2013:
  • I used pomegranate juice instead of the mango juice to add to the batter and skipped the flavoring on top of cake. This juice gave a slightly darker color to the cake and tasted great. So go ahead and experiment with different juices preferably those with milder flavors.
  • I used unsweetened apple sauce as the egg replacement this time. 1 egg = 1/4 cup of apple sauce.
  • I made the cake in a bundt pan and covered it with icing on top.  

Wednesday, March 27, 2013

Roti/phulka & chapati - back to basics for a reason

I am posting a very basic recipe found in most Indian kitchens - the wheat flour roti/phulka (called Godhi rotti in kannada) and chapati (popularly known as plain parantha in the Northern part of India). This is known in other parts of the world as the Indian unleavened bread because it doesn't use any leavening agents such as baking soda, baking powder or yeast. The dough is the same for both roti and chapati, the rolling out and cooking methods differ slightly to make one richer in taste and calories than the other. Rotis are as much of a staple food in North Indian daily menu as rice is in the South. There are exceptions of course and people from any region may choose to adapt to a different eating habit. So, why am I going back to this very basic recipe? A few reasons, read on..

For one, rotis/phulkas belong to that category of recipes where 'practice makes one perfect'. For such a basic recipe (mix the dough and roll it into circles), this has every possibility of going wrong if you do not pay attention to a few minor details. While experts make the softest, yummiest rotis with just the flour and water mixture, it takes some attention to detail when you make them initially. It is a lot to do with the technique and that is what I am going to focus on today. Secondly, I was not a great roti maker for a long time when I started cooking, To start with, the dough would either be too soft or too hard, my rotis would have every possible shape in the Universe except for a decent circle. And I would not get the characteristic fluffy phulka :-). All the while, nammamma used to dish out rottis every other day as if that was one of the simplest things to do in life. Talk about shame facedness, that is what I had. But then I realized that the consistency of dough is all about how you can handle it while rolling out. This is a soft, pliant dough without being sticky.  With all this background, I thought I will share some 'lessons learnt' from my experience with novice roti makers.

The third and most important reason, my daughter reminded me the other day that there was no 'roti recipe' on the blog although she has been pointing it out for a while now. She wants to try it out herself when amma vanishes on one of her business trips which will be pretty soon :-). And I got a lecture for 10 minutes from a very hurt faced teenager as to why I was not considering her request for a simple roti recipe while I keep saying that the blog is an electronic journal for the said hurt teenager :-). I tried to explain that it was such a basic recipe that none of my readers would be interested in and pat came the reply, "so I don't count as a reader"?, I have to give her credit, although she doesn't check out every post, when she bakes or cooks occasionally. she opens up my blog first before doing a generic search for the recipe, so much for loyalty :-). So this post is all about appeasing my blog reader at home and I will consider it purely collateral if some of my other readers benefit from it too.
I am going to use the same dough to make rotis (less oil and hence healthier) and chapatis (more oil and tastier) and let you choose what you want to make. Nammamma used rice flour to roll out chapatis, the home made rice flour has a slightly coarser texture than the store bought and this imparted a very subtle crunchy texture to the layered chapatis. Hot off the tawa, ate with one of her signature gojjus or chutneys, it used to be simply delicious. This used to be the default breakfast on Saturdays when I landed at Mysore with an infant in tow catching an early morning train from Bengaluru to spend the weekend with my parents. 

What do you need to make rotis?
Makes about 8 home sized rotis
2 cups wheat flour
3/4 cup luke warm water
1/8 Tsp salt
1/2 Tsp oil
1 Tblsp wheat flour for dusting
If making chapati you will need 2 Tsp of oil mixed with 1 Tsp of ghee (clarified butter) and heated to luke warm temperature
How do you make roti/phulka? 
  • Bring all ingredients together except for water into a wide bowl and mix it once. 
  • Add the water slowly while mixing the contents. It comes together as a soft dough ball. 
  • Knead for 2 minutes, form into a smooth round ball, cover it with cling wrap or with a dish cloth and set aside for 20 minutes. 
  • Take the dough out, knead it for a minute, pinch off 8 equal sized balls. 
  • Take a ball, dip it in dry flour and flatten it slightly. 
  • Roll the ball, moving it in circular motion to get uniform thickness (about 5millimeter), dusting if needed with dry flour. 
  • Heat a flat griddle, put the rolled out roti on top and cook for 30-45 seconds or until small bubbles appear on top. 
  • Flip it over and cook for another 30-45 seconds. 
  • At this stage, you can do one of the 3 things below: 
  • Method 1: If you own a gas stove, remove the par cooked roti from the griddle, put it directly on the flame (on medium heat) and hold there for it to puff up with the help of tongs. Flip it over and hold for another 5 seconds. 
  • Method 2: If you do not own a gas stove and are working off an electric stove, continue to cook the roti on the griddle. Use a clean dish cloth or thick paper napkin or a wide spatula to press the roti lightly while moving it around for uniform cooking. This puffs up the roti on top of the griddle (see picture below)
  • Method 3: If you prefer, you can put the par cooked roti into the microwave and cook for not more than 4-5 seconds for it to puff up. This is a Madhur Jaffrey tip/
  • Take the cooked roti into a container, brush the top lightly with oil or ghee.
  • Repeat for all the remaining dough balls. Keep rotis in a container with lid and lined with a paper towel.
How do you make chapati/plain parantha? 
  • Follow the above steps until you make the dough and pinch off equal sized balls after 20 minutes of resting period. 
  • Take a dough ball, roll it into a small (2 inch diameter) roti. 
  • Take 1/4 Tsp of the oil+ghee mix (nammamma calls it 'saati', no idea what the word means or where it came from), smear it all over the top surface of the roti. 
  • Fold it half and then hold one of the corners and fold it to the middle, hold the folded piece and bring it on top of the remaining portion. If done correctly, you will end up with a cute triangle shape. This step helps create the characteristic layers in the chapati. 
  • Now dip the folded triangle in dry flour and roll it out uniformly. The chapatis are rolled out as a triangle. 
  • Cook this on a heated griddle brushing a few drops of oil on both sides. 
Notes: 
  • Warm water makes softer rotis but take care not to overheat the water as it will cook the dough while mixing. 
  • Do not make rotis or chapatis very thin (paper thin), they need to have a small thickness for it to puff up on heating. 
  • Do not set the chapati dough out for more than 30 minutes as the wheat flour loses its nutrients. 
  • Do not use too much of flour for dusting as it makes rotis hard. And for the same reason, do not flip the rotis too many times on the griddle. 
  • Adding a Tsp of flax seeds powder makes rotis nutritious and soft. 
  • While these are best eaten hot off the tawa, you can also reheat them in the microwave for less than 5 seconds to make them warm and soft again. 
  • I recommend the method 3 above only if you want that puffed up look and if you are going to use a little bit of grease (oil or ghee) on top as this seems to dry out the rotis very fast. 

I wish all my readers a Happy Holi (belated) - may there be harmony across colors, nationalities, religion and may people always love and respect each other as we embrace the new beginnings this Spring. We are planning on celebrating Holi on a predicted balmy Sunday afternoon later this week. 

Sunday, March 24, 2013

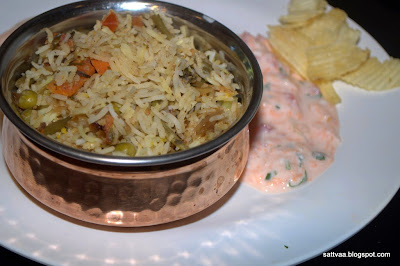
Vegetable Biryani - a magical ride on Aladdin's magic carpet

Fried rice, pulav/pilaf and biryani - is there a real difference between these? You bet there is. I had made vegetable pulav for a pot luck party once and my friend and host made vegetable biryani. Her poor, uninformed husband had to only open his mouth and ask, "are they both not the same?" before he had both women jumping in to explain and enlighten him on the nuances of each of those dishes and how they each held their own perfectly well :-). So for the uninitiated, though the ingredients list may look similar on these two recipes, the preparation is vastly different and so is the end product. While pulav has the spices ingrained in the cooked rice and the flavor surrounds the dish, biryani has rice and spices coexisting but not necessarily blended all the way though at the same time every grain is infused with the flavor of the masala. And where does fried rice fit in, somewhere in between depending whether you made rice first and mixed with other ingredients and let them cook together :-), it is like fast food in the world of pulavs & biryanis with milder spices. I will reserve that discussion for another day while we focus on the famed vegetable biryani for today. If you are looking for a pulav recipe, you will find it here.

Biryani making is a connoisseur process, it is slow and deliberate and takes you, the cook through steps leading to something utterly out of this world. You just have to let yourself go with the flow of the process (not recipe really), let your senses lead the way as you drop the spices in and believe in yourself. I picture myself taking a ride on Aladdin's magic carpet, going to hitherto unvisited beautiful lands and feeling light as a feather and a bowl of steaming hot biryani with a cup of cool raita is all I need to keep me cozy in this imaginary journey.

Hyderabad is famous for its Moghul biryanis, while these are heavily meat laden, the same technique is used to make a delicious vegetable biryani for the non meat eaters. While I am not a native Hyderabadi, nor have I eaten this famed dish in its city of origin, I am confident that the Biryani recipe below is nonetheless very flavorful and can compete with any Hyderabadi restaurant making it.

I have a real useful tip a Persian friend shared with me that is so simple and elegant I wondered why I didn't think of it before. Look for it in the recipe and notes section.

The ingredients list is long and the recipe/procedure looks laborious, I have arranged them in groups and sequenced them for easy following. Once you get the hang of what is going on, I assure you will find ways to make this more efficient to suit your working style.
What do you need to make vegetable biryani? 
Makes 5 servings
To pound/grate/food process: 
1.5 inch long fresh ginger root (wash & peel)
2-3 green chilies (adjust to taste)
2-3 garlic cloves (adjust according to preference)
To roast and powder: 
1 Tblsp saunf/
1 black cardamom
1 green cardamom
1 dry bay leaf/tej patta - use 2 if it is small
4-6 black pepper corns
1 Tsp black cumin/shahi jeera
2 cloves
2 pieces of 1 inch long cinnamon
1/2  nutmeg
4-5 strands of mace/javintri
Vegetables to parboil:
1 cup green beans - sliced in the middle and chopped to 1 inch long pieces
1 cup thin chopped carrots
1 cup cauliflower florets
1 cup green peas (optional)
Other ingredients:
2 cups good quality Basmati rice
1.5 Tblsp salt (adjust to taste)
1 cup yogurt (preferably home made and a day old)
2 packed cups chopped mint leaves
2 cups of finely chopped tomatoes
2 cups of thinly sliced onions.
1/4 Tsp saffron soaked in 1 Tblsp milk for 20 minutes or longer
1/2 Tsp ghee
4 Tblsp oil
2-3 potatoes (washed and cut into 1/2 inch thick discs)

How do you make Vegetable Biryani? 
Prepare Biryani masala powder:
  • Heat a heavy bottom pan on medium heat, add all the spices listed under 'To roast and powder' and fry them on low heat with frequent stirring for 5-7 minutes until the spices start to give out a nice aroma. It is very crucial not to burn these, your only choice is to start over. 
  • Switch off, let cool and grind them into a fine powder. Keep in a covered container until ready to use. 
  • You can make this in larger quantities and refrigerate in air tight containers for later uses or prefer to purchase store bought biryani masala. I make it fresh just for the day. 
Preparing the vegetable sauce:
  • Par cook the chopped vegetables and peas (if using) until they are al dante. They should just lose the rawness but not be cooked. You can do this in an open vessel with enough water to cover all the vegetables or microwave them for 6-8 minutes. 
  • Drain the water and reserve the vegetables. 
  • Take the ginger, garlic and green chilies into a mortar and pestle or a food processor and make them into a coarse paste. 
  • Heat 2 Tblsp of oil in a wide kadai/pan, add the sliced onions and fry until they are pink on medium heat. 
  • Increase the heat to high and continue to fry onions until they crisp up a little. Set aside.
  • Add the remaining 2 Tblsp of oil, add the ginger-garlic-green chili paste and fry for a minute. 
  • Add the prepared biryani masala and mix it well.
  • Add the chopped tomato to the same pan, add 1/2 Tsp salt and let it cook on medium heat until it becomes completely mushy. 
  • Add the chopped mint and fry for 2-3 minutes until the leaves wilt completely. 
  • Add the yogurt and mix it in.
  • Add the par cooked vegetables and give them a nice stir to get coated with the rest of the ingredients in the pan. 
  • Continue to cook for 3-4 minutes until the sauce bubbles up and the liquid evaporates. Switch off, cover and keep aside until ready to use. 
Preparing the rice: 
  • Soak basmati rice in 4 cups of water for 30 minutes. 
  • Wash, drain the water. 
  • Bring to boil about 8 cups of water in a big pot with 1/2 Tsp of ghee. 
  • Add the drained basmati rice to the boiling water, reduce heat and cook covered for 7-8 minutes just until the rice grains plump up. 
  • Drain the water by pouring it into a colander, run cold water on the rice and let it drain. 
  • Pour the soaked saffron all over the rice and give it a gentle mix. 
Assembling and cooking biryani:
  • Put a wide and thick bottom pot on the stove.
  • Arrange the potato discs all over the bottom of the pot in a single layer to cover. 
  • Spread a 1 inch thick layer of rice on top. 
  • Spread a layer of vegetable sauce on top. Spread the fried onions on top.
  • Spread the remaining rice in a layer and repeat on top with the remaining vegetable sauce. 
  • Cover the pot with a snug fitting lid, keep the heat at the lowest and cook for 30 minutes or until the rice grains look all fluffy and your kitchen smells like something from the far away Aladdin's land :-)
Serving Biryani:
  • Do not try to mix in the contents, the layering will ensure that every scoop you take has a fair share of all the ingredients. Scoop out spoonfuls including the bottom most potato layer onto a plate. 
  • Serve it with a yogurt based raita and maybe some roasted papads or chips on the side. 
Notes: 
  • Biryani cooks perfectly well if you have a pot with a snug fitting lid. The idea is to let it cook in slow and low heat for a long time and give the spices time to work their magic.
  • If you do not have a snug fitting lid for the cooking pot, don't sweat, use any lid that will cover the top of the vessel, wrap a dish towel around so as to not let the steam escape. 
  • If you really want to create the 'handi' effect, make a chapati dough with wheat flour and water, knead it into a 1 inch thick rope, stick it all around the top of the vessel locking any crevices between the lid and the vessel. You can later cut this steamed wheat rope to small chunks, bake it in the oven and eat it as a ghatta with dal. Will post the recipes another time. 
  • You can use store bought fried onions to garnish on top but I prefer to fry the onions and add them as a layer in the biryani itself. 
  • It is important to have extra amounts of water and watch closely when the rice is cooked for the first time, you just want it to plump up and not really cook. Extra water and the ghee helps it to not become starchy. 
  • After you assemble the biryani, the rice cooks in the sauce itself and there is no need to add more water. 
  • Layering the bottom of the pot with potatoes prevents burning or sticking, creates a shield between the heat source and the biryani and makes it cook slower. And you get to eat the yummy caramelized potatoes along with the biryani :-).

Wednesday, March 20, 2013

Whole wheat bread

Let me first clarify this is wheat bread but not 100% whole wheat rather 50-50 partnership of all purpose and whole wheat.

Ok, it is official that I am bitten by the baking bug. It beckons me all the time, I am smitten like this teenage girl with a crush, only in my case it looks the crush has every chance of becoming the soul mate. I am in love with the yeast, the dough, the kneading, the aroma therapy of baking and the pure bliss of biting into a perfectly gorgeous, home baked bread. Whew, I know, I know, that was a lot of adjectives and I do sound like the starry eyed teen but here I am with a perfectly valid reason to feel just 'Super' :-)
How many of you buy bread from a grocery store? We do, though not regularly. I stand in the bread aisle every time and spend more than a few minutes going over multi grain Vs whole wheat Vs wheat Vs God knows what else before I grab a bag of the bread. I prefer getting bread from a bakery where I am guaranteed of the freshness factor than regular stores. I have been secretly drooling over the breads in the blogosphere for a while now but chickening out every time I thought of making one myself. Recently, I landed on this beautiful looking bread in my quest of a wheat bread. The pictures looked so good to be true for a home made recipe and the post was inundated with positive comments from people that had actually made the recipe. So I thought there was nothing to stop me this time and decided not to be indecisive anymore.
I wanted to take the path of no return, so started laying out the ingredients. Since I have one set of measuring cups for both dry and wet ingredients and I am too lazy to wash, dry in between, I went ahead and measured the dry flours onto a plate and set out to do the wet ingredients. Then I found out I didn't have milk in the refrigerator, think about it, I am that person who never ever lets milk (by necessity) and salt(passed on from my MIL) run out in my kitchen. When a recipe calls for one Tblsp of milk, the cans are empty, well everything has a first time, right? It was one of those weeks where both BH & I had exhausting work days and I kept pushing and hoping the milk would see me through until the weekend, didn't happen. How I wish I was back in India where you could just step out in to the backyard and ask a friendly neighbor for a cup of milk :-). I have friendly neighbors here but I won't go and ask for a cup of milk from them. Well, I wasn't going to be daunted by the lack of a mere tblsp of milk, and also what was I going to do with a plate full of mixed AP & wheat flour? I checked my pantry and found a sachet of dry milk (don't ask me why I have it, will tell you when I find out myself :-)) and with a spark, added a Tsp of it into the recipe and increased 1 Tblsp of oil to make up for the liquid volume, smart move I would say.
I then followed directions meticulously until my e-mouse seemed to jump ahead of me as I was scrolling down and there I saw something that made me almost sit down and cry in disbelief. The blogger had updated the original post since they moved to Seattle from Ohio  (again, what are the odds?) that the recipe had failed her miserably and provided the new set of ingredients to make it work in the area. Honestly, I have never set out to try a recipe before reading the instructions with all the tips more than once, again there is a first time for everything, right? I was on the verge of calling off the project 'bread making' since more than one ingredient in the new list is not a pantry staple at my home. But I thought all those nice people who took time to make this bread and leave comments couldn't be so wrong and Seattle couldn't have something so destructive in the weather that a bread dough will not work. So I marched on with the original recipe like a brave soldier. So much for Seattle weather bashing, I am sure God was smiling down on me that day as I persevered, I am glad I did what I did. See the results yourself and this only makes me love Northwest more than I do already.

I made this with regular desi whole wheat flour or chapati flour (I had Deep brand at home) the first time and second time made it with Bob's Red mill stone ground whole wheat flour, no difference in texture I could make out, both tasted delicious. The addition of honey not only gives a wonderful hue but a very faint sweet taste. Next, I will be upping my wheat flour portion in this to make it 100% whole wheat bread and will come back and blog when I get to a reliable recipe.
This turned my kitchen into an Indian bakery with that heavenly smell and best of all what I found out that bread making is not scary at all, it is a very, very friendly dough and this recipe consistently makes great bread. Pay attention to the yeast and make sure you have good quality, if in doubt proof it and use it in the dough.

I wish there was a way to share the smell in my kitchen as the golden loaf baked and a way to make you hear that hollow sound of a perfectly baked bread. Well, the pictures and my post should do for now..

Recipe source: Tammy's recipes
What do you need to make wheat bread? 
Makes one 9X5 loaf
1 cup warm water(35-40 secs in the MW)
1 Tblsp milk
2 Tblsp honey
3 Tblsp oil (canola) - original recipe had 2 Tblsp
2 Tblsp brown sugar
1 Tsp salt
1 Tsp dry milk (optional, recommended) - This is my addition based on an accidental finding and I think it makes the bread tastes great.
1.5 cups all purpose flour
1.5 cups whole wheat (desi or any other stone ground)
2 Tsp active dry or fast rising yeast
1 Tsp oil to prepare the dish & pan
1/4 Tsp AP flour to prepare pan

How do you make wheat bread? 
  • Put the first 7 ingredients listed above in to a big mixing bowl and stir it a couple of times. 
  • Measure out the wheat flour and all purpose flour and sieve them together. 
  • Add the flour into the bowl with the wet ingredients, add yeast and stir together with a spoon. 
  • Dump the contents of the mixing bowl and let it rest for a minute (this settles the yeast and gives it a chance to rest)
  • Set your timer to 20 minutes and start kneading (see notes below for tips on kneading by hand), this is a great work out as you swing back and forth and flex your wrist and forearm muscles. If you think you are well exercised, find a couch potato around the house (read spouse) and put him to work with an incentive of the warm slice of bread. Put on some music to help you on.
  • At 20 minutes, stop kneading and form the dough into a ball. 
  • Smear a couple of drops of oil around the inner surface of a big bowl, put the dough ball in it, cover with a cling wrap and let it rise in a warm place for about an hour or until it doubles in size. 
  • Take the dough, punch it down gently and form it into a a bread loaf, see notes for details shaping bread loaf. 
  • Prepare a 9X5 bread pan by smearing oil all over the inner surface and dust it with a couple of pinches of AP flour. 
  • Put the shaped dough into the pan, cover with a cling wrap and let rise for 45 minutes to 1 hour or until it doubles in size. 
  • Preheat the oven to 350F, bake for 20 minutes, turn the pan around for uniform baking and continue to bake for another 12-15 minutes. When you tap on the surface of the bread, it should sound hollow and light. 
  • Take out the pan, let it rest for 5 minutes on a wire rack, take the bread out of the pan and let it rest on the wire rack until it cools down completely. 
  • This is the toughest part of the bread making, the smell wafting from your kitchen is so intoxicating and the sight of that golden brown bread is so beckoning, you just have to find an excuse to get out of the house for an hour or so. 
  • Keep the bread covered with a towel while it is cooling to help it stay soft. 
  • After the loaf has cooled completely, slice it with a sharp knife and enjoy any way you like it. This is a hearty bread with a perfect texture and holds up well in sandwiches.
Kneading by hand: Take the dough onto a flat surface, press the heel of your hand into the center of the dough, curl your fingers & grab the far end of the dough. Stretch it and pull towards you and give the dough a half rotation. Keep rotating the dough and continue to knead uniformly.

Shaping a bread: I found a very useful link here with a video on shaping the bread, so I am not going to regurgitate all that info, here you go to find the tips. The idea is to keep the shaped roll taut so it bakes uniformly and doesn't fall after and during baking.
Notes:
  • If at 20 minutes you notice the bread top is turning brown quickly, cover it lightly with a piece of aluminium foil. This slows down the browning while giving the bread a chance to bake evenly. 
  • Slice the bread only after it has cooled completely, else the slices will be crumbling. 
  • Covering the bread with a layer of towel helps it to stay soft and not become dry. 
  • You can reduce the amount of brown sugar by half, but this is not a sweet bread by any means. 
  • Cooled and sliced bread can be wrapped in a plastic bag and refrigerated for storage. I haven't had to do that as on both occasions the bread was gone completely in the first hour after slicing. 

Sunday, March 17, 2013

BOlu gojju(curry without vegetables) - when the spices took over

Gojju as far as I know is a very Karnataka recipe, it is typically a curry with ground spices and boiled or stir fried vegetables in it. I have other gojju recipes on the blog, check it out if interested. But today's recipe does not have any vegetables in it.

I am not sure how many of you are familiar with this dish. You may have some version of it or call it by a different name but it goes by 'BOlu Gojju' in our family. This funny named dish (BOlu~empty/bald since it is devoid of vegetables, gojju~curry)is one of my doddamma (my mother's older sister) and amma's signature recipes. My doddamma was one of those cooks who made everything taste divine (remember the mosaravalakki?), I can't even pick a favorite from her menu as I would eat every bit of everything she cooked. The only issue I had with her was her extreme 'rules in the kitchen' - do not touch this with wet hands, do not touch this without wet hands, don't ever serve food with right hand, do not put plates in the same pile as the dishes, etc, etc..:-). Nammamma being the flexible one, I almost had a free reign in the kitchen and used to be terrorized by Doddamma whenever she stayed with us.

Once when I asked doddamma how she made such delicious stuff with barely any ingredients, she looked up at me and said, "We barely had ingredients to use but had to feed a big family", I think necessity is truly the mother of invention. Times changed and by the time I was old enough to notice her cooking, there was plenty in her kitchen. Whether she made a vegetable curry, a saaru, a ghee laden dessert or a simple bolu gojju they were all finger licking good except that she would never allow you to lick your fingers :-). Me & my little brother have spent many a school vacations with this doddamma as my cousin was transferred to many rural medical facilities and doddamma moved with him and his young family. Rich, unadulterated milk from the villagers, fresh vegetables brought to the door steps every morning all no doubt made the food much tastier but I can never forget those breakfasts in her kitchen - golden crisp akki rotti with a dollop of home made benne (butter) and a side of yogurt so thick it would not fall down if you tipped the cup over, a menthya dose with a heavenly aroma served with more benne and coconut chutney made in the traditional stone grinder, or avalakki vaggarane (seasoned poha) on a green banana leaf with a mouth watering midi uppinakaayi(baby mangoes pickled whole).

I think the bolu gojju was invented on a day either in hot summer or cold winter when there were no vegetables in the backyard, and there was no one at home to fetch it from the store. Or it was simply a day at the end of the month for a family on a regular income and they had to wait until the next pay day to hit the grocery store. Or it was a day when the mother just couldn't find a vegetable in God's green land to satisfy the conflicting needs and wants of her family and she decided to skip the vegetable all together and cook up something different. OK, those are all 'imaginations uncontrolled' as to how the humble bOlu gojju was born :-), I get carried away sometimes, and this is one of those times.
When I was writing this draft earlier this weekend a very tired BH was almost dozing off at the other side of the bed. I wanted to pick his brain for a few minutes and also subject him to a preview of the draft. He doesn't get caught easily on these chores, so attacking him when he is least expecting it and defenseless seems to work. In that dreamy state and to get a relief from the nagging, he said the bOlu gojju was born when the spices went on a strike as they were all tired of making up a perfectly harmonious gravy only to be out done by some vegetable. I think that might have been it, do you agree? So they told the lady of the house that she should create something where all that would be visible was the masala and its lasting taste and the kind hearted woman agreed with them and thus the Bolu gojju was born on a day when both the cook and the spices boycotted the vegetables.

The ingredients list though looks like a tall order, notice that they are all very common spices found in most Indian pantries. Amma usually made this with Pongal as a side dish. It is a perfect complement to the bland pongal.  This tastes so awesome you don't need to wait until you make pongal or even until you have run out of all your vegetables :-). And you don't even slog infront of a hot stove for more than 5 minutes.Don't go by the pictures, they don't do any justice to how the dish tastes. I can eat it anyday, it tastes good with hot rice or akki rotti too.
What do you need to make Bolu gojju? 
2 Tblsp grated coconut (fresh or frozen)
1 cup boiled black chana or black chickpeas
1/4 cup finely chopped onion
small piece of tamarind
1/2 Tsp crushed jaggery or brown sugar
1 Tsp salt
1.5-2 cups water
To Roast:
1 Tblsp chana dal
1/2 Tsp urad dal
1 Tblsp white sesame seeds
1/8 Tsp fenugreek seeds
1/8 Tsp cumin
1/4 Tsp coriander seeds
2 pieces of 1 inch long cinnamon
1 clove
6-8 black pepper corns
1-2 dry red chilies
How do you make Bolu gojju? 
  • Dry roast all ingredients under 'To Roast' on medium heat in a heavy bottom pan, stirring frequently not to burn any ingredients for 5-7 minutes. 
  • When the dals turn light pink and fenugreek gives out its roasted aroma, switch off, keep aside to cool down.
  • Grind all the roasted ingredients with coconut, salt, tamarind and jaggery. Add water to bring it to a thick flowing (not dropping) consistency. 
  • Add the chopped onions and boiled black chana. Mix well. 
  • Seasoning is completely optional for this gojju (remember, you made this because your pantry & refrigerator were almost empty :-)). If you do like it, you may season it with a Tsp of mustard and 1/4 Tsp fenugreek roasted in a Tsp of oil until they pop. Throw in a couple of curry leaves. I did it just for the picture :-). 
To prepare the black chana:
  • Soak a handful of dry black chana (black chick peas) overnight in water. 
  • Drain, wash and pressure cook with a cup of water and a pinch of salt until it is soft, takes 3 whistles in my pressure cooker. 
  • Switch off, let cool, drain the cooked peas and use it in the gojju. 
  • I normally soak a bigger quantity and end up making some quick usili with the remaining peas. 
Notes: 
  • Roast the masala ingredients on medium to low heat so they get roasted well without any raw smell. This is key to a great tasting gojju as it is not cooked or boiled afterwards. 
  • If your tamarind feels wetwhen it comes from the package, add it to the other ingredients and roast it to remove the raw smell. 
  • Since there are no vegetables added and the ground masala itself constitutes the bulk, plan to scale the proportions up or down depending on the servings you need. The above yields a medium soup bowl full of gojju. 
  • Adjust black pepper and red chilies depending on your spice tolerance and the variety of red chilies you use. 
  • I have not used garbanzo or kabuli chana or white chick peas in this recipe any time, may be because I associate this gojju always with black chana and it is as much about recreating the memory in my kitchen as much as enjoying the food. Try the substitution at your own risk -) if you have to.

Saturday, March 16, 2013

Liebster award - a recognition?

Earlier this week, I received a note from Naaz of Ammi Rasoi that she considered my blog to pass along a Liebster nomination she had received. I am freakishly cautious about comments I publish on my blog and almost always filter out all anonymous, suspicious looking messages but this one looked genuine. How can it not be when someone you don't know hitherto, sends you a message that you and your infant blog are note worthy in this blogosphere. Thank you Naaz for your generosity in spreading this cheer amongst novice bloggers.

I looked up a little bit on Liebster awards and the concept is in practice for quite a while. Liebster in German means 'dearest' or 'favorite' and is initiated to recognize new bloggers in the arena. You either accept it and pass it on or decline it. If you do accept it, you share a few random facts about you, answer some questions the other blogger sets for you, create your own set of questions and send it to other bloggers. Seemed like fun and I told Naaz that I was going to accept it :-). The hardest part was finding new bloggers to pass this award along as I have to admit I don't discover blogs on my own all the time. Some times a generic search leads me to it and sometimes I come across them in another favorite blog of mine. So I have to confess I haven't gone all out in searching for new blogs but shared my joy with some friends I have known in this virtual world.

Rules of Liebster award are:
  1. I have to answer the 11 questions Naaz set for me and pass this award on to other bloggers with less than 200 followers. 
  2. Share some random facts about me.
  3. Create a set of my own questions when I send this award to other bloggers.
  4. Let the person who nominated me and the new bloggers I nominate know about this award.
So here you go, some random facts about me:
  • I love being outdoors, doesn't have to be any fancy place, just my backyard will do. 
  • I love reading and there is no one genre I am specially fond of. 
  • I love music and it is always a sure way for me to relax. 
  • I love to do impromptu comedy shows for my family but end up laughing more than they do. 
  • I am a perfectionist to the point of being obsessive sometimes.
  • I have a general positive outlook in life though things can sometimes weigh me down.
  • I love my dog but hate it when she curls up on my favorite saggy sofa.
  • I treasure my friends and family.
  • I believe there is a power beyond what I can see that guides me in this life. 
  • Cooking and gardening are my stress buster hobbies. 
  • I love snacking on spicy treats - especially hurigalu and mirapakayi bajji. 

Now on to the questions Naaz has set for me: 
1. What you like to cook?
Depends and has been changing over time, although I just love cooking, currently I am experimenting quite a bit with baking. 

2. What is your favorite food?
All kinds of spicy food, spicier the better and I can go on eating my mom's kodubale (deep fried spicy rings made with rice flour, coconut, red chilies...) until I literally burst at the seams :-).

3. Why did you start blogging?
I love to cook and write. So blogging was a naturally great way to combine these 2 interests. Also, it is an electronic recipe book for my daughter to use whenever she needs it. 

4. What are the best five words that describe you?
Hmmm.., I believe I am defined by my family all my life, so I would say dedicated, friendly, trust worthy,  independent, and trusting, 

5. Do you have some other food blogs that you recommend?
Many, many. There are so many foodies out there with great blogs and since my current passion is baking, I recommend Smitten kitchen and Tammy's recipes

6. How do you click your photographs?
I have a nikon, D5K and use an extended flash to overcome the gray skies. Food photography is something I still am working on. 

7. What is your weakness?
I had to laugh when I read this question. In my professional world, we are taught never to state a weakness when asked in an interview and if the interviewer insisted I am to spin it as a positive thing. Since Naaz is not insisting on it, I will pass this one :-)

8. Your favorite weekend outing?
If all three of us are free, we love to head out for a hike or a simple walk and I love to try a new dish and revisit an old recipe over the weekend. 

9. What was your first comment on other blogs?
I really don't remember as I must have done that a while ago. 

10. What do you love about blogging?
The fact that it helps me loosen up, get some creative juices going and get to know other foodies out there. 

11. You are extrovert or introvert?
Depends really. I take time to open up in new company but once I know my turf, I can be all chirpy. 

And now below is the set of questions I want to pass this award along with. I have tried to keep it around blogging in general and food blogging specifically but it is ok to pass any question if you think it is personal or just don't want to divulge information. I hope you accept and have as much fun as I did doing this: 
  1. What was your reaction when you received the Liebster award? 
  2. What do you most look forward to with your blogging? 
  3. What is your all time favorite ingredient or spice in cooking? 
  4. Do you always give credit to a recipe source or blogger when you use one? 
  5. What are your hobbies outside of food blogging? 
  6. What appeals to you most in other food blogs (writing style, blog layout and visual appeal, pictures, recipes and anything else)? 
  7. How has blogging changed your life? 
  8. How do you feel about plagiarism in food blogs? 
  9. Who is the one person that influenced you most in starting your blog? 
  10. Who is your all time favorite cook/chef and why? 
  11. What is cooking currently in your kitchen? 
And here are my nominations: 
Smitha of Kannada Cuisine
Nandita of Paaka shale
Deeksha of Dee's Kitchen 
Saranya of Saranya's kitchen

Wednesday, March 13, 2013

Pesto pasta - Minty fresh pasta with nutty goodness

Is there anyone out there that doesn't like pasta? Confession here, I am not a fan of pasta, something about the texture of cooked pasta puts me off. The husband and daughter both love pasta in all its shapes and size which set me off on a hunt for a good home made pasta recipe.

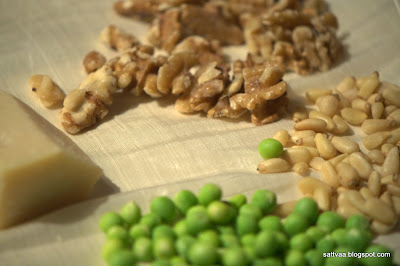
Pesto is Italian for 'pound' or 'crush' and refers to the way this sauce was originally made by pounding the ingredients together. Typically pesto has the usual suspects, basil, garlic, pine nuts, cheese and olive oil. But there are also all kinds of innovative pesto sauces. I normally add a handful of nuts from my refrigerator in addition to the basil. I once saw a pesto recipe that had frozen green peas in it and have been religiously adding it as my family seems to like the taste. This makes the sauce a tad bit healthier too. I got a bag full of fresh green peas which I sat down and shelled patiently the other day and put them into the pesto. It seemed to work wonders if I can go by the smile on DD's face as she ate it. So then it became a norm to add either frozen peas or fresh ones if I could get my hands on them.

When something clicks and becomes a regular at home, I tend to go off and make modification (and tell my unsuspecting family they are improvisations) :-) which sometimes works and sometimes I get told sternly to stay away from that modification and stop killing a wonderful recipe :-). I had made pudina chutney (the regular South Indian chutney with coconut and mint) and the bowl was still on the kitchen counter when I started to put the ingredients for the pesto, so I just added a couple Tblsp of the chutney into the pesto and the reaction was, "Amma, this is the best pesto pasta you have made so far" immediately followed by a suspicious, "What did you do??" :-).

The coconut lover that I am, I would love to tell you all to go ahead and add some chutney into your pasta sauce to make it yummy but I won't. That would make some puritans cringe totally, coconut in a pasta sauce? So, not to break the order in the World, just go ahead and add a whole bunch of fresh mint leaves to make it minty and yummy. I have found that this recipe is a total comfort food in my daughter's age group and they love it every time it is made.

On another note, I got a stand mixer sometime back, it was one of those - "do I need it, do I want it" deliberations that had been going on with my inner self and finally I gave in during the last black Friday sale. To give myself some credit, I had a long unused gift card (so I didn't deny my family from any basic necessity) and the store had this stand mixer stacked outside with a huge sale board. So it was like destiny, I went and picked one up, came home and gave a long explanation of all the wonderful things I could make with that stand mixer including bread dough and how this machine would revolutionize my kitchen and make it a wonderfully efficient place. BH, the ever patient man, nodded very encouragingly (he does that when he sees a lost cause), I saw the lips curl ever so slightly as he probably thought about the other similar gadgets I have acquired previously. What I have found with this stand mixer is that it is a really powerful machine and does what it claims to do including the bread dough but I have a 7 cup mixer which I wrongly understood to be the amount of dry flour it can mix at a time. But the reality is I can only put about 2.5-3 cups dry flour and the remaining ingredients will fill the capacity.  So, you see it is too much of work, doing it in batches and cleaning up all the different attachments and so I have fallen back to my kneading by hand (good exercise and calms my nerves too). But I use this mixer every time I make pesto as it crushes frozen nuts like a bulldozer and produces a wonderfully textured sauce. So, it was not a bad buy after all :-)
Update on 9/24/14: I am revamping this post as an entry for Indus Ladies kid's lunch box event since the first thing DD mentioned when I asked her what her ideal lunch box recipe was this :-)
So here is a recipe for a minty, creamy pesto sauce to jazz up your pasta.
What do you need to make pesto? 
1/2 cup walnuts
1/4 cup pine nuts
1/2 cup green peas (fresh or frozen)
1/2 cup packed fresh mint leaves
1 Tsp dry basil (or a handful of fresh basil leaves)
1/2 Tsp dry oragano
1/2 Tsp dry thyme (optional but recommended)
2 cloves of fresh garlic (adjust quantity to your liking)
1/4 Tsp black crushed black pepper
1/2 Tsp salt
1/2 cup grated cheese (suggestions: mozarella, parmigiono)
2 Tblsp olive oil
To make pasta:
2 cups of pasta (I normally use any of these types - penne, fusilli, bow tie)
1/2 Tsp salt
1 Tsp oil (I use saffola oil)
1 cup mixed vegetables (I use green beans, carrots, broccoli or cauliflower) - chopped into thin slices or small pieces.

How do you make pesto?
  • Add all the ingredients under pesto except for cheese and olive oil into the bowl of your food processor or mixer and pulse it a few times until the nuts crumble down. 
  • Add the cheese and stream the oilve oil little at a time to grind the pesto into a smooth chutney like consistency. 
  • Taste and adjust any herbs or spices you like. 
How do you assemble pesto pasta? 
  • Cook pasta per the package instructions. Drain the pasta and reserve the cooked water. 
  • Heat 1 Tsp oil in a big pan, add the chopped vegetables and saute for 4-5 minutes on medium heat. The vegetables should be barely cooked and should not lose their crunch. 
  • Add the cooked pasta into the pan, add the pesto and adjust the consistency using the reserved water. Switch off the stove and serve warm. 
Note: 
  • If you are using a regular mixer, be kind on the motor and thaw the nuts to room temperature before running the mixer. Also use about 1/4-1/2 cup water if you need to help the grinding process. 
  • The above quantity makes enough pesto for 2 cups of pasta, you can make pesto in larger quantities and refrigerate up to 3 days. 
  • The above proportion is how my family likes it, you can increase/decrease any of the spices or herbs and cheese to make it perfect for your taste buds.
  • The consistency of the final dish is an entirely personal choice, DD loves to slurp every bite with a little bit of sauce so I make it slightly liquidish. Adjust the amount of water you use. 

Sunday, March 10, 2013

Kosambari, easy breezy salad - light on the stomach, good for the spirit

It has been a while since I wrote here, I really wanted to say 'Thank you' to all you wonderful people that stopped by and made things easier for me with your thoughts and prayers. You may not realize it but your act of kindness has meant a lot to me. I am overwhelmed and grateful by the love I have received from so many people, most of whom I have never even had a chance to meet in real life. Life is very pleasantly strange. So again, a big Thank you to all of you, your thoughts are very appreciated.

Past few weeks have been rough and although the ride is definitely not over yet, I feel like we are doing the best under the circumstances. Nammamma seems have reached a balance of comfort and happiness which is a blessing. I realize that the act of cooking, eating, feeding & writing makes me a happy person and I don't want to let go of something that easily is one of the things I enjoy, as does my other favorite activity of reading. Here is something (Mankutimmana Kagga by D.V.G) from one of my favorite Kannada poets that I have been rereading for a while now..with an extremely light translation attempted by me.

Baalkeyali noorentu todaku tinukugaluntu
kelke maankegaligavu jaggavondinisu
golkaredarenu phala? guddaalenu phala?
palkiridu taalikolo Mankutimma
(You encounter many hurdles & difficulties in life, these will not go away at your asking, there is no use crying over it and no use fighting it. Just grin & bear with patience what life dishes out to you)

We (most of USA) did a Spring forward today with clocks getting reset to adjust the hour we gained earlier in the Fall. While it is not good to lose an hour of sleep, Spring holds its promises to look forward to. My rhododendrons are perking up and I can see buds becoming fuller by day in the Camellia bush underneath the window. I will get ready to transport the Jasmine and other flowering pots outdoors in a couple of weeks. So I am ok with the lost hour :-).

Today also happens to be Maha Shivaratri, a celebration to remember and practice self control and apply a little bit of oneself to something bigger than oneself. Unlike many other Hindu festivals, Maha Shivaratri is not about food, it is a day of living simply and self reflection. In the spirit of the day, I made this very simple salad called Kosambari or Kosambri in Kannada. This is one of the very popular versions of the kosambari Nammamma made on most festivals. As the weather gets warmer, this salad makes a wonderful lunch, protein rich with the lentils, citrusy with the lemon juice, taste enhanced with coconut and not at all heavy on the stomach.
What do you need to make Sautekayi(cucumber) Kosambari?
1 medium sized tender cucumber - about 2 cups finely chopped
1/2 cup moong dal/hesaru bele/pesara pappu
1/2 cup grated coconut - preferably fresh, but frozen works well, see notes below
1 Tsp salt
1 Tblsp lemon juice
1 Tblsp chopped cilantro
Seasoning: 
1 Tsp oil
1/2 Tsp mustard
1-2 green chilies - chopped small
1/8 Tsp asafoetida
How do you make Sautekayi Kosambari?
  • Soak moong dal for 45 minutes - 1 hour or until it plumps up. 
  • Rinse and wash the soaked moongdal, drain the water and keep aside.
  • Wash, peel and chop cucumber in to small pieces, you can use the entire cucumber if it is tender, else remove the seeds and use only the flesh part. 
  • Mix soaked moong dal, chopped cucumber, chopped cilantro, salt, lemon juice and grated coconut together. 
  • Heat oil in a pan, add mustard and chopped chilies and let mustard sizzle. Add asafoetida when the mustard starts to pop, switch off the stove and pour it on top of the dal and cucumber mixture. 
  • Mix well and enjoy as a salad or a light lunch. 
Notes: 
  • If using frozen coconut, keep the coconut outside to thaw and let it come to room temperature. alternatively, you can put the frozen coconut in a bowl and keep it in a wider bowl with hot water. Take care not to have water flowing into the coconut bowl. 
  • Kosambari is typically a spicy, tangy mixture. Go ahead and adjust the lemon juice, green chilies to suit your palate. 
  • Asafoetida gives a wonderful flavor to the kosambari, do not skimp on it. 
  • There is no hard rule about the proportions used in this recipe, we love it with loads of cucumber and the amount of moong dal used is less. Feel free to change it any way to suit your taste. 
Variations: 
  • As I said this is our favorite version of kosambari, Nammamma makes it with grated carrots instead of cucumber or soaked chana dal instead of moong dal. I mix & match depending on the menu for the day.