Last week has been such a rushed one what with amma complaining about a back pain that pretty much tied to her room and bed for a couple of days. She is the backbone of the family and when she is down, typically life seems down too :-(, Woman power in our household in not at all exaggerated. On that note, Happy Women's day everyone!
 Then BH started coughing and sneezing and like always didn't go to the doctor until it brought him down royally during the midweek, makes me wonder if my 'nagging' abilities are kind of becoming diluted over time :-). Finally, when he couldn't sleep for 2 straight nights and also kept the rest of the house up & awake, realization dawned on and he came back from the doctor with a handful of antibiotics. He is on the mend, slow and sure recovery. I am hoping to not catch any bugs for a while but then they don't really listen to me, do they?
On a positive note, my Maddur vade post got published in Indian railways Railbandhu magazine. You write something that is close to your heart not even thinking about the audience it may reach and then someone from the other side of the world finds it and reaches out to you. It is exhilarating. I wasn't even aware that Indian railways had a magazine and when they contacted me in Jan stating they liked the post (not just the recipe but the write up about train journeys) and wanted to publish, I was more than happy to nod my head. The entire post is not on the magazine for lack of real estate, however it is an abridged version of my original post. If you are in India and travel in railways, look up the magazine if you have time. I received a pdf version of the monthly and here is a picture of the same. Happiee me..
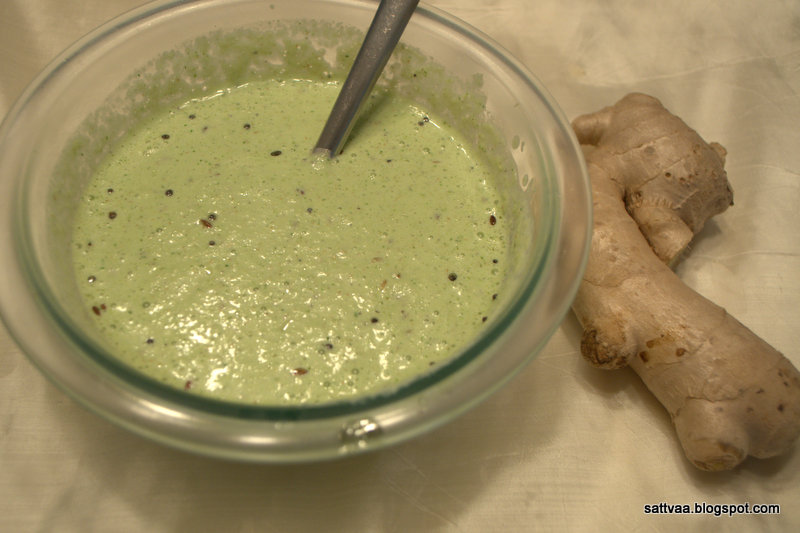
 I have a very simple, homely, almost rustic recipe today that won't be on the menu in any restaurants. You will have to knock on the doors of people who continue home cooking in Mysore region and ask them for a bowl of this delicious tambuli. Yep, that is the only way to get your hands on this ever green, soul happy dish. I have a couple of recipes for tambuli on the blog, here & here but what I have today is the queen (it could have been king I suppose but since I am writing the post on International Women's day :-)) of tambulis made with doddapatre (dodda~big, patre~leaf) or cuban oregano.
This is my favorite tambuli variety, nammamma always had this bush growing in the yard as far as I can remember and it used to be on the menu regularly and more frequently in summers. She would serve it as the first course on a hot afternoon and the taste & fragrance of the leaves just freshens you up. I have had it in pots for over 8 years now. The herb like the regular oregano is easy to grow and grows wild if allowed but pots seem to restrain the free growth. Some of my Tamil speaking friends have borrowed it to be used as medicine, I believe the leaves are crushed and the juice is applied on the forehead to get relief from common cold and congestion. It may not be easily available in your garden stores around the world but you can order it online. Growing it in the pot is easy, don't expose it to extreme temperatures and harvest the leaves regularly. DD loves it so much that she won't eat anything else on the days I make it for lunch.
 My inlaws live on the outskirts of Bengaluru in a self contained educational campus filled with students but devoid of any of Bengaluru city's pollution (atleast thus far). The air is clean, mornings are filled with the music of birds & stray dogs, unadulterated cool breeze freely fills the surroundings. While staying so far away from the city has these advantages, it also becomes essential to be self sufficient. The surrounding villages have stepped up along with the college itself reserving land for farming. You get the fresh vegetables but also get the instant maggi noodles and the likes to satisfy the student population :-). I guess everyone thrives. The people who live on campus (other than students) are typically the teaching staff and management and the housing has developed in to a colony.
On our last India visit, DD & I were generally walking around on our last day in Bengaluru around the campus and came across a small park not far from the house. There is an elderly lady who lives right across and is a mega gardening enthusiast. She has plants all around her house and also have adopted this park to grow plants of all varieties, you will find vegetables, fruits, flowers which just makes the area so colorful and chirpy. She invited us to come see her park and we went with her. As I was admiring the pomegranates, guavas, chikkoos hanging from the branches, DD saw something that made her jaw drop and she quietly sat down. Curious, I went near her to see what she had found and burst out laughing.
 There was the doddapatre plant creeping so generously all over the ground that she had never experienced the abundance in our restricted pot growing. The lady thought we didn't know what it was and started to explain the medicinal values, looking at DD's face I knew what I had to do and asked the lady if I could pick some leaves. As soon as she said yes, we went to her house to get a small bag and picked the leaves to our heart's content, here was the catch, we were heading back that night. So the leaves got all washed up as soon as we reached home, roasted in ghee and ground with coconut and yogurt. The freshness of the leaves still in our throats, we finished our 'head out' meal and made our way to the airport. BTW, this makes an excellent dip for maddur vade if you want to try them together :-)
I recently read an article about why Indian food is so tasty where the research says that Indian cooking seems to blend flavors that are vastly contradictory unlike others where things that complement each other are used in a recipe. I don't know all the science behind it but one statement caught my eye which read that typical Indian recipes are complicated medley of ingredients and usually have upwards of 6 ingredients. Here is my very humble, simple yet exotic in taste and medicinal value - Doddapatre tambuli for all of you to try with a small set of ingredients.
 What do you need to make doddapatre tambuli?
30-35 medium sized dodda patre (cuban oregano)
1 Tsp ghee (clarified butter)
1/2 Tsp black pepper corn
1/2 Tsp cumin seeds
1 Tsp salt (adjust to taste)
1/2 cup grated/shredded coconut (fresh or frozen)
1 cup yogurt (home made and a day old preferred, or use plain yougurt from the store)
 How do you make tambuli?


On a positive note, my Maddur vade post got published in Indian railways Railbandhu magazine. You write something that is close to your heart not even thinking about the audience it may reach and then someone from the other side of the world finds it and reaches out to you. It is exhilarating. I wasn't even aware that Indian railways had a magazine and when they contacted me in Jan stating they liked the post (not just the recipe but the write up about train journeys) and wanted to publish, I was more than happy to nod my head. The entire post is not on the magazine for lack of real estate, however it is an abridged version of my original post. If you are in India and travel in railways, look up the magazine if you have time. I received a pdf version of the monthly and here is a picture of the same. Happiee me..
This is my favorite tambuli variety, nammamma always had this bush growing in the yard as far as I can remember and it used to be on the menu regularly and more frequently in summers. She would serve it as the first course on a hot afternoon and the taste & fragrance of the leaves just freshens you up. I have had it in pots for over 8 years now. The herb like the regular oregano is easy to grow and grows wild if allowed but pots seem to restrain the free growth. Some of my Tamil speaking friends have borrowed it to be used as medicine, I believe the leaves are crushed and the juice is applied on the forehead to get relief from common cold and congestion. It may not be easily available in your garden stores around the world but you can order it online. Growing it in the pot is easy, don't expose it to extreme temperatures and harvest the leaves regularly. DD loves it so much that she won't eat anything else on the days I make it for lunch.
On our last India visit, DD & I were generally walking around on our last day in Bengaluru around the campus and came across a small park not far from the house. There is an elderly lady who lives right across and is a mega gardening enthusiast. She has plants all around her house and also have adopted this park to grow plants of all varieties, you will find vegetables, fruits, flowers which just makes the area so colorful and chirpy. She invited us to come see her park and we went with her. As I was admiring the pomegranates, guavas, chikkoos hanging from the branches, DD saw something that made her jaw drop and she quietly sat down. Curious, I went near her to see what she had found and burst out laughing.
I recently read an article about why Indian food is so tasty where the research says that Indian cooking seems to blend flavors that are vastly contradictory unlike others where things that complement each other are used in a recipe. I don't know all the science behind it but one statement caught my eye which read that typical Indian recipes are complicated medley of ingredients and usually have upwards of 6 ingredients. Here is my very humble, simple yet exotic in taste and medicinal value - Doddapatre tambuli for all of you to try with a small set of ingredients.
30-35 medium sized dodda patre (cuban oregano)
1 Tsp ghee (clarified butter)
1/2 Tsp black pepper corn
1/2 Tsp cumin seeds
1 Tsp salt (adjust to taste)
1/2 cup grated/shredded coconut (fresh or frozen)
1 cup yogurt (home made and a day old preferred, or use plain yougurt from the store)
- Wash the leaves under running water a couple of times and pick any stems that might have made their way.
- Heat ghee in a thick pan on medium heat
- Add pepper & cumin seeds, let them sizzle (1-1.5 minutes)
- Roughly chop the cleaned leaves and add it to the pan.
- Add salt and mix well.
- Roast for 3-4 minutes until leaves turn into a mush and leave water.
- Switch off and let cool completely.
- Grind the roasted mixture along with coconut into a smooth blend, use the water that is in the pan.
- Add yogurt and run the mixer a couple of times to get a homogeneous mixture.
- Serve it with piping hot rice and enjoy the unforgettable experience.
Notes:
- Slightly tangy yogurt brings out the best taste, if your yogurt is too plain, add a small piece of tamarind and grind. I have done this and DD was none the wiser so it is a great tip :-)
- Use ghee in this recipe instead of oil if you can, it really brings the taste.