Sunday, July 29, 2012

Poli Purnam Boorelu - Varalaxmi Vratam sweet

Hope everyone had a good weekend, we had a good one starting with the Varalaksmi festival on Friday. There has been some planning going into the pooja preparation and menu finalization for the past week or so, now that my in-laws are here with us, we have 2 additional brains for menu ideas :-). Amma said we had to make 9 varieties for the naivedya/naivedyam (offering to God after the pooje), so I kind of tried to pick atleast one each of everyone's favorite in addition to the traditional must-haves and we actually ended up with a wonderful spread of dishes and all of us including some friends who came in the evening enjoyed the food.

Food is such an integral part of any festival, right? I notice it is true without any barrier of region or religion. I guess, for me that is where my earliest food related memories are, any festival or get together at home, nammamma would be up early and in the kitchen preparing variety of dishes, there were days on which we kids were strictly forbidden from entering the kitchen and my uncle would be in charge of driving any stray kids away from the place, I even remember him writing 'No Entry' on the kitchen door to drive home the point :-). Some of the festivals, nammamma would prepare things ahead of time (Sankranthi ellu being one of them) but most times, she would cook the naivedya dishes only on the day of the festival after bathing. We prepared all of the naivedya dishes on Friday morning too and so the pooje started a little late and took us right into lunch time which was perfect. We were famished, food was good and we had a great time.

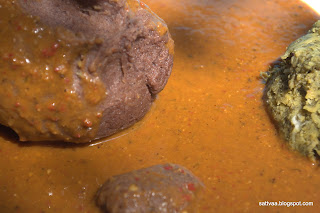
Here is a quick look at our naivedyam thali(s), I will try to get all of them into the blog as soon as I can. Though I took the pictures for every dish, I don't have enough of them especially for a stand alone blog post, so some of them will be featured only when I make it next time :-).
But today's post is dedicated to a traditional Andhra delicacy - poli purnam boorelu. The name is a mouthful, so let me break that out for the uninitiated. Poli~steamed, purnam~sweet stuffing. This is a sweet prepared in weddings and other auspicious occasions, the process is slightly laborious but the end result will simply mesmerize you with taste. Ingredients are simple, used every day in the kitchen. There is another very popular form of boorelu with the chana dal stuffing (my personal favorite only because I like jaggery based sweets more than those made with white sugar) which is simply called purnam boorelu but the poli purnam boorelu is equally delicious. 

The stuffing is made with moong dal, sugar and lot of cardamom(yes, use lots and freshly pounded for flavoring), the outer shell is made with a dosa like batter made with urad dal and rice. Stuffing is dunked in the batter and deep fried to a golden brown, crispy perfection. I am told that this is traditionally eaten by making a hole in the middle of a hot, crispy boorelu and adding a spoonful of ghee before popping it into the mouth. Although, we didn't go to that extreme indulgence, we completely enjoyed the sweet, cardamom flavored, protein packed boorelu.
What do you need to make Poli Purnam Boorelu? 
The proportions below make about 18-20 golf ball sized boorelu. 
Ingredients for stuffing:
1 cup moong dal/pesara pappu
3/4 cup sugar (adjust to taste if you like sweeter)
4-5 cardamom - peeled and seeds freshly pounded
Ingredients for covering: 
1/2 cup urad dal/uddi pappu/minapappu
1 cup rice
Other ingredients: 
Oil to deep fry

How do you make Poli Purnam Boorelu? 
Making the stuffing: 
  • Soak moong dal in 3 times water for 2 hours.
  • Wash and drain the moong dal, grind it with as little as possible water to a paste. 
  • Put spoonfuls of the ground paste into idli moulds and steam it for 15 minutes until the dal is cooked. 
  • Once the steamed cakes cool down, break them into pieces and run it through your mixer on pulse mode to further break them, add the sugar and blend it once with the dal. 
  • This mixture will be slightly wet because of the added sugar, add the freshly pounded cardamom and working with your hands, knead the entire mixture for a couple of minutes until the consistency is good to make balls out of it.
  • Make golf sized balls with this mixture and keep aside.
Making the covering:
  • Soak the urad dal and rice together in water for 3 hours until they soften.
  • Wash, drain the dal-rice mixture and grind it in the mixer into a batter. Add water while grinding but make sure you get a dosa consistency batter at the end. 
  • This batter doesn't have to ferment and does not have to be overly smooth. Keep aside.
Boorelu assembly:
  • Heat the oil for deep frying preferably in a wide pan. Check the readiness by dropping a small droplet of the batter in the oil, if it comes right up to the surface, oil is ready. 
  • Take the prepared stuffing ball, dunk it in the batter, shake it to remove any extra batter and drop it carefully in the hot oil. Repeat for the remaining stuffing to just fill your frying pan.
  • Leave the boorelu to cook untouched for a couple of minutes before slowly turning them over to cook on the other side. 
  • When the boorelu reach a golden brown crust on all sides, take them out of the oil onto a paper napkin. 
Notes: 
  • Do not soak moong dal for more than a couple of hours as it tends to become oily when fried. 
  • Breaking the steamed moong dal idlis into fine powder along with sugar takes some hard work with your hands, make use of the mixer to pulse it down as much as possible before manually kneading it to make balls.
  • The batter covering should be flowy but not watery, it should coat the stuffing well at the same time not becoming very thick, adjust the consistency as needed. 
  • Use fresh pounded cardamom for best flavor burst.
  • You can make dosas with any extra batter, i added a spoonful of fine sooji, salt and the dosas were delicious. 

Thursday, July 26, 2012

Happy Vara Lakshmi festival

We are celebrating Vara Lakshmi Vrata tomorrow, 3 generations of women (young girl included) in the family doing the pooje together for physical health, wealth in addition to spiritual prosperity for everyone.


May the blessings of the Goddess be with you all. 

I will be back later this week with Pindi vantalu/habbada adige/festive food.


Wednesday, July 25, 2012

Dum Aloo - baby potatoes in creamy coating

Potatoes were one of those fancy vegetables (roots/tubers/spuds all that & more) growing up. Nammamma got potatoes only when we made bajjis(deep fried) or bondas or once in a while the favorite eerulli-aalugedde huli (Onion-potato sambar, believe me this combination in sambar is heavenly and I have stories to go with it, another time perhaps). Then as her repertoire grew, she made aloo parantha very frequently which used to be melt in the mouth with just the right kind of masala for the stuffing. My sister entered the kitchen and took our potato love a notch higher with her aloo tikkis - I am still on my quest to recreate that magic. Though every time my tikkis taste good, I still feel there is something missing in them, maybe just my akka's hands :-).

Then came the big brother, coming home for his 2 weeks vacations between hectic studying from the confines of his North Indian student life, he was grown up and all wiser for having gone that far from home. He would regale us with the stories from the college, hostel and obviously the food with spuds playing a huge role in the food. Well, he had it almost every meal you see :-). But potatoes grow on you, I haven't seen a person so far that said they didn't like potatoes, sure there are many of us who want to avoid/reduce the consumption because of the carbohydrates and sugar but we still love our tubers.

So this very North Indian dish got added into our family recipes from my brother, he makes some of the killer North Indian gravies I have tasted and his South Indian delicacies are always enhanced with a generous second helping of ghee :-). Either way, we tend to gain including around the waist. I do not claim that I remember the first time he made it at home or that I follow his recipe, but this is how I have reached my formula on the Dum Aloo and it turns out delectable every time and is a guaranteed crowd pleaser.

After that story of Dum Aloo, now I am onto where I got my recent bounty of baby potatoes. Seattle downtown has a charming, very popular market called Pike Place market in downtown, it is 9 acres in area spreading across multiple floors, spans indoors and outdoors and is surrounded by the beautiful land and waterscape of the Northwest. You will find everything from fresh farm produce to meat to antiques to designer clothes. We love to visit there especially in Spring and Summers, my daughter loves the WA grown juicy peaches and sweet Rainier cherries and I love to buy the fresh veggies. Like anywhere else, we frequent one specific store for all our farm fresh needs, according to DD Sosios is the best fruits stand and I agree with her in addition to the fact that the store helpers are super helpful and they give you ample samples to taste:-). Last week, in addition to a bunch of fruits we ended up bringing home a bagful of baby potatoes. They looked so adorable and I didn't have the heart to cut them into pieces or anyway butcher them, so they went straight into creamy sauce and we had the delicious Dum Aloo.

You can make Dum Aloo with bigger potatoes cut into pieces but traditionally and tastewise try and use the baby potatoes. It does make a difference.
What do you need to make Dum Aloo? 
12-14 baby potatoes
1 small red onion or shallot - roughly chopped
2 medium tomatoes - roughly chopped
10 cashew nuts (you can replace with almonds with a slight difference in the texture)
1X1 inch piece fresh ginger - chopped fine
1 clove of garlic (increase if you like garlic or omit completely) - crushed slightly
2 Tblsp yogurt
1 Tblsp salt (adjust to taste)
2 Tblsp oil
1 Tsp kasoori methi (dry fenugreek leaves)
1/2 cup water
1 Tblsp finely chopped cilantro

Dry masala ingredients: 
2 dry chilies
1/2 Tsp black pepper corns
1 Tsp saunf
1/2 Tsp cumin seeds
1 Tblsp coriander seeds
2 - 1 inch piece of cinnamon
1 star anise
How do you make Dum Aloo?
  • Wash and scrub the potatoes clesn, poke a fork randomly a couple of times in each potato.
  • Put the potatoes in a microwave safe bowl, fill it with water till the potatoes are completely merged. 
  • Microwave until the potatoes are just tender, my MW takes 8 minutes. 
  • Take the potatoes out of the hot water and let them cool down a little, peel off the skin. 
  • Heat a heavy bottom pan on medium heat, add all the ingredients listed under 'dry masala ingredients' and roast them for 2-3 minutes until you get a nice aroma, take them off the pan and let cool. 
  • Roast cashew nuts in the same pan for 2-3 minutes until they turn crisp and light pink in color, keep aside to cool.
  • Add a Tblsp of oil to the same pan, add ginger, garlic fry for a minte, add chopped onions and let them sweat for a minute, add tomato pieces and continue to cook until it turns soft and mushy. Switch off and let cool. 
  • Make a dry powder of all the roasted dry ingredients, add cashew nuts to the same mixie jar and blend it into a fine powder.
  • Add the fried ginger-garlic-onion-tomato into the mixie and blend into a smooth paste, add a couple spoons of water of needed.
  • Heat the remaining Tblsp of oil and add the ground masala paste into it along with salt, 1/2 cup water and let it come to a slow boil, test for taste and adjust if needed. It needs to be slightly strong on spices as potatoes will absorb the flavors.
  • Add the prepared potatoes, crushed kasoori methi and yogurt and let it boil for another 10 minutes on low heat. Switch off, top it with finely chopped cilantro and serve with rotis or jeera rice.
Notes:
  • Pricking potatoes with a fork helps it to absorb the masala flavors better.
  • Take the potatoes out of the boiling water as soon as done to arrest further cooking, you want the potatoes to be still firm and holding shape when it goes into the masala.
  • You can add 1/2 Tsp of amchoor powder for a tangy taste while boiling the masala, I used a day old yogurt and hence didn't add the powder.
  • I do not add any garam masala powder to this recipe, if you need to adjust the spice level make use of the store bought powders towards the end.
  • Unlike my other North Indian curries, I do not blanch tomatoes,onions or cashews. The toasted flavor perfectly complements the baby potatoes in taste. 

Monday, July 23, 2012

Puri upma - quick recipe for breakfast or snack

How do recipes that are very region specific get to other regions? I am not talking now when everything can be looked up with Guru Google and you can whip quite an international fare at home never leaving your kitchen but how did the recipes get transferred from one region to the other in the past without internet became such a household thing? I think some of it has to do with people's likes and availability of similar ingredients and some of it is due to a constant quest for new types of food. Travelling to places definitely helps in mixing, merging tastes and evolving new recipes. Today, it is one such recipe from the Northern regions of Karnataka, there may be other places that have this or a similar version but I was introduced to this long ago by a cousin of mine who was a medical representative and traveled places.

When we are home on weekends, we usually do a heavy brunch and have snacks in the evening, snacks are generally light, quickly put together and chat pata in taste. I have reduced the deep fried snacks quite a bit and found baked, steamed, stir fried yummy alternatives which are healthy.

Puri or puffed rice is light, tasty and can be adapted in many recipes - both sweet and savory. If you are a chat lover like me, you will find the Mysore Churmuri irresistible. Growing up in Mysore, visit to the hill top Chamundeshwari (Protector Goddess of the place) temple was a frequent outing for us. Climbing the 1000 steps, stopping for rest multiple times on the way, stopping at the big Nandi statue is all part of my childhood especially during the summers when we always had cousins over at our place. After the pooja was done, we would always get some puri from the small shops in front of the temple to go with the freshly broken coconut pieces and jaggery before we ate any of the home cooked picnic lunch. Sometimes, if we went without any packed food, we would still be full eating the fresh puri and the coconut pieces. Fresh puffed rice is a snack by itself, doesn't need much in terms of decoration.
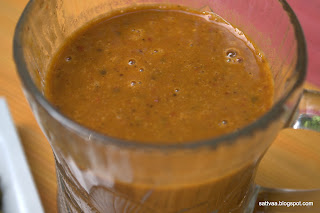
Today's recipe as I mentioned is very popular in Northern Karnataka and the bordering districts of Andhra Pradesh. My cousin used to say that he always ate chili pakodas or the famous mirchi bhajias as a side with this. I make this often when I can't think of anything quick for a light dinner or snack and usually make variations with what I add to the seasoning. Here is a nutritious sprouty version of the puri upma.

Also, here is another way in which I use the pappula podi we made earlier.
What do you need to make Puri Upma? 
Makes 3 bowls of puri upma
6 cups of puri/marmaralu/puffed rice
3-4 green chilies (adjust to taste)
1 cup sprouted moong or any other sprouts you like
3/4 cup thinly chopped onions
3/4 cup pappula podi
5-6 curry leaves
1 Tsp salt
2 Tblsp oil
1 Tsp mustard seeds
1 Tsp cumin seeds
juice from one big lemon
water
How do you make Puri Upma? 
  • Slit green chilies and keep aside.
  • Chop the onions into thin, long strips and keep aside.
  • Take a big vessel and fill half of it with water and add the puffed rice into it, push it down so it touches the water and let it stand for a minute. 
  • Take handfuls of the soaked puri, squeeze out the water and keep aside.
  • Heat oil in a pan, add mustard, cumin seeds and let it splutter. Add the green chilies, curry leaves and fry for a minute until blisters appear on the skin of the chilies and curry leaves crisp up.
  • Add sliced onions, fry for 2-3 minutes until onion sweats a little.
  • Add the sprouts, salt and let cook for 3-4 minutes until sprouts soften a bit. 
  • Add the soaked. squeezed puffed rice, pappula podi and lemon juice and mix it well. Adjust any taste as needed. Keep it on the stove long enough to get the puffed rice warmed up.
  • Serve immediately topped with chopped cilantro (I didn't have it when I made it) and a wedge of lemon. 
Notes: 
  • The end product should be spicy and tangy, adjust the green chilies and lemon juice accordingly. 
  • Do not soak the puffed rice for longer than a minute at the most, it loses the crunch and turns soggy.
  • You can add other sprouts that cook fast such as alfalfa sprouts. 
  • I like the onions to retain their crunch in this recipe and hence undercook it a little bit. 
  • Puffed rice is generally salted and you have added salt to the pappula podi also, so go easy on the salt and adjust at the last step if needed.

Thursday, July 19, 2012

Dosaavakaya - a deserving alternative for mango avakkaya

Back with another pickle, this time with lemon cucumbers or dosakayi(Telugu) or banna soutekayi(Kannada). I had no idea there could be so many dishes with this golden beauty until I got married. This is not a very frequently used vegetable in Mysore regions, while we had the green cucumbers regularly, yellow cucumbers were largely used in Huli/sambars and rottis. But when you get married into a family that makes and eats umpteen number of pickles and pachadis, you will soon discover the joys of many hitherto unknown varieties of them. Here is my dosakaya pachadi blogged earlier.

While the traditional mango pickle or mango avakkaya is held at the top of the pickle chain, this no fuss and faster to make dosaavakaya doesn't fall behind in the race. Amma tells me it is a favorite with wedding menus as it can be prepared in a jiffy and used immediately unlike the mango avakkaya which needs some settling time before you can enjoy the real taste. What is more, dosakayi is available almost through the year and you don't have to wait for Summer like in the case of mangoes.

South Indian pickles essentially are either mustard based or fenugreek based. Both have their unique tastes and enhances the dining experience. I have noticed Kannadiga pickles to be more fenugreek based while Andhra pickles have mustard as the focal point.

A good dosakayi is slightly tangy and imparts the right amount of pulupu (tanginess) to the pickle. But these cucumbers can also be deceiving and be bitter sometimes. I really do not know how to tell if it is bitter by looking at it. If someone has tricks up their sleeves to make out a bitter dosakaya in the grocery isle, please share your gyan. However, I have some tips to select a good dosakaya for the pickle at the end of this post.

And btw, dosakayi in telugu is the lemon cucumber and aavaalu is mustard which is the primary ingredient for the pickle. The name dosaavakaya is the combination of the two.
What do you need to make Doasaavakaya? 
2 small sized, tender firm dosakayis - to make 3 cups of chopped pieces
1/2 cup mustard
1/2 cup red chili powder
1 cup cooking oil - traditionally sesame oil or gingelly oil is used but I used my regular sunflower oil
1/4 cup salt - adjust based on the saltiness of the salt :-)
1/2 Tsp good quality asafoetida
How do you make Dosaavakaya?
  • Wash and pat dry the dosakayi ensuring there is no trace of water anywhere on the surface. 
  • Take the mustard to your blender and make a fine powder of it. 
  • Remove the stem end of the dosakayi by chopping a thin round slice of it.
  • Slit the dosakayi in half and taste a small piece of it to ensure there is no bitterness, it has to taste a little tangy or just bland. 
  • If the seeds are tender and do not carry any bitterness (do a taste test on them), go ahead and add them in the pickle. If the seeds are hard to touch, discard them.
  • Chop dosakayi with the skin intact into small pieces. The size of the piece is your preference. I have seen really thinly chopped pieces served in weddings, we cut it into normal bite sized pieces at home. 
  • Mix asafoetida, mustard powder, red chili powder, salt and half of the oil into the chopped dosakayi pieces and mix well till everything incorporates homogeneously. 
  • Add the remaining oil and  gently mix it in. 
  • Set aside for a couple of hours, you will see the dosakayi being a watery vegetable would have released water on contact with salt and the oil comes to the top of the bowl.
  • Scoop spoonfuls into a dry jar and enjoy it with your breakfast, lunch or dinner. 
  • This doesn't have a very long shelf life compared to the mango avakkaya but stays well for a month if preserved properly. 
Notes: 
  • Thumb rule proportion for the ingredients is 3 cups dosakayi pieces:1/2 cup red chili powder: 1/2 cup mustard:1/4 cup salt. I learnt my salty lesson some time back and the table salt is generally saltier than the sea salt version. 
  • Look for a dosakayi that is firm to the touch, no blemishes or soft spots on the surface. Golden colored skin all over the vegetable indicates it is wine ripened.
  • Do not use store bought mustard powders in pickles, use fresh ground mustard for the best flavor. Smaller mustard are more flavorful than the big seeds. 
  • As with any pickle making, ensure the cutting board, knife, dosakayi, mixing spoon and the preserving can are all completely clean and dry. 
  • Giving a couple of hours of settling time to the pickle helps the dosakayi pieces absorb the flavors well.
  • See the last picture to get an idea of how the pickle turns out in consistency after 2 hours of mixing the ingredients. Oil, mustard powder and dosakayi water blend together to produce a heavenly taste you won't be satisfied with one spoonful :-)

Tuesday, July 17, 2012

Raagi Mudde - welcome to a rustic, down home meal experience

Yep, some of of you that visited Sattvaa on my last post guessed it right about the next post. Raagi mudde and bassaaru is such a well known hand in hand combination. This dish is one of the staples in rural Karnataka diets and many other Southern states. Raagi/finger millet makes for a very filling and nutritious (highest calcium content per serving compared to all other millets) meal and hence is especially popular in the farming communities as they will be able to sustain longer while doing the physical work. Though I am a thorough city bred gal, I love this simple, homely meal of raagi mudde anytime.

By itself, the mudde (or balls) does not have taste except for the salt added to it but it is usually paired with a spicy, slightly thick broth such as bassaaru or other gravy items. This ball is not chewed but dunked in the gravy and gulped down the throat :-), so if you have never had it, it takes some practice. Nammamma never learnt the trick of gulping mudde bites while us kids followed Anna and enjoyed it. Now, while DD & I love our raagi mudde with bassaaru and adept at the technique of eating it, BH is still working on his skills of eating it right. So a trivia conclusion is that the genes can be transferred from father to daughter (as in my case) or mother to daughter (as in my daughter's case) :-)

Raagi mudde or cooked finger millet balls had been available only at homes when we were kids but on my recent visits to Bengaluru, I saw places glorifying and touting this healthy, nutritious and very filling dish. My experience with one of the restaurants which claimed to serve authentic Malnad food (for starters, raagi mudde is not from Malnad region) had a really bad looking mudde which was not even a decent mudde/ball but wiggling like jelly :-). I am grateful that I only saw it on someone else's thali and not mine.

I like my mudde soft yet firm. While the consistency is somewhat personal preference, the important thing is to make sure the flour is cooked well. If you are looking for back to basics, raagi mudde is as basic as it can get. Easy to prepare, uses just 3 ingredients (not counting the water of course) and keeps you full for a long time. Give this earthy dish a try and enjoy a wholesome meal.

If you haven't made raagi mudde or seen it being made, I strongly urge you to read through the notes. I made sure I put a lot of helpful tips in there. I am not very happy with my pictures right now but I did the best as everyone was waiting at the dining table, will try to update pictures when I next make raagi mudde.
What do you need to make Raagi mudde? 
1 cup raagi flour/finger millet flour
1.5 cups water
1/2 Tsp oil
1/2 Tsp salt

How do you make Raagi mudde? 
  • Take water, salt and oil in a thick bottom sauce pan and let it come to a gentle boil. 
  • Pour the raagi flour into the water, reduce heat and let cook for 4-5 minutes.
  • The water will bubble up and surround the dry flour completely, do not mix it before this happens.
  • Once you see only a small tip of the dry flour mound, mix it vigorously with the back of a sturdy wooden spoon and bring it to a single mass. 
  • Reduce the heat to low, cover the pan partially and cook for another 5-6 minutes. 
  • The color of the raagi mudde changes from light brown to dark brown when it cooks.
  • Take off the stove, smear your palms with a drop of oil and scoop out the raagi mass and make it into a ball. 
  • Pinch off small pieces of the mudde, dunk it completely in the gravy, put it in your mouth and gulp it down. Doesn't sound appetizing? Trust me on this and give it a try and I am sure you will become a fan.

Notes:
  • It is important to wait until the dry flour gets covered with boiling water so it gets cooked partially. 
  • Hold the pan tightly in one hand (my father used to hold it between his two feet to get a good grip while moving the wooden ladle with his hands) and mix it well so it doesn't form small flour knots - these do not cook well and makes raagi mudde taste bad. 
  • Watch the change in color of raagi mudde as you let it cook, you can also pinch off a small portion between your fingers, if it is sticky it needs to cook further. 
  • While making balls, put your hands in cold water to help manage the heat. 
  • You can enjoy raagi mudde with gravies that do not have a lot of vegetables so it is easier to dip the mudde pieces and coat it with the gravy. 
  • The ratio of raagi flourto water is 1:1.5 but may change slightly depending on the quality of the raagi flour. Whenever I get a new brand of flour, I usually take 1/2 cup water out of the vessel before adding the flour and then reuse it while cooking the mudde. This way you can be guaranteed with the right consistency. 
  • If the mudde after mixing in the flour seems very liquidish, add a Tblsp more of flour, mix it well and let cook. If the mudde seems hard (you will notice the difficulty while mixing it in), sprinkle some water and mix it. 

Sunday, July 15, 2012

Bassaaru & Palya with Dill leaves - a homely Karnataka experience

When me & younger brother were in elementary school, we lived in a rented house in Mysore that had a huge fenced up yard which was what i think most attracted my parents to take up that house. Over the years we spent in that house before moving away, we planted numerous flowering plants and fruit trees. That yard was where we had our summer drama clubs, climbed on trees to pick berries, put up impromptu and planned dance shows, painted our nails with color pencils and had all the fun with friends. The area was literally infested with kids my age and all of us going to the same school helped since we had the same vacations and holidays.

One drawback of the house according to nammamma (though we never cared) was that there was a wide, deep open drain meant for sewage running behind our house. It was dry for most part of the year except in the rainy season and never actually was used for the purpose it was built for. The mori as we called it in Kannada was deep and much lower than the street level and we kids had strict instructions not to go to the back side of our fenced wall and peep down into the activities that went on in the mori :-). As it was dry most days, it had become a play ground for traunt kids from a nearby neighborhood that never seemed to go to school. The kitchen window when opened overlooked a garden cum vegetable patch on the other side of the mori. When we first moved into that house, nammamma was very hesitant to even open that kitchen window but after some months she felt confident that the vegetables were grown in a healthy way and started getting her greens from there.

In the vegetable patch they mostly grew greens - all kinds of them, amarnath (dantina soppu), fenugreek (menthya soppu), Dill (Sabsige soppu), Coriander (kottambari soppu) and many others that I haven't seen in years and do not know the English names such as honagonne (a small leaved, slightly sweet and supposedly great for eyesight), keere soppu, chakkota soppu (though it had no relation to the similarly named citrus fruit) and so on. The patch looked like a green carpet from far and nammamma would know which was ready to be harvested by the height and density of the patch. I believe it was maintained by a family but we mostly saw two teenage boys tilling the patch, seeding it, hauling water from a dug up well, tending to the plants, harvesting and taking them off to the market for sale.

Although there was no scarcity of street hawkers frequenting our street starting at 6am in the morning with fresh picked vegetable baskets on their heads, nammamma preferred getting the greens from this extended backyard of ours. All she had to do was open the kitchen window and have a quick conversation with the guy in the patch as to what he was picking that day and what she wanted. He would keep some aside for her. After that one of us kids would be told to run around the house and the mori and get the freshly picked greens in a environment friendly basket called butti. The guy would come back later in the day to get his money and we never saw him as we would be at school. Fresh picked vegetables are the best kind and buying local  was a lesson in paying attention to what went into the plate and stomach every day.


Saaru in Kannada refers to the usual tangy appetizer also called rasam in many other languages that preps you up for a well made south Indian meal. Saaru is usually made with lentils and much thinner in consistency compared to the vegetable laden sambar or hulis. Every day saaru at home is made with toor dal & tomatoes/tamarind and then there are umpteen varieties of lentil free saarus made with the intention of drinking up as an appetizer. These are the comfort foods of every home cooked meal. Bassaaru is a popular variation of the saaru where in lentils and greens are cooked together and strained to get a very flavorful broth which is boiled with fresh roasted and ground spices. Since the saaru has to live up to its consistency, most of the cooked lentils and greens are transformed into a palya (curry) while the juicy broth is made into the saaru. The word bassaru can be broken up as 'basida (~strained)' + 'saaru(~rasam) which just explains the procedure of making this tasty saaru.  

While you can use all you want of the ready made rasam/saaru powders off the shelf for regular saarus, prepare bassaaru with freshly roasted and ground masala paste for best taste. The saaru is spicy with a blend of red chilies, tamarind and salt for taste while the palya is milder. The list of ingredients looks a little intimidating but they are all usually found in the Indian pantries, so go ahead and give it a try.
What do you need to make bassaaru & palya? 
4 cups cleaned, chopped dill leaves
1 cup toor dal/togari bele
2 Tsp salt divided (adjust to taste)
Small lime sized tamarind soaked in warm water for 20 minutes
1/2 cup grated coconut (fresh or frozen) - divided use
5-6 cups of water
1/4 Tsp turmeric powder/arishina pudi
Saaru masala: 
1 Tsp chana dal
1 Tsp coriander seeds
1/2 Tsp cumin seeds
1/2 Tsp poppy seeds/gasagase
4-5 dry red chilies (adjust to taste)
2 cinnamon sticks - 1 inch long each
2 black pepper corns
1 Tsp oil
2 Tblsp coarsely chopped onions - use red onions or shallots for best taste
For Palya seasoning/vaggarane:
1 Tsp oil
1 Tsp mustard seeds
1 Tsp chana dal
3/4 Tsp urad dal
1 or dry red chilies broken into 2 pieces each
3-4 curry leaves

How do you make bassaaru & palya?
  • Clean, remove thick stems and chop the dill leaves finely. 
  • Wash, pick toor dal, add chopped dill leaves, water and turmeric powder and cook it in pressure cooker until the lentil is cooked soft. 
  • Open the cooker after the steam is gone and pour the entire cooked mixture into a sieve to collect the water in a bowl. Reserve both the broth and the dal mixture separately. 
  • Heat 1 Tsp of oil in a pan, add all ingredients under saaru masala except onions and fry on medium heat until well roasted,  3-4 minutes.
  • When the roasted ingredients are cool, take them to the mixer/blender along with soaked tamarind, chopped onions and 1/4 cup of coconut and grind it to a smooth paste. 
  • Add salt and ground masala paste to the reserved broth and bring it to a slow boil. adjust salt, tamarind and water to taste if needed. 
  • Add 1 Tblsp of the dal and greens mixture on top before switching off. Consistency of the saaru should be slightly thick (like full fat milk). Bassaaru is ready to be served hot. 
  • Take another pan and heat a Tsp of oil and add the seasoning ingredients. When mustard pops and the dals turn light pink, add the reserved strained dal and greens mixture, salt and remaining coconut gratings and mix well. 
  • Keep this on the stove for a minute or two to bring it together and switch off. Palya is ready.
Notes: 
  • I used Byadagi variety of chilies which gives a bright red color to the saaru but is mild on heat. If you are using other spicy varieties of chilies, adjust the quantity
  • Do not add garlic to this saaru as it will overshadow the dill flavor.
  • If your cooked dal & greens mixture has less water or is devoid of water, add 2 cups of water, mix well and then run it through the sieve. You need to get the flavored broth for the saaru.
  • Bring the saaru to a slow boil as the onion needs to cook and let go of the raw smell.
  • The palya tends to get dryer and thicker as it cools because of the cooked dal in it. 

Coming up next on Sattvaa - Guess what we ate bassaaru with? It makes for a very nutritious meal and is a regular meal in the farming communities in Karnataka. I will be back soon with that recipe.

Wednesday, July 11, 2012

Bhindi (Okra) Jhunka - Blog hopping for taste

Oh Boy! time really flies, it seems like only yesterday when I did my last blog hop post about Cajun potatoes and here I am with another one. Exciting journey, exciting explorations and lots of fun.

Radhika who has been running the blog hop Wednesdays, paired me up this time with Priya of Priya's Versatile Recipes. Now, here is a person I have only met online in the context of food blogs and i have visited her blog for the last month or so since I discovered her on the previous hop. She has amazing energy, cooks a wide array of dishes and going by the number of posts she has blogged in the last few days, you would think she is on a mission (incidentally she is really on a cooking marathon). Priya has been blogging for a while now and has a wonderful collection of recipes on her blog. I do honestly admit, I had short listed 4 recipes from her blog and finally gave into this okra dish. I am glad I did as we all enjoyed this side dish very much.

Okra/ladies fingers/bhindi/bendekayi is one of my favorite veggies, I know I say this for most vegetables. What can I do? I am just a regular veggie lover. Look for other okra recipes here and here. Okra is unique, not very tempting to look at and slimy when you cut into it but properly cooked, this makes for some of the tastiest dishes you would have had. I am familiar with jhunka and make it plain or sometimes with bell pepper but had never thought of making it with okra. The addition of ajwain in this recipe was a clincher and we loved the flavor pop in the mouth.

Thanks Priya for a keeper recipe :-)
What do you need to make Okra Jhunka?
2 cups thinly sliced okra roundels
1/2 cup thinly slices onions
1/2 cup gram flour/basan
1/2 Tsp ajwain/om seeds
1 Tsp mustard
1 Tsp red chili powder (adjust to taste)
1 Tsp salt (adjust to taste)
2 Tblsp cooking oil
3-4 curry leaves
2 green chilies - slit lengthwise
1 Tblsp chopped cilantro/coriander leaves for garnish

How do you make Okra Jhunka? 
  • Wash, pat dry okra - make sure every okra is completely dried. 
  • Trim the ends and cut the okra into 1mm thick roundels.
  • Heat a pan on medium and dry roast the gram flour constantly stirring for 8-10 minutes or until the flour turns light brown and you get the nice roasted smell. Keep aside.
  • In the same pan, add oil, mustard seeds, ajwain, green chilies and curry leaves. Let mustard pop. 
  • Add the onion slices and let it fry for a couple of minutes until onion sweats and turns pink. 
  • Add the okra pieces, salt, turmeric powder and cover and cook undisturbed for 3-5 minutes. 
  • Once the okra is soft, add the roasted gram flour, red chilies powder and mix well.
  • Continue to cook on medium low heat for another 5-8 minutes, the gram flour when comes in contact with oil gives out a wonderful aroma. Priya says the oil leaves sides, I didn't see it since I hadn't used a lot of oil to start with. But the taste was perfect. 
  • Take off the heat and garnish with chopped cilantro or coriander leaves. 
  • Serve with rotis or hot rice. we had ours with rice and rasam. 
Notes: 
  • Roast gram flour on medium heat and constantly stirring so it doesn't burn. 
  • Make sure okra is cooked before adding the gram flour.
This delicious okra jhunka goes to Radhika's Blog Hop Wednesday

Monday, July 9, 2012

Gobi Manchurian - a family favorite

Gobi Manchurian - the yummy appetizer available in every Indian restaurant, doesn't need any introduction, right? It is not something I make frequently at home just because I go a little low on deep fried recipes. But when craving hits, DD is having her Summer vacations and it is one of her favorite starters (she fills her stomach with it before the main course is served), I made an exception last weekend and we had some of the best home made Gobi Manchurian devoured by all.

Weather has been so gorgeous and perfect, I don't want to jinx it but I have to admit that the balmy skies bring a wonderfully peppy outlook. It is easier to plan outings, enjoy the beautiful nature and terrain and that is what we have been doing for the last 2 weekends. Get up in the morning, pack stuff for lunch and head out on a drive or a hike and I am loving it. Last weekend, we came back in the evening from one of our outngs and made some delicious Gobi Manchurian for dinner, yes it was a full dinner and we made up for eating all that deep fried goodies with some fresh fruits we had got in the morning :-)

Gobi Manchurian is easy to prepare as long as you follow a few simple tricks which will make you dish out a perfectly crispy and juicy Gobi in the sauce. We like the dry form of the Gobi Manchurian and as you can see in the pictures, the sauce is well coated on every Gobi floret but it is not floating in it.
What do you need to make Gobi Manchurian?
For Gobi Manchurian: 
1 medium head of fresh cauliflower/gobi
1 cup all purpose flour/maida
1 heaped Tblsp corn flour
3/4 Tsp rice flour
2 inch long fresh ginger root - peeled and pound in a mortar & pestle or use 1 Tsp fresh ginger paste
2 garlic cloves - mashed into a paste
2-3 green chilies - pound in mortar and pestle
1/4 Tsp turmeric powder
1 cup water
Oil to deep fry - I used Sunflower oil
For the sauce:
1/2 cup tomato ketchup (I used Heinz)
1/3 cup soy sauce - I used the less sodium, naturally brewed
1/4 Tsp black pepper powder
1/2 medium red onion - chopped roughly
1 small jalapeno pepper - deseeded and cut into 1/4 inch thick roundels or use roughly chopped bell pepper

1 Tsp salt - divide and use - adjust to taste
For garnish(Optional): 
1 Tblsp finely chopped sprig onions
1 Tblsp finely chopped cabbage

How do you make Gobi Manchurian? 
Gobi preparation: 
  • Remove the stem of the cauliflower and separate the florets, chop them as small or big as you would prefer individual bites to be. 
  • In a wide bowl mix 1/2 Tsp salt, turmeric powder, ginger, garlic and green chilies paste and coat them over the cut Gobi florets. Let it marinate for 30-40 minutes. 
  • Mix all the flours, remaining 1/2 Tsp salt and make into a thin batter. The consistency should be flowing. 
  • Heat the oil on medium heat and test readiness by dropping a small pinch of the batter into it. If the batter comes right up to the surface, the oil is ready for frying. 
  • Take the marinated Gobi florets one batch at a time (sufficient to fill your oil pan but not overload it) and dip it into the batter and drop gently into the hot oil. 
  • Let it cook for 2 minutes without disturbing and then turn them over and let cook on the other side for 2 minutes. Keep the oil on medium heat and let the Gobi cook well. The bubbles in the oil subsides when the Gobi is done. 
  • Drain the fried Gobi and set aside on a paper tissue to absorb oil. 
Sauce Preparation: 
  • Heat 1 Tsp oil in a wide pan, keep the heat on high. 
  • Add the onion slices and let cook on high for just a minute, the onion should not get soft, should be crunchy. 
  • Add the sliced bell pepper and fry for another minute, again make sure it doesn't become soft. 
  • Add the tomato ketchup, black pepper powder and soy sauce in to the pan and stir it quickly to coat all the onion and bell pepper pieces. 
  • Add the fried Gobi and mix it well to coat every fried floret well with the sauce. 
  • Serve hot Gobi Manchurian immediately garnished with thinly chopped spring onions and cabbage. 
Notes: 
  • Corn flour and rice flour give a crispy layer to the Gobi, so make sure you use them. 
  • Marinating the florets in the ginger, garlic and green chilies paste allows them to absorb the flavors well and gives you the authentic, restaurant taste of the Gobi Manchurian.
  • Make the batter thin, it should only coat the Gobi in a single layer and should not be lumpy as it will make the Gobi soggy. 
  • Remember you are adding salt in 2 places and the store bought tomato ketchup and soy sauce have sodium in it, so make sure you do not over salt the end product.
  • Adding turmeric powder to the batter gives a nice color to the Gobi Manchurian when fried. 
  • It is a good practice to soak cauliflower florets into warm salted water before marinating it. 
  • Garnish is completely optional and you can use anything you like or omit it completely, it is my way of getting some healthy vegetables in as part of the process.
  • Mix fried Gobi into the sauce just before serving. 
  • After taking the Gobi out of oil, if the covering feels soft to touch, refry another 2 minutes until it is crispy.