Hope you all had a good weekend, we enjoyed ours and had the finale of Summer over the past 3 days. Had some guests on Saturday, watched some movies on Sunday and Monday, got ready for another school year. Back to school for DD from today, another year has started. Time seems to be just flying. I miss my little girl and the cuddly times but so proud of the confident young woman she is growing into. It has been a good Summer, contrary to what many said, weather has been extremely pleasant, I am happy that we all settled in without major 'hitchkies' and completed a full year in the new home.
So, to celebrate a good year, good summer and also to wish for sweet tidings in the future, I made some yummy mithai (burfi) last evening. This is called 7 cups burfi (I would imagine it was some one who was extremely creative on the cooking side but had exhausted those streaks when it came to naming their creations :-)), the name is just suggestive of the quantity of ingredients that go into the mithai. Mithais or burfis are Indian desserts made in different ways but usually ending up as a semi firm - firm piece of sweet comparable to fudges. For a long time, I had not ventured into the mithai making as I always thought getting the right consistency is for experts only :-). I am slowly feeling confident that I can manage burfis in the kitchen now.
This is a very 'novice friendly' recipe with no syrup involved, a few things need to be kept in mind while making this mithai which applies equally well for all mithai making, look for those tips in the notes section below. As nammamma puts it 'Ganapati maadbeku andre kashta, avarappanna maadokke enu kashta? (It is difficult to make an idol of the Hindu diety Ganesha/Ganapati as he has eyes, trunk, mouth, flappy ears and so many other details to be taken care of but making his father Shiva represented by a lingam - a very easy to depict structure should be totally effortless.). So here is a very simple recipe of the 7 cups mithai you can attempt in your kitchen and enjoy these melt in the mouth desserts.
The cup referenced below can be any size, use the same container for measuring all the ingredients. I used my small katories from the kitchen.This is a semi firm mithai with a coconut flavor, the pieces hold their shape well and can be kept for 4-5 days . If you want to extend the shelf life, put it in the refrigerator.
 What do you need to make 7 cups mithai?
1 cup kadle hittu/besan/gram flour (use the fine powder)
1 cup grated coconut (fresh or frozen)
1 cup ghee/clarified butter melted to liquid form
3 cups sugar
1 cup milk (I used 2%)
1/4 Tsp fresh ground cardamom
Other needs:
1 - 8 inch pan or steel plate with edges to spread the mithai
1 heavy bottom pan to make mithai.
How do you make 7 cups mithai?




So, to celebrate a good year, good summer and also to wish for sweet tidings in the future, I made some yummy mithai (burfi) last evening. This is called 7 cups burfi (I would imagine it was some one who was extremely creative on the cooking side but had exhausted those streaks when it came to naming their creations :-)), the name is just suggestive of the quantity of ingredients that go into the mithai. Mithais or burfis are Indian desserts made in different ways but usually ending up as a semi firm - firm piece of sweet comparable to fudges. For a long time, I had not ventured into the mithai making as I always thought getting the right consistency is for experts only :-). I am slowly feeling confident that I can manage burfis in the kitchen now.
This is a very 'novice friendly' recipe with no syrup involved, a few things need to be kept in mind while making this mithai which applies equally well for all mithai making, look for those tips in the notes section below. As nammamma puts it 'Ganapati maadbeku andre kashta, avarappanna maadokke enu kashta? (It is difficult to make an idol of the Hindu diety Ganesha/Ganapati as he has eyes, trunk, mouth, flappy ears and so many other details to be taken care of but making his father Shiva represented by a lingam - a very easy to depict structure should be totally effortless.). So here is a very simple recipe of the 7 cups mithai you can attempt in your kitchen and enjoy these melt in the mouth desserts.
The cup referenced below can be any size, use the same container for measuring all the ingredients. I used my small katories from the kitchen.This is a semi firm mithai with a coconut flavor, the pieces hold their shape well and can be kept for 4-5 days . If you want to extend the shelf life, put it in the refrigerator.

1 cup kadle hittu/besan/gram flour (use the fine powder)
1 cup grated coconut (fresh or frozen)
1 cup ghee/clarified butter melted to liquid form
3 cups sugar
1 cup milk (I used 2%)
1/4 Tsp fresh ground cardamom
1 - 8 inch pan or steel plate with edges to spread the mithai
1 heavy bottom pan to make mithai.
How do you make 7 cups mithai?
- Prepare the 8 inch pan by spreading 1/2 tsp of melted ghee, keep aside.
- Heat the heavy bottom pan on medium heat, add all the ingredients and mix them well.

- Keep stirring constantly with a spoon.

- The color changes to a slightly darker shade and you start to smell the roasted besan in your kitchen.

- Continue to stir until milk reduces and all the ingredients start to come together into a soft mass. At this stage, you will also notice ghee oozing out from the sides and the mixture looks dry.

- Add cardamom powder and mix well.

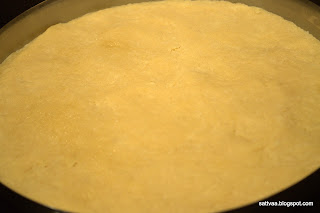
- Pour the mixture into the prepared pan and with either wet hands or a flat spatula, spread it into a even thickness in the pan and smoothen the top.

- Using a sharp knife, make markings for the pieces - do not do all the way to reach the bottom of the pan/plate at this time.

- Let the mithai cool down before cutting them into pieces of desired shapes.

Notes:
- Always keep the heat on medium low - the basan needs to get cooked while you make the mithai. High heat burns the mithai while fast cooking renders basan uncooked/undercooked.
- I use my thick non stick sauce pan as this has a handle which I can hold while mixing.
- One of the readiness tests I do on the mithai is to wet my hands, take a small portion (~1/4 tsp) in my hands and roll into a ball. If the ball holds the shape, does not stick to your fingers and stays up, the mixture is ready to be poured into the pan.

- I have made this burfi without milk and reduced sugar - turns out fabulous too. We call it '5 and 3/4 cup burfi' or '4 platforms behind Hogwarts express' - <wink>, <wink> for any Harry Potter fans out there. Just eliminate the milk and use a little less than 3 cups sugar. I recommend using milk as it further softens the texture but try this variation if you want an extended shelf life.
- Make the markings for the mithai as soon as you have spread the mixture into the plate. This helps cut the mithai into nice looking pieces.

- My Indian grocery store carries two kinds of basan - one slightly rough and meant for making boondi or laddoos and the other a super fine powder used in burfis, kadhis and dhoklas. I use the super fine powder in this recipe.

- You can use nutmeg powder for a different flavor or just enjoy the mithai with the roasted basan & coconut flavor.


