Even at the expense of sounding like a broken record, I state that I am a self confessed snack junkie and a grazer by all ccounts. I love my snacks more than regular food and love spicy ones better than sweet ones. I have successfully transferred that habit of mine to BH in all these years of togetherness. He was the 'happy to overeat' at regular meals but 'not bother about snack' person. On the contrary, some of my best childhood memories are with the snacks nammamma stored in the tin cans and plastic jars. I don't remember our kitchen devoid of some kind of snack item at any given point of time. The quantities used to be large as the house was always filled with visiting friends, family and others :-). I love to keep something in the kitchen for my cravings. These items have varying shelf lives depending on what they contain and how they are cooked.
A lady I knew in Midwest made rotis at home that used to get grabbed almost immediately by people who either had no inclination to cook at home or were busy to do so. I have got rotis from her on occasions when work was too hectic. I could walk into her kitchen and chat with her as she deftly made rotis and packed them hot and soft. I later learnt she also made some curries and was famous for her 'made from scratch' Dhoklas. Once when we had family visiting and went out on a trip, I asked her for a couple of dozen rotis and Dhokla. She hesitated a little bit as it was a long weekend and she had other plans but handed me the Dhokla box when I went to pick up my rotis. One of the sweetest ladies I have met and the Dhoklas were to die for.
She told me later she soaks dal, grinds it and makes the dhokla. I don't go into all that trouble but I do make some real good Dhoklas. Lot of my friends have been asking for the recipe and though I have made it many times in the last year, I had either not taken pictures and the pictures had not turned out to my satisfaction. But I made some this past weekend for a pot luck and remembered to also take pictures. Since everyone liked it at the party, here is an easy and quick recipe for Dhokla. Look for the tip in the notes section to make every Dhokla piece taste equally tangy & good.
 What do you need to make Dhokla?
Makes about 20 1X1 inch piece dhoklas
1 cup besan/fine gram flour
1/4 cup plain yogurt (preferably home made and a day old)
1/4 cup oil (I used Sunflower oil)
1 Tsp eno fruit salt
1 Tsp salt (adjust to taste)
1 Tsp grated ginger
1/2 Tsp green chili paste
1/4 cup water
1/8 Tsp asafoetida powder
1 Tblsp Chopped cilantro for garnish
1 Tblsp Grated coconut for garnish
For seasoning:
1 Tblsp oil
1 Tsp mustard
1/2 Tsp cumin (optional)
1 Tsp white sesame seeds
1 Tblsp lemon juice
 How do you make Dhokla?


A lady I knew in Midwest made rotis at home that used to get grabbed almost immediately by people who either had no inclination to cook at home or were busy to do so. I have got rotis from her on occasions when work was too hectic. I could walk into her kitchen and chat with her as she deftly made rotis and packed them hot and soft. I later learnt she also made some curries and was famous for her 'made from scratch' Dhoklas. Once when we had family visiting and went out on a trip, I asked her for a couple of dozen rotis and Dhokla. She hesitated a little bit as it was a long weekend and she had other plans but handed me the Dhokla box when I went to pick up my rotis. One of the sweetest ladies I have met and the Dhoklas were to die for.
She told me later she soaks dal, grinds it and makes the dhokla. I don't go into all that trouble but I do make some real good Dhoklas. Lot of my friends have been asking for the recipe and though I have made it many times in the last year, I had either not taken pictures and the pictures had not turned out to my satisfaction. But I made some this past weekend for a pot luck and remembered to also take pictures. Since everyone liked it at the party, here is an easy and quick recipe for Dhokla. Look for the tip in the notes section to make every Dhokla piece taste equally tangy & good.

Makes about 20 1X1 inch piece dhoklas
1 cup besan/fine gram flour
1/4 cup plain yogurt (preferably home made and a day old)
1/4 cup oil (I used Sunflower oil)
1 Tsp eno fruit salt
1 Tsp salt (adjust to taste)
1 Tsp grated ginger
1/2 Tsp green chili paste
1/4 cup water
1/8 Tsp asafoetida powder
1 Tblsp Chopped cilantro for garnish
1 Tblsp Grated coconut for garnish
For seasoning:
1 Tblsp oil
1 Tsp mustard
1/2 Tsp cumin (optional)
1 Tsp white sesame seeds
1 Tblsp lemon juice
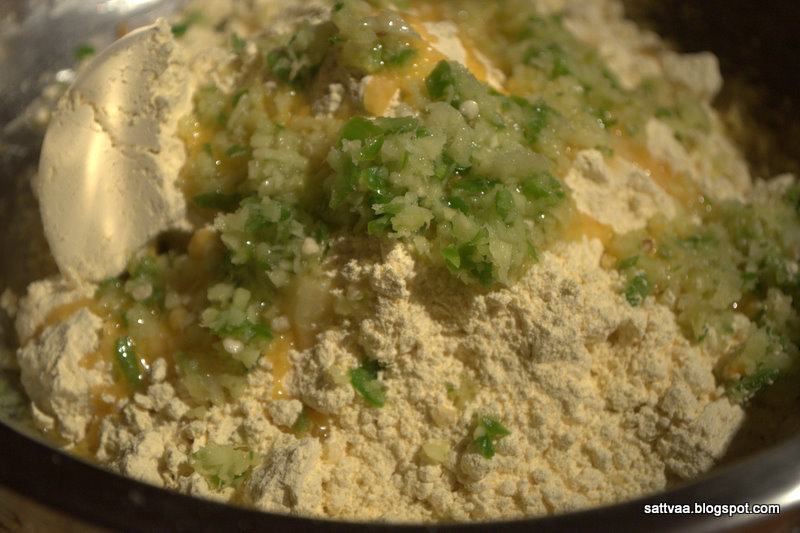
- Take a big bowl, add besan, salt, asafoetida, grated ginger and green chili paste. Mix well.
- Whisk the yogurt once to make it uniform.
- Add oil, eno, yogurt and water and mix it in. Consistency of this batter should be thicker than the regular dosa batter and it should fall in clumps. Follow the proportions above and you get the right consistency.
- The batter should be mixed well without any lumps, I employ my trusted hands for the job as I can feel the texture better.
- Pour the mixture into a pressure cooker vessel (or any other vessel you can fit in your pressure cooker) and cook it without the pressure cooker weight for 15 minutes after the steam starts coming out.
- Switch off and let the steam go down, open the cooker and let the dhokla stand for a few minutes before cutting them into pieces of desired shape and size.

- Arrange the pieces in a wide plate.
- Heat oil in a pan, add mustard, cumin(if using) and sesame seeds. Let mustard crackle. Add lemon juice into the hot oil and switch off the stove.

- Using a spoon, pour the seasoning all over the Dhokla pieces.

- Garnish with chopped cilantro and grated coconut.
- Enjoy the moist, melt in the mouth Dhokla with your evening tea or coffee.
Notes:
- Ensure your Eno is fresh & potent. When you add Eno to the mixture, it should feel frothy in your hands as you mix it in.
- I add asafoetida in most of my non-sweet dishes using besan to ward off the side effects of the flour. You can omit it if you consume besan regularly or do not like the smell of asafoetida.
- Cooking Dhokla is same as cooking idli, no weight on the pressure cooker, turn the heat down to medium low once it is full steam and cook for 15 minutes. A knife pushed into the Dhokla should come out clean.
- The lady who made the Dhoklas for me said adding lemon juice to the hot seasoning helps Dhokla to absorb the lemon juice uniformly and I find that tip to be very useful.
- I use plain Eno salt, you can use flavored ones if you like them.


