Showing posts with label South Karnataka specials. Show all posts

Sunday, May 1, 2016

Boodukumbala kaayi (Ashgourd/winter melon) dose - changed perspective with a swapped in ingredient

Changing one's vision changes one's sight - Acharya Vivek

Random rambling alert on today's blog post:-). If you like to go to the recipe directly, please feel free to do so below. Let my ramblings not dilute the delicious dish I have today, I will say only this - this is a dose/dosa recipe that changes your perspective on dosa, the ingredients that are in the recipe are not what you would expect from a typical South Indian dose recipe, but then with so many changes around you, what really is typical anymore? Your last chance to scroll down to the recipe before the ramblings come down in an avalanche :-) and here is a teaser of the dish..
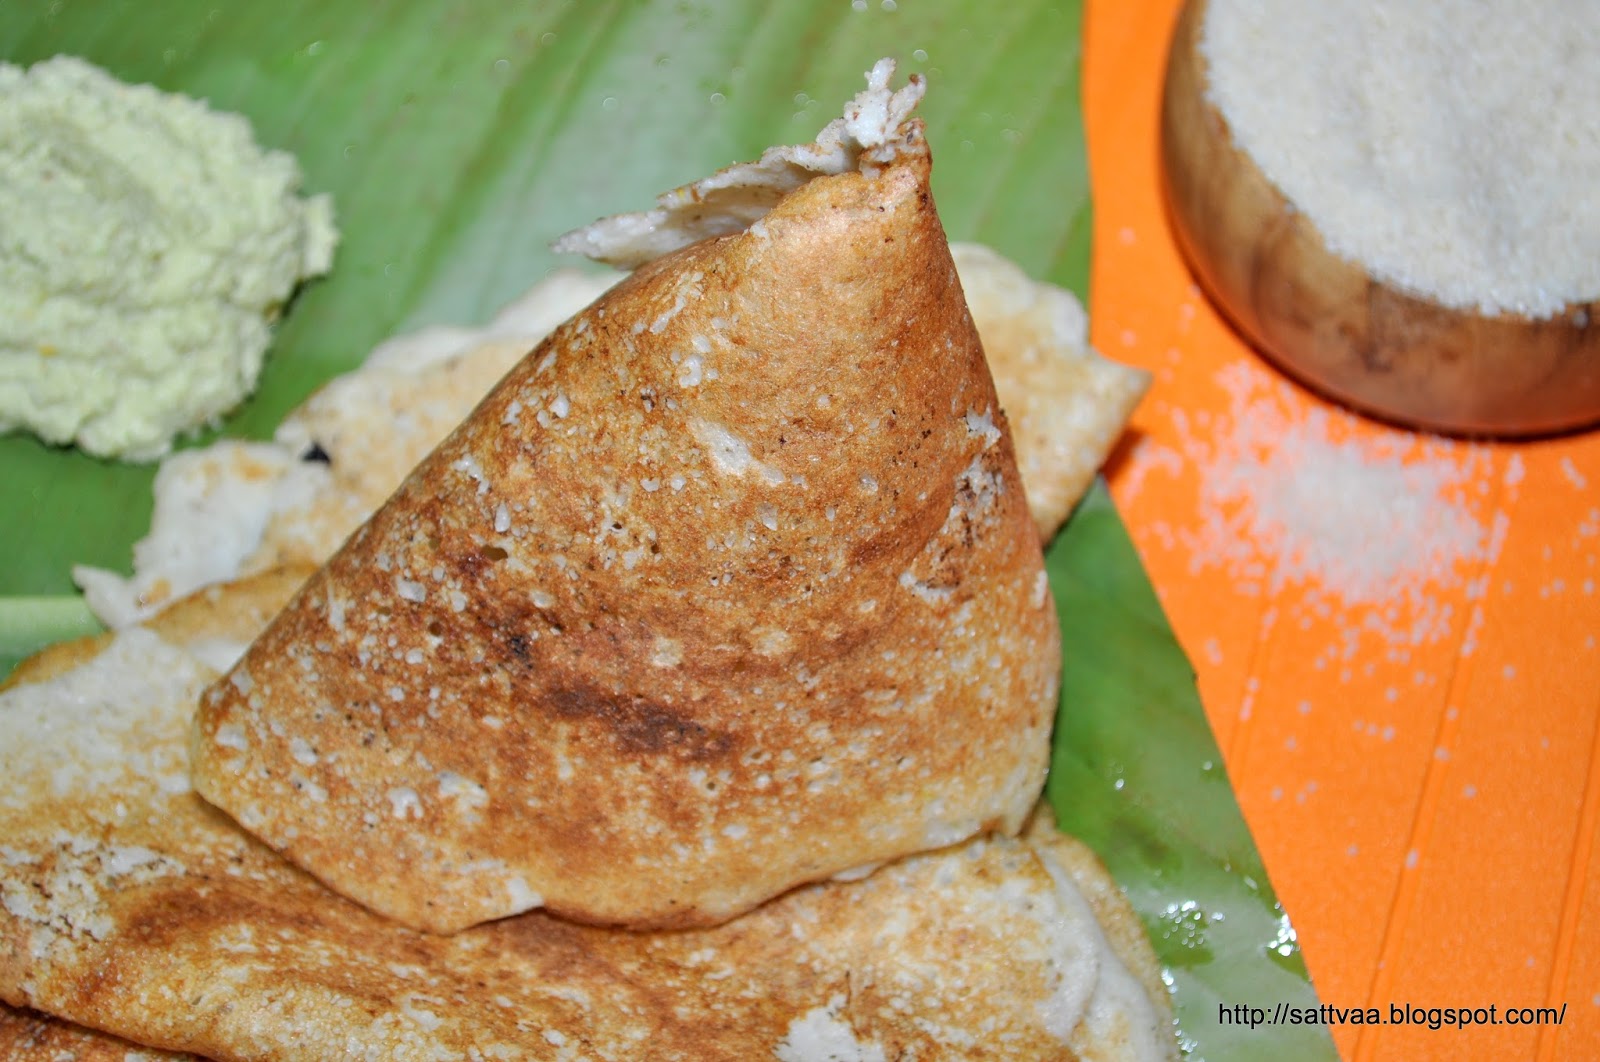
I wrote the quote at the head of the post today for a reason, that single sentence seemed to convey so much that I have been grappling to take in recently. Stereotypes broken, traditions created a-new.. isn't that part of life and while I am looking wide eyed around me, this quote finds its way into my inbox as if to summarize all that is happening.

I grew up in a small city, culturally vibrant, educational hub for some of the best education possible at the time, nonetheless small and contained. I also grew up in a family that was interested in music, literature and arts as well as scientific education. I am grateful for all of this and what it has made me in life today. But as life takes me to different places through different experiences, I learn every step of the way that my values are solidified with what I know thus far and the only way to broaden horizons is to be accepting of things that I may not know of and keep an open mind.
Music has been an integral part of life for me and I am no stranger to music concerts. But we went to a certain kind of music concerts always, mainly the classical kind. There was no dearth of concerts in Mysore and the music lovers in the city didn't need excuses to arrange concerts either. There were big scale concerts around Rama Navami and Dasara but rest of the year used to witness multiple music programs sponsored by various sabhas (organizations). I went to many, many concerts with family and enjoyed them all. Big brother studying in the Northern part of India introduced us to the joys of Hindustani classical, high school and college days saw me listen to many light classical ghazals, post marriage I enjoyed a lot more Lata, Rafi, Kishore Kumar style with BH and then as DD grew up into a music loving teenager, I was introduced to many of her favorites in Pop, jazz and all the new age genre. I love all kinds of music as long as it suits my mood at that time, but have really not attended many non classical concerts in my life. BH & I went to one last evening by a very popular musician, classically trained but into Indian movie music.
It was almost an eye opener, everything about the program was so different from my mental image of a music concert :-). The big stadium, the dancing crowd, loud speakers, flashing lights and the musicians engaging the audience all of it seemed to contrast and almost defy everything I held as part of my definition of a music concert where audience are engaged in a very subtle and gentle way, the most visible movement you see is a nod of the head or a pat on the knees as you try to keep with the percussion and the musicians themselves are more inward than outward. My initial reaction was one of total hesitation but as I got into the music, I found it totally enjoyable and in no time was enjoying the real music behind all the glitter. Great experience and only because I was ready to lift the veil off of my perceptions and change the vision!! Thanks to the local chapter of Sankara Eye foundation for organizing the program as they also fund raised for a good cause.
Today's recipe is one of changing the vision too. Millets started showing up as part of super healthy food on the blogosphere a few years back. There has been so much discussion about embracing healthy foods such Oats and Quinoa Versus the Desi grown millets. I accept that I am not an early adapter of changes, I let things settle down a little, feel comfortable before jumping on any band wagon. Though I kept hearing about the millets from various sources, I didn't spend a lot of energy researching them until much later. The only millet I was familiar with was Raagi or finger millet which I love and then jowar or sorghum. Raagi is a regular at home with the famed Raagi mudde and jowar has been silently sneaking into the kitchen for years since we love jolada rotti. Other than these two, I had pretty much stayed away from the millets, or rather was ignorant and uneducated about the existence of other millets.

For my background as a South Indian from Mysore, no meal is satisfying without the fluffy, white steamed rice. Most of us do not even consider brown rice as edible, it is almost snobbish the way people like me turn their noses to anything but the light, pearly white, super fluffy sona masoori rice :-). If you were to feed me a sticky jasmine rice, you would have to be a very patient, gently coaxing mentor :-), otherwise chances of success would be highly diminished. As we grew up, and also due to the lack of easy accessibility to rice made me add lot of wheat (another grain I was familiar with) and then slowly steer towards the easily reachable oats, quinoa and barley. Over the years, I have experimented with these different, possible supplements for my white rice. I still love my white rice but have successfully incorporated other grains and seeds in to the daily routine. And yes, brown rice makes its way into our kitchen too.

When I first heard of millets, I had no clue what they were. Nammamma never made anything like this, nor did amma. A year or so back, on a trip to my local grocery story, I found an entire shelf of packets that had different looking ingredients. Out of curiosity, I picked up each one of them and read the labels and then one of them caught my attention. The label said kodo millet and had the name in multiple Indian languages and the Kannada name was 'Harka'. This took me to a favorite novel of mine I have read and re-read many times by a famed Kannada author called S.L.Byrappa and there is a reference of Harka in that book as a rice substitute but the part I remembered was how people in plague ridden parts of the state had no access to rice for many months and had to survive on lesser desired things such as Harka which caused familial fights. While reading the book, I had never bothered to find out what harka was but here it was glaring in my face after all these years in my adopted country.

I brought small packets of every single variety of millet home that day and tried to cook with it. More than cooking, I was somehow trying to relate to and connect with all those ancestors that had lived the nightmare of the plague in those times. Millets are actually seeds very much like Quinoa which is the modern day super food and have higher fiber content than rice and better nutrition than polished rice too. I have been experimenting with these millets for almost 2 years now but haven't really written a lot about them. They are great rice supplements if you are looking for one and you can have them with any side dish just like rice. Depending on the variety, you may find and need to adjust how you cook or use them as some of them are bigger in size than others and may take longer to cook.
Initially I started adding them to my dose and idli batter while still keeping a major portion of rice. But once we got over the initial hesitation, I extended the proportion of millets and now have recipes which do not use rice at all. I am not saying rice is bad, my family has consumed rice all their lives and lived a pretty healthy life but as times change and if you are actively looking for other ingredients, millets are ready to take that spot without hesitation. Of the varieties I have used, 2 of my favorites are the foxtail millet (navane in kannada) and the little millet (Saama in Kannada). I find kodo millet to be dry and also the packages that I got had a lot of dirt that had to be picked. I don't get barnyard millet all the time here so no specific bias on that one.

Foxtail millet is good if you are making rice varieties (Ex: tamarind rice, chitranna etc) as it holds shape and can be cooked fluffy. Little millet is perfect for batters as it soaks and grinds easily. It is also great in and recipes like pongal, BBB etc since it tends to cook to a mushy consistency. Unlike quinoa, the millets do not have a smell or taste of their own thus making them invisible super ninjas as you replace them with rice in any recipe. Today's recipe is a coastal Karnataka favorite made with rice and ashgourd, I replaced the rice with little millet. Ashgourd is summer vegetable, when the mercury hits high and you are craving for something watery and cool, this is a go to vegetable. This dose is delicious whether you make it right out of the blender or let it sit for a few hours. All I had to do was change my vision to find better sight :-), go ahead and give it a try. If you are hesitant to try millets, make this dose with regular rice. Either way it is a keeper recipe!!

If this interests you to try other millet recipes, let me know with a comment on the blog post, I will get to post them sooner than following my lethargic pace :-)
What do you need? 
2-2.5 cups grated ashgourd
2 cups millet
1 Tsp fenugreek seeds
1 Tbsp urad dal (you can skip this if you like)
1 Tbsp poha or avalakki (thick variety)
1 Tsp cumin seeds
4-5 green chilies
1 Tsp salt (adjust to taste)
couple Tsp oil to roast dose
How do you make? 

  • Wash, pick any dirt from the millet and soak it in water along with fenugreek, urad dal and poha for 4-6 hours. Do it overnight if you have time or if you are using the thicker millets like foxtail millet. 
  • Wash, peel the outer skin and grate the ashgourd. Collect all the water it releases while grating and reserve for later use. 
  • Drain the water you have used for soaking and add the ingredients to a blender along with cumin and green chilies. 
  • Add all the grated ash gourd reserving about 2 Tbsp for later use to the blender and blend into a smooth paste. 
  • The water from the grated ashgourd can be added while grinding to get the required consistency, use it a little at a time to avoid making a very watery mixture. 
  • Once the ingredients have turned into a smooth paste of pouring consistency, take it out into a bowl and add the remaining grated ashgourd. 
  • Add salt to the batter if you are making dose right away or wait until you are ready to make them. 
  • Heat your dosa pan or griddle on medium heat, and once the pan is hot, take a ladle full of the batter and spread it in a circular motion. 
  • This can be made as thin or as thick as you choose. 
  • Add a few drops of oil around the edge of the dose, and let it cook covered on one side for a minute on medium heat. 
  • When the underside is golden, gently nudge the dose from the pan and flip it over. 
  • Cook on the other side for 30secs and take it out onto a plate. 
  • Repeat for the remaining batter or as many doses as you need.
  • Serve hot with ghee and chutney of choice. 
Notes: 
  • I used sawa/little millet this time but have made it with foxtail also. You can use either of these or other millets such as kodo, barnyard or little millet. Soaking millet makes it soft for grinding and makes the dose soft too. 
  • If you like thinly spread dosas, grate a small piece of the gourd in the small hole of the grater. The rest of the gourd that goes into the blender can be done on the big holes. This makes it easier to spread. 
  • The dosas get a nice golden color with the fenugreek so do not skip that. 
  • Urad dal is optional in this recipe and I don't add it sometimes. 
  • You can make this dose with the watermelon rind instead of the ashgourd. 
  • If you like crispy dose, don't cover it while cooking and cook on one side only. 
  • I add green chilies and cumin for flavor as both millet and ashgourd are sort of bland, you can omit these ingredients and eat it with a side dish if you choose. 

Sunday, June 15, 2014

Ele kadubu also called Kai Kadubu - a succulent sweet dish from the deep interiors of Karnataka

I am back with a regional delicacy from the interiors of Malnadu/Malnad in Karnataka. It is a sweet very unlike anything you may have eaten thus far but has the ability to hook you on the first bite and keep you asking for more :-). I would say this is a very elegant and artistic dessert that is fit for a weekend indulgence with family or to treat friends on occasions. It has a succulent coconut jaggery filling wrapped in a thin layer of ground rice and steamed in fresh turmeric or banana leaves that impart their natural flavors to the dish. I am talking about Ele Kadubu (~Steamed dumpling made in leaves) or Kai kadubu (dumplings made with coconut) as it is called in the Malnad region. This dish is very popular in South Karnataka/Mangalore region too and goes by the name of 'Genasale'. I have seen this dish also called Pathol/Patholo on the borders of Karnataka and Maharashtra.

What is so special about this steamed dumpling? The way it is made, there are other similar (from an end product perspective) looking dumplings, I have one of them here. But the Ele kadubu varies from this version in the way it is prepared using a leaf (Ele ~ leaf and usually fresh turmeric leaves are used) and if you are not used to dishes cooked in leaves, you obviously have the question mark on your face now asking, "Why"? Here is why.. fresh turmeric leaves impart a beautiful aroma to the dish and from a very consumeristic goal, it reduces clean up effort since all you have to do is, unwrap the leaf, eat the kadubu, put the leaf into the backyard composter for reuse. Let us back up a little bit to the aroma advantage, this is slightly hard to describe but all I can say is for you to trust me on this and believe that wrapping in turmeric leaves makes the dish totally delectable.
I remember having talked about our precious turmeric leaves in Mysore home in one of my earlier posts. Once when doddamma (amma's older sister) visited us, she exclaimed at the fresh green turmeric leaves in the yard and was really surprised at the ignorance of her city bred sister's family. So the sisters got together and made this out of the world dish for us :-). Doddamma lived her entire life in the heart of Malnad and was an awesome cook. But then that was long time ago and somehow nammamma never took to making this often as she made the sweet version the other way. Sometimes, one experience is all it takes for something to make a lasting impression. I fell in love with this kadubu.
A couple of years back, while in India, DD & I went to meet up an old collegue of mine. His parents live with him and aunty had made a delicious lunch of vegetable pulav, raita, home made papads, rice, rasam etc and I was already feeling like a bloated boat when she brought us the yummy looking sweet. Something popped and I knew exactly where and when I had eaten it before and without my usual, "I don't really eat much sweets" etc, I grabbed a kadubu. DD was looking at me as if I could cover for her but since she didn't get any encouragement from me and not being able to say 'No' to the sweet lady, she took one bite gingerly. I could tell from the gleam in her eyes and the speed at which she went back for the second bite that we were two peas from the same pod :-). Needless to say, I made aunty explain the how & what of the dish in detail. Like I said, she called it Genasale and told me that banana leaves can be used in the absence of turmeric leaves and mentioned that they add chopped jackfruit pieces when the fruit is in season. We came back home completely satiated.
I had this on my list to post for a while now but today is as good as any other. I am hitting my 250th food post with this and so I thought this was a good dish to celebrate with. For someone who started blogging for no good reason other than to record my way of cooking, this number means that I am able to sustain. I know I haven't been going at it regularly but then speed has not been one of my concerns. I am happy to share some stories about the dish with you guys and if some of you try it and like them, I feel I have accomplished what I set out to do. Looking for your feedback as always.
While Arishina (Turmeric) leaf gives the best aroma for this kadubu, you can make it with banana leaves which are easier to procure. We have banana plants in pots, started with one and in 2 years they have become three. They are not fruit bearing but I just love the green leaves as they sway happily in the wind. We bring the pots inside during the cold months but they get to enjoy sun shine just like the rest of us during the summer. I used the leaves from my small plant.

We got a couple pieces of jack fruit from the store the other day and I decided to make the ele kadubu with jack fruit. The only problem at my home is that DD takes after her ajji (grand mother) and loves jack fruits and they get over in minutes when we bring some home. I stuck a bargain with DD to keep some pieces of the fruit aside for the kadubu and used them the next morning. The jack fruit I got was slightly orange-ish in color, very sweet and extremely aromatic. I also made some savory ones with an urad dal filling just to make it a complete brunch. Yummm!

Don't you think this makes for a beautiful Father's day breakfast/brunch? Happy Father's day to all you wonderful dads! 
What do you need to make Ele Kadubu? 
For the batter
2 cups rice (sona masoori)
1 cup grated coconut
pinch of salt
1/2 -3/4 cup water
For the stuffing
1 cup grated jaggery
1 cup grated coconut
1 Tsp water
1/4 Tsp freshly powdered cardamom
2 Tbsp chopped jackfruit (optional & seasonal)
Others:
A few banana leaves
Tsp of ghee

How do you make Ele kadubu?
  • Soak rice for 4-6 hours, longer soaking softens rice further and makes it easy to grind.
  • Wash, rinse the soaked rice and grind it with 1 cup of coconut and a pinch of salt until really smooth.
  • When you feel the batter between your fingers, there should be no grainy texture.
  • Prepare the sweet filling like so: Heat a pan, add the grated/crushed jaggery and Tsp of water and mix in on medium heat until jaggery dissolves. Add the grated coconut and cardamom powder. Mix well and switch off.
  • Wash, pat dry the banana leaves and hold them for a couple of seconds on the hot stove. This step not only removes any insects on the leaf but also softens them and makes pliable for folding over.
  • Take a softened banana leaf, lay it on a flat surface, spread a drop of ghee all over on it.
  • Put a Tbsp of the batter on top and spread into a thin layer.
  • Put the sweet stuffing on top leaving a small gap from the edges.
  • If using jackfruit, add the pieces on top.
  • Fold the leaf in the middle gently and put it in a steamer container. I use my idli stand.
  • Prepare the rest of the kadubus in the same way, arrange them in a steamer basket or on idli plates and steam cook for 12-15 minutes or until a knife pushed through the kadubu comes out clean.
  • Let cool for a minute or so after switching off, peel the leaf layer slowly to uncover the yummy kadubu.
  • Serve it with a drop of ghee for a satiating experience.
Notes: 
  • This kadubu is best eaten warm and fresh. The outer layer tends to become hard and chewy if kept for long or refrigerated. If you make a large batch, do not peel the leaves while storing, re-steam them to warm up just before serving. 
  • The consistency of the batter should be thicker than regular dosa batter, it should be easy to spread but not runny so you cannot fold the leaf over. 
  • I made a simple khara (savory) filling with urad dal - soak, grind urad dal (or replace it with moong or chana dal if you like that taste better) corasely along with a couple of green chilies and ginger. Steam this for 10 minutes to par-cook. Once cool, crumble the steamed dal. Make a seasoning of mustard, curry leaves and add the crumbled urad dal and roast on low heat until cooked and sorta dry. Add grated coconut, salt to taste. Use this to fill the kadubu for a delicious savory version. 

  • You can reuse the banana leaves a couple of times but I would suggest starting with enough pieces so you can steam them at one go. 
  • Spreading a drop of ghee on the leaf gives a glossy finish to the kadubu and upps its taste.

Tuesday, September 3, 2013

Heerekaayi dose - nudge your unwilling child towards a delicious vegetable

We all have our preferences when it comes to eating habits, don't you agree? BH & I for most part are non fussy eaters, he is the more daring one, trying out new dishes, while I tend to tread a little more cautiously and slowly. When it comes to vegetables, I can't point out to anything that I don't relish. Cooked in a way that appeals to my taste buds, all vegetables sing happy tunes in my tummy. DD is mostly taken on this streak from her parents but she clams up when it comes to a few vegetables. With a family full of brinjal/eggplant lovers, she is the odd one out, bitter gourd finds its way to her plate only when the stuffing is good and so on.. But being the relentless mom that I am, I try to morph and dress up vegetables (there is no hiding, she is past that age and can fish up a truly collapsed cooked tomato between her nails and flap it infront of my face :-)) so either the shape, color, taste or something else appeals to her visually and she tries it once. Why do I go to all this trouble and not let her eat what she loves? Simply because I believe it gives her a wider choice when she is on her own and also because she gets to eat the goodness of all good things in life.

Well, is there is a point to all the rambling? You bet there is, heerekayi (as it is called in Kannada) or ridge gourd is one of the vegetables that was not palatable to her a few years back. This, like most gourds is a watery vegetable and doesn't have a pronounced taste and usually finds its way in dal (tovve in Kannada), chutneys etc where the taste is enhanced with other ingredients. This dose or dosa was something I ate in one of my friend's house, thought it was a very good alternative to deep fried heerekayi bajjis (which I love by the way) and made it at home. The little girl sat at the kitchen table, smeared a drop of ghee on top and chomped away at the dose and asked for seconds :-). I couldn't have asked for more. This is a regular at home and I use the same batter but replace it with thin cut slices of sweet potatoes or onion roundels. Tastes delicious, give it a try and let me know how you liked it.

My Mangalorean friend calls this as 'Uppu Huli dose(Uppu~salt, huli~sour as in tamarind)' with ridge gourd and makes regular dosa with the batter. I like the flavors that surround the tender ridge gourd and always make it with ridge gourd.
The batter does not need any fermentation and can be made right away. All you need is to plan for the soaking time.

What do you need to make Heerekayi Dose? 
1 medium sized ridge gourd/heerekayi
1 Tsp salt (adjust to taste)
2 Tblsp shredded coconut
Small piece of tamarind
To soak:
1.5 cups rice (I use long grain or sona masoori)
2 Tblsp Toor dal
3-4 dry red chilies (adjust to taste)
1 Tblsp coriander seeds
3/4 Tsp cumin seeds
1-2 Tsp oil for cooking
How do you make Heerekayi Dose? 
  • Wash and soak all ingredients listed under 'To soak' in 4 cups of water for 4-5 hours. 
  • Drain the water, blend it into a rava consistency paste along with shredded coconut, tamarind and salt. Use about 2 cups of water for grinding.  
  • The batter should have a consistency of a thick dip so it coats the heerekayi slices well but not too thick to form clumps, adjust water if needed. 
  • Wash, remove the ends, scrape the ridges off the heerekayi and remove a thin layer of the outer dark green skin to expose the fleshy, white inside of the gourd. Reserve the green peels to make a yummy chutney. 
  • Slice the heerekayi into thin discs (1mm) like you do for the deep fried bajjis.
  • Dip the disc in the batter, lay it on the center of a hot griddle or dosa pan. Use 10-12 discs to fill in and grow the dose in size, keeping the batter dipped discs next to each other, slightly touching each other. Try to keep the circular shape. 
  • Drizzle a couple of drops of oil around the finished dose, cover and let cook for 3-4 minutes on low-medium heat. 
  • Open the lid, ease the dose gently and flip it over to cook uncovered for 2 minutes on the other side. 
  • Serve hot with a dab of ghee and any chutney of choice. 
Notes:
  • Since you are using raw heerekayi, you need to be patient while cooking it, covering and cooking it on low heat ensures there is no rawness left behind. Open cooking on the second side renders it crunchy and slightly crispy (just like bajjis)
  • It is your choice to make this dose as big as you want, make sure heat reaches evenly across the pan for uniform cooking. The shape belongs to you too, make it hexagonal, square, triangle (you get the idea) as you please, just make sure you can grab all of it at one go and flip it over.
  • Mix finely chopped onion, cilantro to any remaining batter and pour like regular dose on a hot griddle, let it cook both sides on medium heat and enjoy with a spicy chutney.
  • I replace heerekayi with washed, scrubbed sweet potato slices for a sweeter version of the dose. 
  • Add a small piece of jaggery to the batter while grinding for a slightly sweeter version. 

Friday, January 4, 2013

Ottu shavige - Dreamy white, Indian angel hair pasta with rice flour

Some memories are a full 4D IMAX experience, don't you agree? They have picture, sound, smell and taste. All I have to do is close my eyes to relive those moments. Some other memories leave you searching for details but you can't forget the impact they have had on you. Both are good and needed for a wholesome experience. Since the time I posted my Lemony rice noodles recipe here using a short cut, I have been craving to write about the real deal. What is the big deal, you may ask? It is, it was a huge deal growing up and lot of planning and preparation went into making those melt in the mouth ottu shavige(ottu~pressed, shavige~noodles).

Anna spent a year in Mangalore as part of the usual government transfers while we stayed back in Mysore for schools & other things. Anna used to visit us once a month or so and we would all be eagerly waiting for him to reach home from the bus stand. Once when he came, he had a heavy box on his shoulder and we were all dying of curiosity until he had his dinner and opened the box. He had bought a ottu shavige maker in Mangalore (I don't think it was easily available in Mysore at that time) and brought it with him on the bus and carried it home. Thus started our ottu shavige experiences. This sturdy machine dished out huge quantities of ottu shavige for many, many years until it was retired to a top shelf (to give company to many other 'not anymore used' large family utensils) quite recently.

While Anna didn't really cook on a regular basis, there were days he would enter the kitchen and make something so delicious and spoil us that we refused to eat if nammamma made the same dish equally well :-). Making Ottu shavige was like a festival, it would be on the menu if family was visiting or if there was a reason to celebrate. I have a picture of my parents in our Mysore kitchen both bent around the ottu shavige machine on the floor, nammamma feeding the steamed balls into the machine and moving the plate underneath to ensure the noodles didn't form a lump in one place while Anna kept turning the handle above to produce those thin noodles - well I don't have an actual photo, it is in my heart. Making the basic noodles is only half the job done, and there several options to serve it depending on whether you like a sweet shavige or a savory one. Nammamma usually prepared one sweet kind and one savory kind, look for serving suggestions below.

There are 2 ways of making the ottu shavige, the first one involves preparing the dough, making the noodles and then steaming them which is very popular in Tamil Nadu & Kerala and the second one is where the dough is prepared, balls steamed and then noodles made which is what nammamma does and I follow this 2nd method. If you have the press kind of murukku maker, the first one is better suited and if you are using the rotate kind of murukku maker, the second option works well. I don't have a ottu shavige maker but make do with this fantastic murukku maker I found in my Indian store, if you get the dough right and employ a strong, muscular person in the kitchen you can make this on large scale without breaking a sweat :-).

When nammamma made the ottu shavige, she prepared the rice powder at home. Rice would be washed, drained and set to dry inside in shade until the moisture is gone. Then it is fine powdered and used in Ottu Shavige or Bili Rotti. I buy the idiyappam flour from the store which works perfectly well and skip one step to make it easier. If you have the time and inclination, go ahead and make the rice powder at home, see detailed procedure at the end of this post.
What do you need to make basic Ottu Shavige? 
Serves 4 adults for a heavy breakfast, makes about 6-8 steamed balls
3 cups idiyappam flour** or home made rice powder
4 cups water
1/2 Tsp oil
**I used Nirapara brand and the proportion of water & rice powder works perfectly.

How do you make Ottu Shavige?
  • Heat water with the 1/2 Tsp oil in a big pot and bring it to boil.
  • Add the rice flour and let it cook on medium heat for 2-3 minutes while the water boils over the flour and makes it all wet, do not disturb this for the 2-3 minutes. 
  • When water has bubbled over all the dry powder, take a strong wooden spoon and vigorously mix the powder in to the water to form one big mass.
  • Switch off the stove and let it stand for a few of minutes until you can comfortably handle the dough (the dough should not cool off though).
  • Keep a wide bowl of cold water ready to dip your hands in. 
  • While the dough is still warm, dip your hands in the cold water (but do not carry any extra water to the dough)and pinch off tennis ball sized dough, knead a little to make a smooth cylindrical shape, arrange them in a pressure cooker or steamer vessel. 
  • When all the dough is made into balls, steam it in the pressure cooker or steamer for 15 minutes - Do not use the pressure cooker weight, this is similar to making idlis. 
  • Switch off the stove, get your murukku press ready and wet the inside walls of the murukku press with a few drops of water. While the steamed balls are still hot, put them inside the murukku maker and press into strings of thin noodles. 
  • We like this thin and I use the smallest hole plate for the murukku maker, you can change it according to your preference. 
  • Press the shavige into a wide plate, moving the murukku maker around the plate so the strings form a sparse layer and not become lumpy. Transfer over to a big bowl by inverting the plate on top of the bowl and leave it to become cool before you season them. 
How do you serve Ottu Shavige (some suggestions, follow your heart and taste buds)?

Savory variation 1: Lemon Shavige
Heat 2 Tblsp of oil, add 1/4 Tsp asafoetida, 1 Tsp mustard, 1 Tblsp chana dal, 1 Tsp urad dal, 2 Tblsp peanuts, a few curry leaves, 1/4 Tsp turmeric, 2-3 chopped green chilies. Roast them until the dals and peanuts are crisp. Pour it over the ottu shavige, add salt to taste, lemon juice, 2 Tblsp grated coconut and mix gently breaking the long strands ever so softly. 
Savory variation 2: Hasi chutney shavige
See procedure here

Savory variation 3: Chutney pudi shavige
Take a bowlful of the white noodles, add a couple of spoons of home made chutney pudi, 1/2 Tsp oil and a pinch of salt to taste. Mix  it in gently and enjoy.

Sweet variation 1: With Gasagase payasa
Serve the rice noodles with a bowl of warm gasagase payasa. Pour the payasa on top of the noodles, mix gently and slurp it in. 
Sweet variation 2: Ellu-bella
Roast 2 Tblsp of white sesame seeds for 2 minutes. Powder them in a dry grinder, add 2 Tblsp of grated jaggery, a pinch of cardamom powder, 1 Tblsp grated coconut and mix it all with fingers. Add this to the white noodles and enjoy the flavorful sweet shavige.

Others: In Kerala and parts of Tamil Nadu, the white noodles are typically served with stew.

Procedure for making rice flour at home for ottu shavige:
  • Wash 2 cups of rice in 2-3 changes of water and drain the water. 
  • Spread a thin cotton cloth inside the room and spread the washed rice on top of it. 
  • Let the moisture go away by drying it in shade for a couple of hours. The rice should feel dry & brittle to touch.
  • Make a powder of this dried rice and sieve it get a very fine powder, take the residue back and run it in your blender. Repeat until all the flour is superfine. 
  • Store it in air tight containers for use in ottu shavige or rotti etc. 
  • 2 cups of rice yield about 2+1/4 cups of the powder.
Notes: 
  • There is a very huge difference in taste and texture between the store bought rice noodles and the home made ones and it is definitely worth the effort. 
  • If you are using store bought idiyappam flour, follow the rice to water proportion on the package. 
  • Do not let the dough become cool before making balls or before pressing them into noodles. This will render shavige hard and also make it very difficult to run the murukku maker. 
  • I don't put salt while making the dough as we usually eat it both sweet & savory, mixing salt later works as well. 
  • As you can see, this is a 2-people task atleast until you get comfortable with it. So make sure you ask for help in the kitchen.

Sunday, October 14, 2012

Neer dosa - delectable coastal Karnataka specialty

What is the best part about having friends from different places or travelling to different places in the world? There are many, first and foremost you make friends, you get to learn new things about different ways of life and yes there is definitely the most enticing part - food. I never shy away from asking a person for a recipe if I like it, you can even believe that I do sometimes chase people until they part with their recipes so I can recreate it in my kitchen.

We had this huge group of people in my project when I first started working many years ago. In those days (yeah, I make it sound like I am ancient but I am not, it is just that things have changed so rapidly) eating out was not the norm and even people who worked in the software industry preferred home made dabbas for the canteen or restaurant lunch. Infact, our office used to be in the city center in Bengaluru but we reserved eating out only to special occasions and occasional TGIFs. So a large group of us used to sit down together with our lunch boxes and just like in schools the boxes would go around for everyone to taste. And just like in schools, there used to be favorites and some of us would never get anything back in the dabba but some would come back with a little bit tasted :-).

One of my friends S is from Udupi region known for its distinctive flavors and yummy pickles and papads. His mom made some of the best neer dosas I have ever had. If there is a dosa I would carry in my lunch box, this is one as it stays soft even when cold. Aunty would pack him these soft layers with a spoonful of midi uppinakayi (pickled tiny whole mangoes) on top, so by the time we sat for lunch the dosa would have had a bath from the flowing pickle juice and would have turned just heavenly. There were 3 of us girls who would jump on S's lunch box every time he got neer dosa and poor S had to eat from one of our boxes whether he liked it or not. I think he did become smart since we started seeing more layers (= more dosas) in his lunch box after a while :).

Nammamma & akka make a similar dosa and we call it kaayi(coconut) dosa, the meat of tender coconut is used and the texture is very similar to neer dosa. This is usually made in Summer months when you drink a lot of tender coconut and have had enough of eating the pulp (though that has never been a problem for me as I love those soft, almost melting, not fully mature coconut and can just eat them forever). But 'neer dosa' is an authentic coastal karnataka name and recipe.

This is a dosa that doesn't get fermented like the traditional dosa and also needs just 3 ingredients including salt. If you are craving for soft dosas and do not want to wait for the batter to ferment, go ahead and give these a try. Eat it with any juicy pickle, chutney or spicy powders as the dosa itself is devoid of any spices.The rice to coconut ratio below gives a perfectly soft dosa, however you are welcome to increase the coconut if you like it. Although I have heard people making neer dosa without coconut, I recommend against it as dosa turns dry in that case.

Use a flat tawa/griddle and also notice how I don't call for a flipper. I use my non stick, flat, rectangular tawa and once cooked, I can easily peel the dosa and fold it in. This dosa is cooked only on one side, so keep the heat medium and the dosa covered so it cooks slowly and thoroughly. Aunty always folded the dosa twice, though I don't know the reason, here is my theory - it keeps the dosa soft for longer and it fit snugly into a lunch box :-).

What do you need to make Neer dosa? 
Makes about 5 regular size dosas
1 cup rice (I used regular sona masoori)
1/2 cup grated coconut
1 Tsp salt
5-6 cups water (adjust to get a flowing consistency)

How do you make Neer dosa? 
  • Wash and soak rice in water for about 6 hours.
  • Grind the soaked rice and coconut to a very smooth batter. 
  • Add salt and adjust the consistency of the batter by adding water. The batter should be flowy, almost runny like reduced fat milk :-). 
  • Heat the flat dosa griddle on medium heat, take a ladle full of batter and pour it in the center of the griddle. 
  • Lift the griddle off the heat and with a quick motion move it around so the dosa batter is spread. Do not use the back of the ladle like regular dosas. 
  • Cover and let it cook for a minute.
  • Hold one end of the dosa and fold it in half. Fold once more so you get 4 layers. Take off heat and serve with any spicy pickle or chutney. 
Notes: 
  • Grind rice and coconut to a very fine paste and add water to get the right consistency. 
  • Add a Tsp of cumin seeds while grinding if you like the flavor. 
  • The batter should be like milk, if it is thicker it will not self spread and the dosa becomes thick. 
  • It is important to let the dosa batter find its destiny in terms of shape, do not be impatient and use the ladle like regular dosa. Your role is just to move the griddle a little bit to guide the flowing batter. You will become an expert in making decent circular dosas with some practice. 
  • This dosa is white in color with very faint and few light brown spots and it is important to let it cook covered and on medium low heat.